PL + Neverland Card Kit | Lisa Truesdell
I’m not much of a cardmaker, but I’ve been getting the
Studio Calico Card kits since they were first released. Why? I love patterned
paper, and the smaller scale of the patterns in the 6x6in pad that comes with
the kit is a great fit for the pockets in my Project Life album. I’ve also
found that card friendly embellishments work really well to add interest to
journaling cards without bulking them up too much for the pockets in the page
protectors. I’m excited to have a chance to share a few tips to help you get
the most out of using a Card Kit in your Project Life spreads.
Click here to download a PDF tutorial with tips and tricks on using the Neverland Card Kit for Project Life.
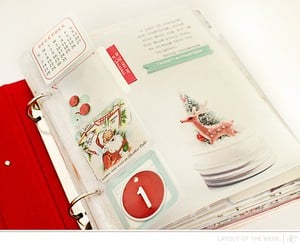
1. The Neverland Card kit comes with an exclusive
mask and Mini Mister Huey – mist is a GREAT way to add interest to a card
without adding extra dimension. I misted over patterned paper, but you can also
use plain cardstock. I embellished the misted design with a punched star and
some enamel dots from the Neverland Card kit. I used the finished card next to
a photo, but this would also be a fun way to make a filler card for an empty
pocket or a date/title card for your week
2. The only item that I added to the Neverland Card kit for this spread was the coordinating printable labels from the shop. Labels are one of my Project Life staples & these printables are a great way to get a perfect color match. I find that they’re an inexpensive way to stretch the contents of a kit just a little further. You could also consider adding the coordinating printable journaling cards and accents, or the More Grid Cards available in the shop.
3. To turn the cardstock that comes with the Neverland Card Kit into a custom card, I machine stitched lines to hold my journaling. You could duplicate this look with handstitching, or even by drawing lines with a marker. I also added a vellum border sticker across the top of the card for a bit of color.
4. Here’s a fun way to stretch the patterned paper
from your Card Kit a little further – if you use a punched accent, include both
the positive and the negative from the design on the page. I punched an arrow to draw attention to a
detail on a 4x6in photo, and then used the negative of the punch on my date
card for the week.
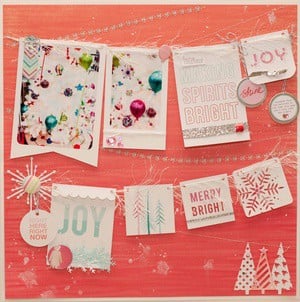
5. One of my favorite ways to use paper scraps in
Project Life is to handcut banners. You can make them from tiny leftover bits
of paper, and they add a punch of color and interest with almost no bulk.
6. To maximize the paper from the 6x6in pad, I like to start by trimming it into two pieces – 4x6in and 2x6in. I then use the 4x6in pieces to fill the larger pockets, or trim it down into two 3x4in cards, depending on what photos I have for the week. I use the 2x6in strip for border strips and punched and handcut accents – OR you can stack two of them and create another 4x6in or 3x4 in card. I find that taking the time to trim the paper to these dimensions in advance saves me the mistake of cutting an accent that just a little *too* big and being left with paper that’s too small to fit the pockets in my page protectors.
(supplies : Neverland Card Kit, Neverland Printable Labels, Tiny Attacher, StazOn black ink)
I hope I’ve inspired you to look at the Studio Calico Card Kits in a new way. Whether you’re a current Project Life subscriber or one of our patient PL waitlisters, the Card Kits are a great way to fill in your Project Life album!


Sign in or sign up to comment.
0 comments