Sunday Sketch
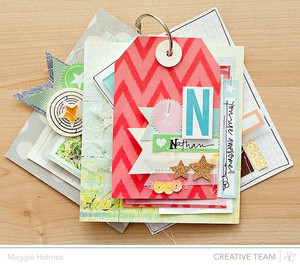
We know that our members love sketches, so this week we are offering you TWO...one for cards and one for layouts!! The card sketch is from Joy Taylor's Spencer's gallery:
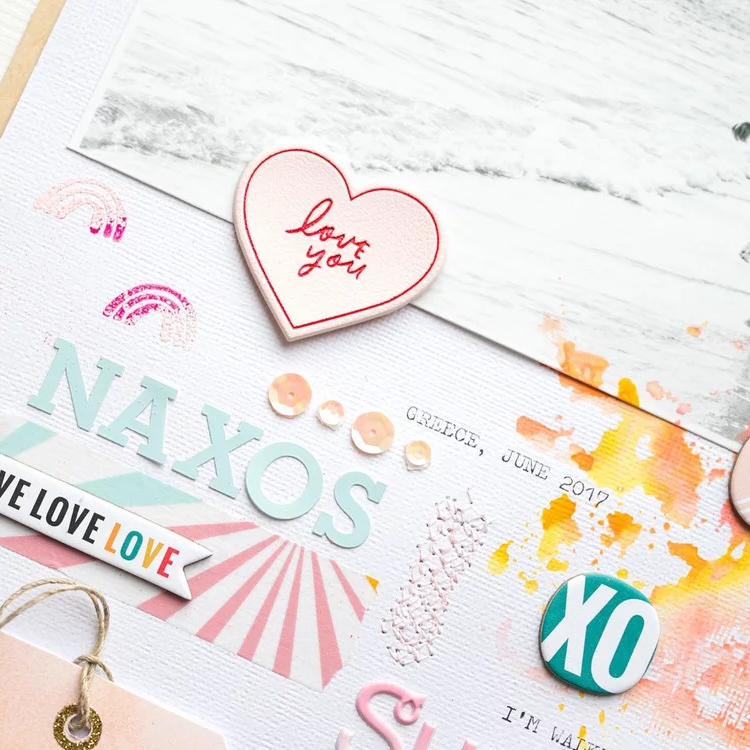
And the layout sketch is from Shanna Noel's Spencer's gallery:
We invited member Tina (adogslife13) to choose one of these to
use as a starting point this week, and she couldn't choose just one!! She wowed us with both of the projects she submitted!!
Supplies: (layout) Patterned Paper: Crate Paper, Twine: American Crafts, Stickers: Crate Paper, American Crafts, Chipboard: Crate Paper, Buttons: Crate Paper, Clothes Pins: American Crafts, Crate Paper, Deli Paper: WebRestaurant.com, Die Cut Machine: Silhouette Cameo, Adhesive: Tombow (tape runner), Scrapbook Adhesives (foam tape), Mini Stapler: Tom Holtz
(card) Patterned Paper: Studio Calico, Die Cuts: Studio Calico, Stickers: American Crafts, Filter: Fancy Pants Designs, Washi Tape: Etsy, Sewing Machine; Brother, Thread: Coates & Clark, Adhesive: Tombow (tape runner), Scrapbook Adhesives (foam tape)
We asked Tina to share her thoughts on using these sketches...here's what she had to say:
Layout Sketch:
I really loved the 'split' page look; using 2 patterned papers to make the background. I used this idea, but shrunk down the 'split' page look and created 2 strips of patterned paper to place behind my photo.
I love any sketch with a banner. Banners have been around for awhile but I never get tired of creating layouts with them. They are definitely one of my go-to design techniques. You know what they say, 'Go Big or Go Home', so I went BIG with my banner. I layered several cut banner pieces and chipboard elements for my banner, and 'hung' them to a piece of twine with mini close-pins. I seriously think I could put mini close-pins and paper clips on every project. LOVE THEM!
I also changed the location of the title, and moved mine to the bottom of my page. I'm not sure if you can see this from the photo, but I wanted to expand on the fun theme of squirrels and nuts, so using a squirrel shape, I repeated the design with my Silhouette software and cut out a squirrel background from deli paper. It's a great way to tone done a busy background, and super fun at the same time.
Card Sketch:
I LOVE Joy's card and how she combined such fabulous shapes and design elements. I actually stayed fairly close to the sketch, layering all sorts of SC goodies, creating my sentiment.
Instead of a large circle in the background, I brought the circular element forward and layered my sentiment on it. I layered several die cuts to create my sentiment and popped the sentiment off the card. In place of the paper strip, I used 2 strips of washi tape and stitched them in place. Quick and Easy!
Lots of ideas and neat elements on Tina's projects! She has a way of using layers and pieces together that always catches my eye, I simply adore her work...thank you so much for joining us this week, Tina!! You can see more inspiration from her in her SC Gallery, and on her blog.
How will YOU use this sketch? Whether it's a layout, a card or something else, link us up to your project by April 22nd for a chance to win a $5 gift card to the Studio Calico shop. (Please remember, your project must be loaded into our gallery to qualify...and your comment has to link back to it in the SC Gallery)


Sign in or sign up to comment.
0 comments