Studio Calico digital | Dana, Kinsey & Celeste
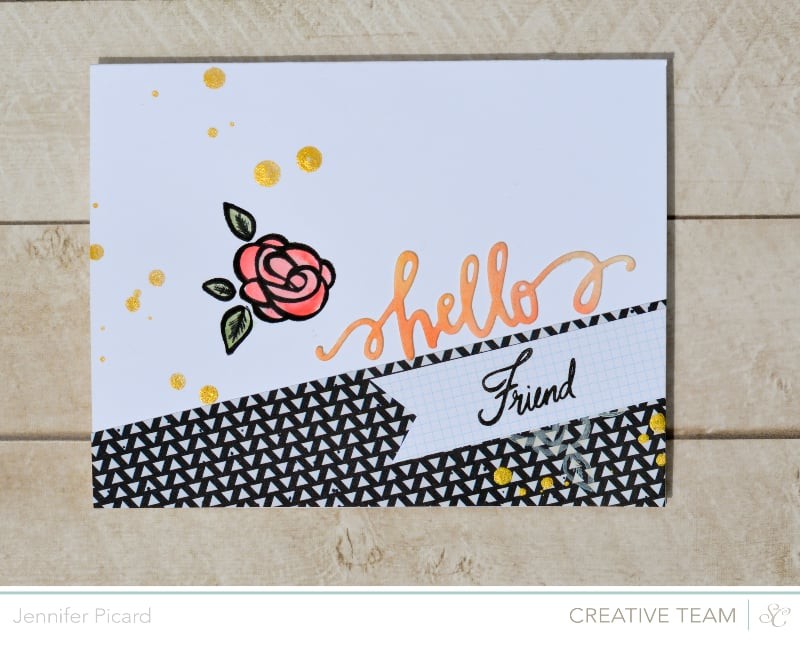
Dana Fleckenstein : Just one of the many things I love about digital die-cuts is the ability to manipulate them to perfectly fit my projects. No matter if you are working on a PL spread, layout or card, it's up to you how big or small the cuts end up. Don't like a small feature of a digital design? No biggie since you can easily replace it!

(supplies - patterned paper: Studio Calico Print Shop 6x6 Paper Pad; cardstock: More Solar White; More Vellum; stamp: Antiquary Card Kit; ink: Hero Arts Charcoal Shadow Ink; digital items: Antiquary Thankful cut designs; tools: Silhouette Cameo machine, Tiny Attacher; other: Martha Stewart Glue Pen, This to That Foam Tab Circles, Martha Stewart Smokey Quartz glitter, sewing machine/thread)
For the card I made here, I had blown up the size of the leaf from 2 1/4 inches (the 100 % size of the png file) up to 4 1/2 inches and made the width just a tad narrower. I knew I wanted to layer the adorable acorn cut file on top and felt it would stand out more if the leaf underneath wasn't outlined on the side were both cuts would overlap. By releasing the compound path of the leaf, I could simply remove the part I didn't want to be cut.
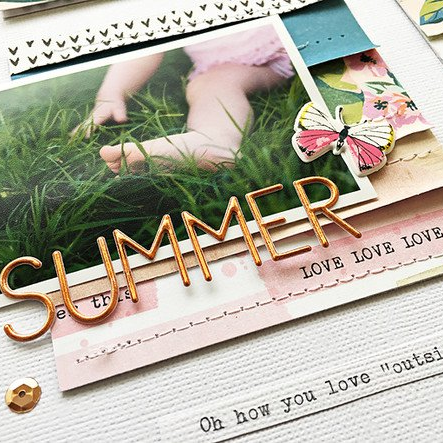
Kinsey Wilson : One of my favorite things about Studio Calico's digital offerings is that they are so flexible. The stamp brushes, cut files (PNGs), and the printable elements are awesome as a quick accent but they're also customizable which really makes them go the extra mile. I love that I can use them with my kits and they coordinate perfectly but it doesn't stop there, I can use them with anything and any color scheme by recoloring, changing out text, and resizing.
 (supplies - Studio Calico Digital Shop : Antiquary printables by Hello Forever, Antiquary printables by in a Creative Bubble, Antiquary Exclusive Digital Stamps by Hello Forever, Antiquary digital Project Life kit stamps, Antiquary digital Scrapbook kit stamps, Thataway printables by in a Creative Bubble, and Magical printables by Hello Forever ; patterned paper : Studio Calico Thataway Made It and Roundabout, Magical Under Wraps, Atlantic Scarborough ; letter stickers : Antiquary Kits ; cardstock: watercolor paper ; Enamel dots : My Minds Eye ; other : foam dots, thread, piercer, micron pen)
Here's a semi- before & after of the files I used (I masked them so that only the items I used are highlighted on the left and on the right are my customized elements) and a couple of close ups of the elements on my layout:


 Celeste Vermeend : Every time a new kit rolls around, I find myself looking forward to the digital elements that will be on offer. I love to sit and download everything and then sit and play on my laptop. I particularly like using the digital brushes in photo shop.
I find mixing them up and making them larger than life works really well with my style.

Every month I love opening the printables. Different from the brushes, in that someone else had done the hard work creating their loveliness for us! I always print the page of printables and then go through the individual ones and select the ones I like.
 The coloured circle is one of the individual elements this month. I increased its size and printed it on photo paper. The digital elements are very user friendly. I find they can be tailored to suit your needs, used on photographs and used exactly as they come as well. I love creating with a kit and find the digital kits really help my creativity and with them I am able to create more layouts each month.
How do you use SC digital products in your projects? We'd love to see! Link your project in the comments, or tag us with #SCdigital on instagram!


Incredible projects!
Sign in or sign up to comment.
Dana, I was planning to make a birthday card this week with those very cut files--thanks for the timely inspiration. Great ideas here for putting cut-files to use on scrapbook pages, too.
Sign in or sign up to comment.
Love all projects so beautiful!
Sign in or sign up to comment.
I use SC printables just like any other embellishment. For example, on this page I used the little sun printable from the Pop off the Page class behind the Prima lightbulb: http://www.flickr.com/photos/13874142@N05/8354819793/
Sign in or sign up to comment.
Wow - I love this phantastic use of the digital elements!
Sign in or sign up to comment.
@Jil - How fun! I'll be watching the gallery to see what you come up with :)
Sign in or sign up to comment.
I absolutely love using SC digis either printed out & accenting my cards here & there....or on my actual digi pages! I love that SC gives them as individual files, & on a printable sheet!
Sign in or sign up to comment.