Start to Finish Video | Paige Evans

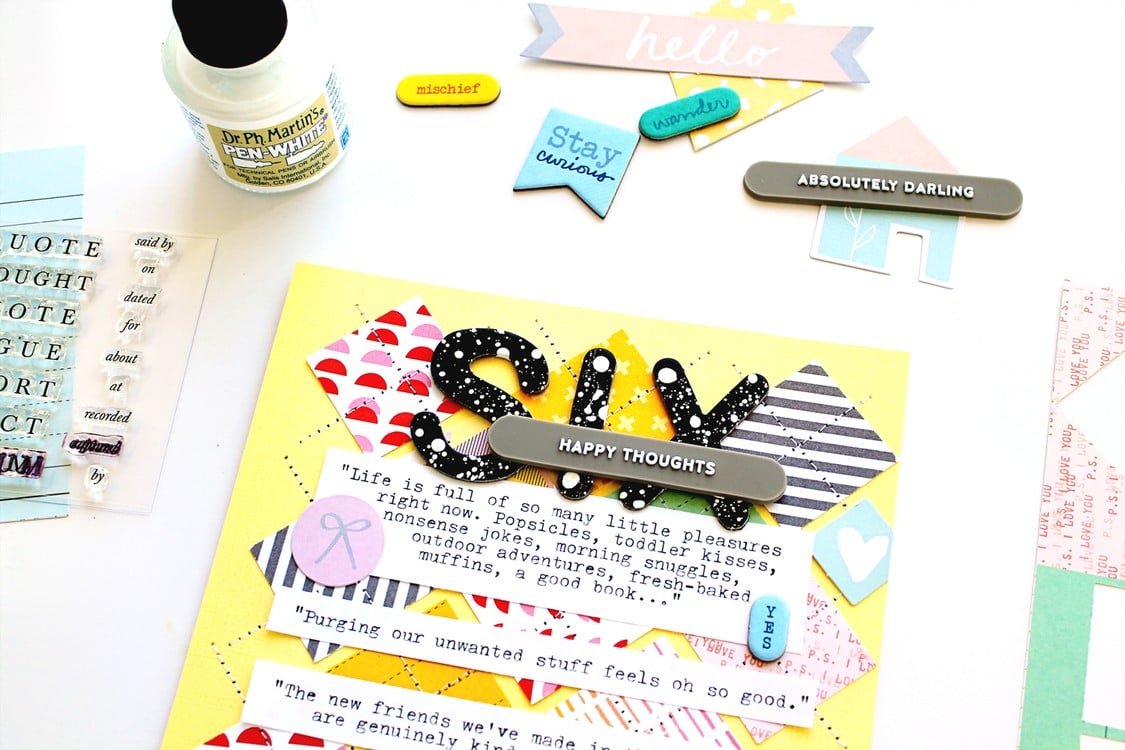
I wanted to create a layout showing the technique for backing cut files so I used a big and basic shape. Then I chose a rainbow of patterned papers for the pie chart to make an eye catching design. Another one of my favorite techniques is to layer color-on-color so I found matching embellishments and placed them in the pie chart pieces. All of the supplies (except a few staples like cardstock, ink, and mist) are found in the Studio Calico PENNY ARCADE scrapbook kits and add ons!
HOW TO: Turn the pie chart from the Penny Arcade Project Life Digital Stamps into a cut file then die cut it from white cardstock. For help on how to do this, the Cameo Basics Studio Calico class is a great place to start! Use the largest "slice" as a template to cut 8 slices from a rainbow of patterned papers. Place foam squares on the back of the pie chart then adhere the papers. Glue the pie chart in the center of a white cardstock layout background. Sew a few circles around the pie chart using white thread for texture. Add a black and white photo to the middle. Fill the pie chart slices with matching colored embellishments. Paint a wood veneer number with mist and add it to the pie chart. Print labels and printables, trim them out, and add them to the pie chart as well. Stamp the date, write a line of journaling, and drop three colors of spray mist on the coordinating slice.

Supplies : kits - PENNY ARCADE SB kit, FORTUNE TELLER SB kit, SKEEBALL SB kit, SPUN SUGAR SB kit; Labels - Hello Forever for Studio Calico; Printables - Hello Forever by Studio Calico; 03 Black Precision Pen - American Crafts; Ink - StazOn; Pie Chart cut file - Penny Arcade Project Life Digital Stamp; Die cut machine - Silhouette Cameo; Spray mist - Mister Huey's by Studio Calico


This is so great- love watching your process!
Sign in or sign up to comment.
Waouh!!! Love your layout
Thanks for sharing the video!
Sign in or sign up to comment.
Gooooooooo o o rgeous!
Sign in or sign up to comment.
Thanks Paige, awesome video and such an easy way to back the die cuts.
Sign in or sign up to comment.
Paige..this is amazing! So cool to watch you work your magic! ;)
Sign in or sign up to comment.
Love this video, Paige! Thanks for sharing!
Sign in or sign up to comment.
This is a gorgeous page. I like the bright colors.
Sign in or sign up to comment.
Love this Paige! Thank you for the video.
Sign in or sign up to comment.
Awesome Paige, and I really hope they run the cameo class again as I'd love to sign up.
Sign in or sign up to comment.
A work of art!!!!!
Sign in or sign up to comment.
This is fantastic! I love it..thanks for the video.
Sign in or sign up to comment.
Paige! I love this design! I love your color on color technique too!
Sign in or sign up to comment.
This is great! Love the colors.
Sign in or sign up to comment.
Love this layout. Thanks for sharing
Sign in or sign up to comment.
Awesome video and I love the layout!!
Sign in or sign up to comment.
This is the best! I L.O.V.E. the layout and haven't watched the video yet but I already know I'll love it :)
Sign in or sign up to comment.
wow!!!
Sign in or sign up to comment.
awesome loved the video..xx
Sign in or sign up to comment.
Thanks so much!! Love this!…going to purchase the printables and digital stamps right now…
Sign in or sign up to comment.
I thought it adequate to post about this on my blog (http://kerryscoolcreations.blogspot.ca/2014/07/www-wednesday-second-edition.html) since I'd never seen this technique used before this way!
Thank you SO very much for sharing, and I'm super excited to give this a try!
Sign in or sign up to comment.
Awesome video! Can't wait to try it.
Sign in or sign up to comment.