Make a Shaker Card | JJ Bolton
Tags: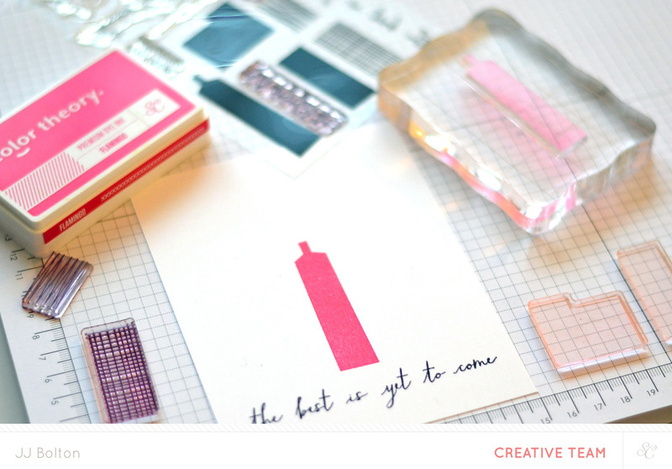
Once the cityscape was stamped, I fussy cut around the buildings with the sentiment still attached at the bottom. This was the top layer of my card.
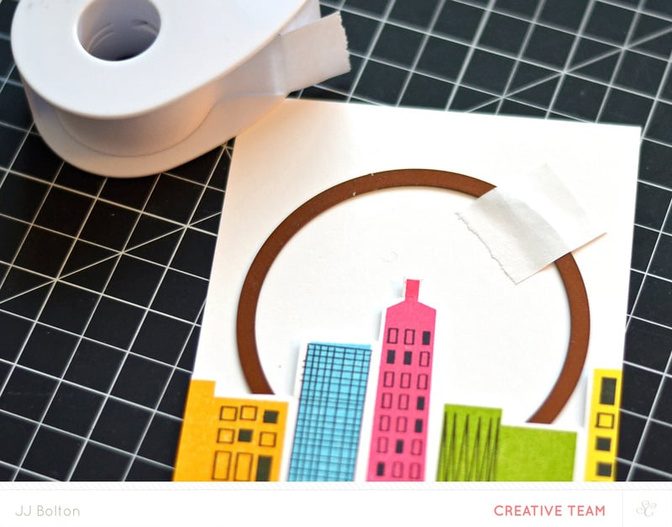
Then I took the second panel and prepared to die cut a circle. I placed the cut cityscape over the panel to make sure that the die cut circle was placed just right!
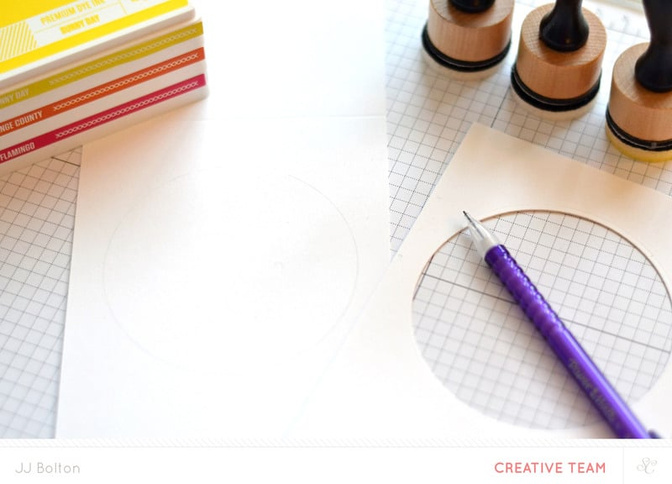
After die cutting my circle, I used the circle panel to lightly draw a circle onto the card base with a pencil. This circle was used as guide to show the area visible inside of the shaker.
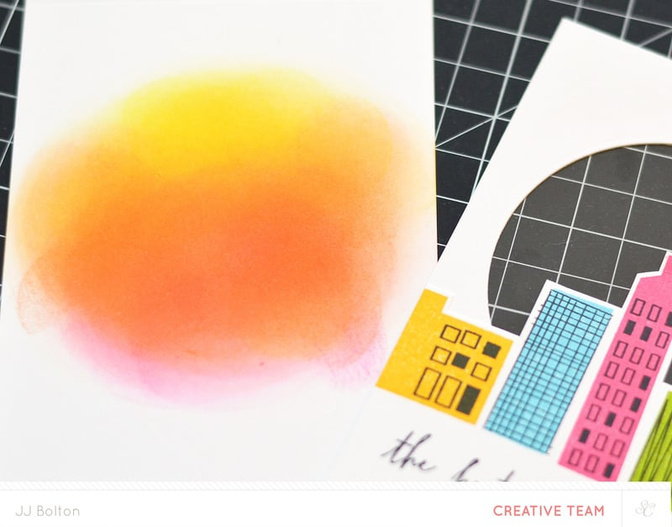
Using the drawn circle as a guide, I blended a mix of Sunny Day, Orange County, and Flamingo inks using sponge blenders. After blending, I erased the drawn circle.
Now all that was left was assembling the parts! The first step was to glue the cut cityscape to the panel with the die cut circle. The next step was to cover the backside of the die cut circle with a piece of clear acetate.
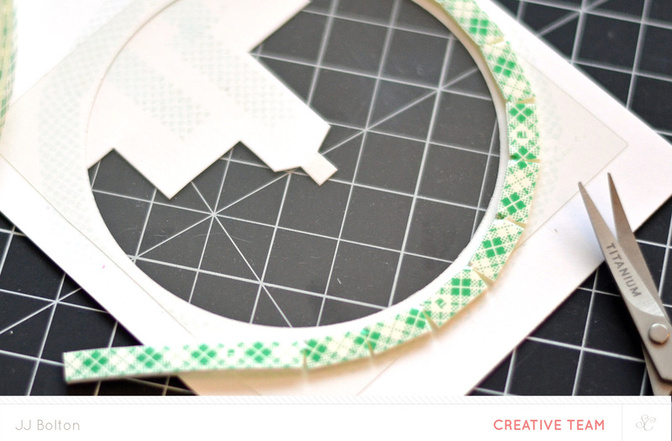
On the backside of the acetate, I used foam tape to create the reservoir for the shaker sequins and glitter. My favorite tape for this purpose is ¼” wide foam tape (which I buy on a huge roll). It fits practically anywhere and can be easily manipulated to fit around curved shapes.
To fit around the die cut circle, I snipped the foam tape in regular intervals and bent it around the curve. If you’re a seamstress, you know exactly what I’m talking about! Remember to snip only around the outside of the curve and only cut about halfway through the tape.
After going around the entire curve, I also covered the back of the cityscape with the foam tape. This created a leak-proof reservoir for the sequins and glitter. If you’re wondering, I put foam tape on the backside of the cityscape because I don’t want my sequins and glitter to fall down out of view. I also put foam tape around the edges of the panel to keep things nice and level.
Now the fun part! I filled up the shaker with a variety of colors that matched the background. A couple tips about filling shakers. Always use a generous amount of filler! No one likes a skimpy shaker;) Also, I’ve found that my shaker cards look loads better when there is variation of colors, shapes, and sizes.
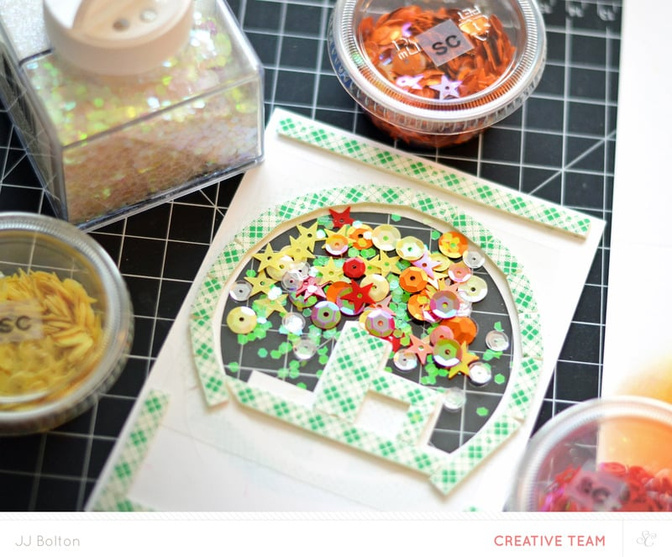
{Sidebar about static cling. There can be a fair amount of static cling with the acetate sheets. Personally, I use static cling to my advantage! To all my shakers, I add a small amount of hexagon glitter which has a tendency to cling to the acetate. I love that it keeps the fun shiny things front and center but you may not like that look. If you don’t, use a little bit of cornstarch or embossing buddy on your shakers before you add your filler.}
The last step was to remove the paper from the foam tape and adhere the card base to the shaker. For me, it’s easier (and less messy) to leave the shaker panel on the desk and apply the card base over it.
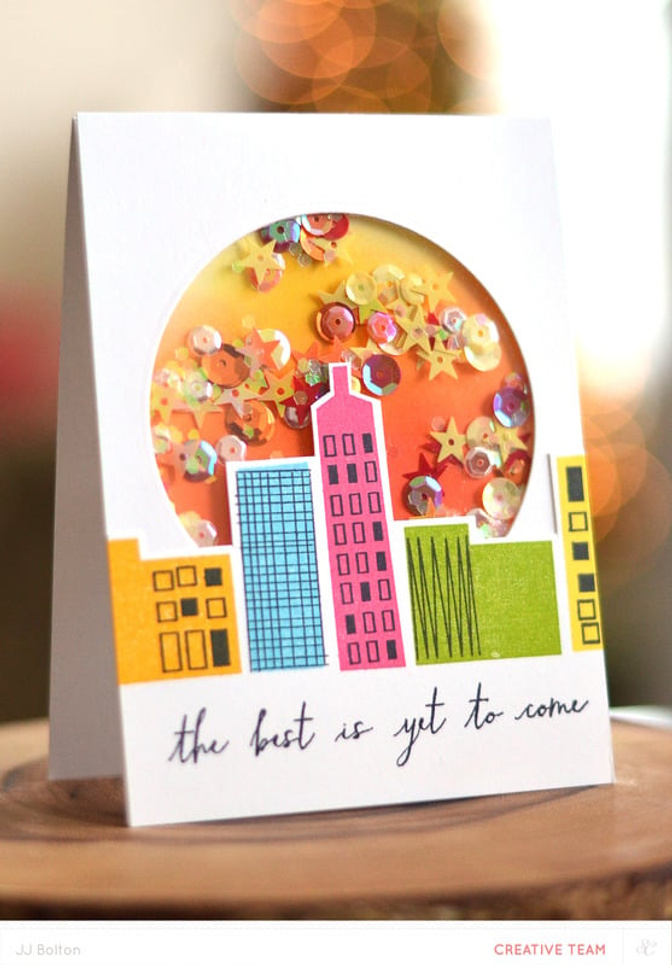
If you haven’t already, I hope you go out and try a shaker card of your own! I know if you try it, you’ll be addicted like me!
Supplies:


Comments
Sign in or sign up to comment.
8 comments
ok this is one of the prettiest cards
Replies to neetasduggal
Sign in or sign up to reply.
beautiful card!
Replies to toribissell
Sign in or sign up to reply.
Gorgeous card.
Replies to Neela
Sign in or sign up to reply.
Beautiful!
Replies to 1Djc
Sign in or sign up to reply.
Love it! Thanks for the tip on snipping the tape to curve it--genius!
Replies to donnamikasa
Sign in or sign up to reply.
Where did you get the shaker container the white glitter is in, please?
Replies to Sharon_Sienaski
Sign in or sign up to reply.
LOVE this JJ!
Replies to tsurutadesigns
Sign in or sign up to reply.
So awesome!
Replies to natalieelph
Sign in or sign up to reply.