Tutorial: Block Printing With the Blockwallah Leaf Stamp by Natalie Elphinstone
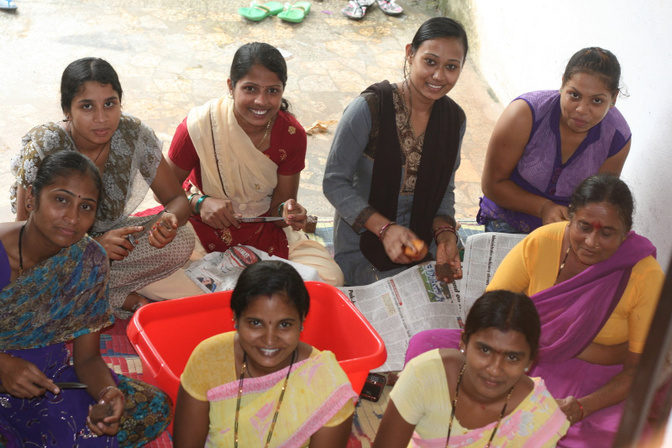
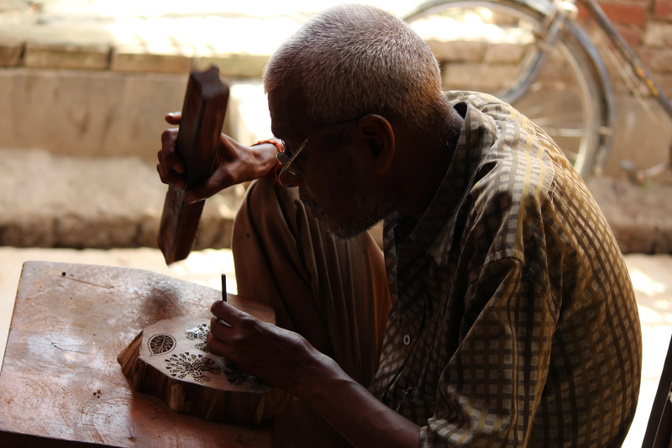
Tags:In the upcoming October Scrapbook, Project Life® and Stationery kits, Wink Wink, a special wooden stamp from Blockwallah will be featured. Blockwallah is a Finnish-Indian family company that works directly with rural Indian artisans and empowers impoverished women. Blockwallah is run by Laura, a Finn living in India, and her Indian husband. The art of block-printing goes back over a thousand years, practiced by traditional artisans across the country. Blockwallah stamps are hand carved on sustainable Shesham wood. Blockwallah strongly believes in ethical work practices as well as dignity of labor. They feel that a business must benefit everybody involved as well as make a difference to the society we live in.
Today, Creative Team contributor Natalie Elphinstone is here to show a tutorial on using these beautiful stamps!
The wooden block stamps in both the Scrapbook and Project Life® kits are something new and exclusive to Studio Calico this month and it’s possible you’ve never used one before. Today I’ll show you some tricks to getting good images, and how to incorporate these into your paper craft projects.
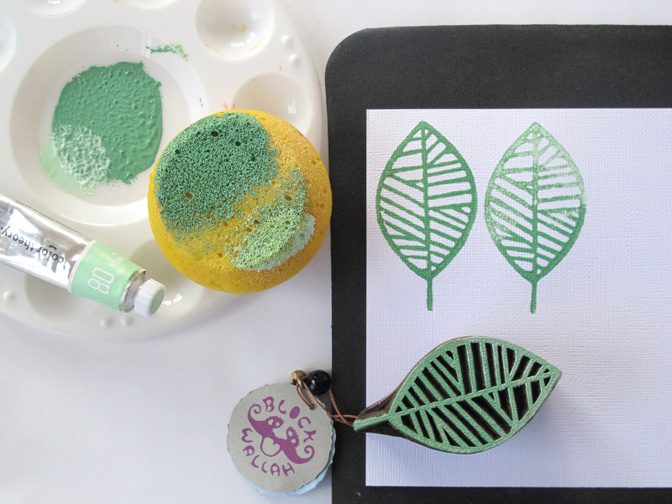
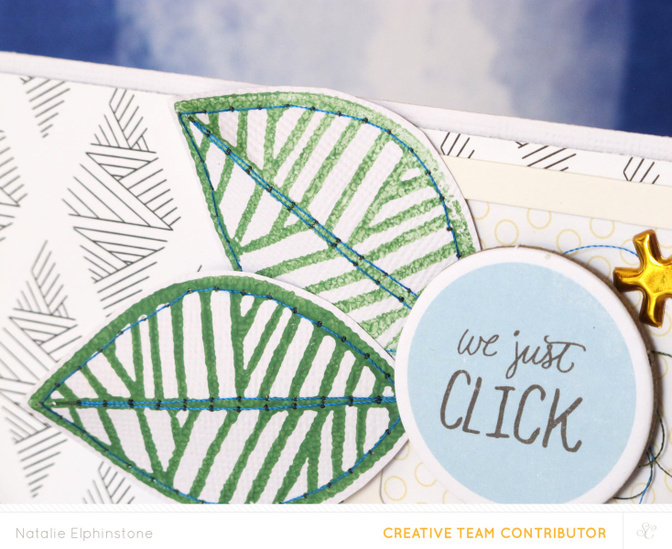
1. While it’s tempting to use these stamps with your regular ink pads you’ll find that the results are incomplete and scratchy images. It’s possible that’s the look you’re after (we’ve all loved Geralyn’s patterned paper she made doing it this way!), but if you want a more precise image then you’ll have to use acrylic paint. The Color Theory paints work perfectly for this technique. Squeeze some paint onto a flat surface and then use a sponge to apply it to the stamp with a dabbing action. Because the stamps are so hard you need to place something soft but firm underneath your paper to get the best results. I’m using an old foam mouse mat, but you could also use something like a towel or kitchen sponge.
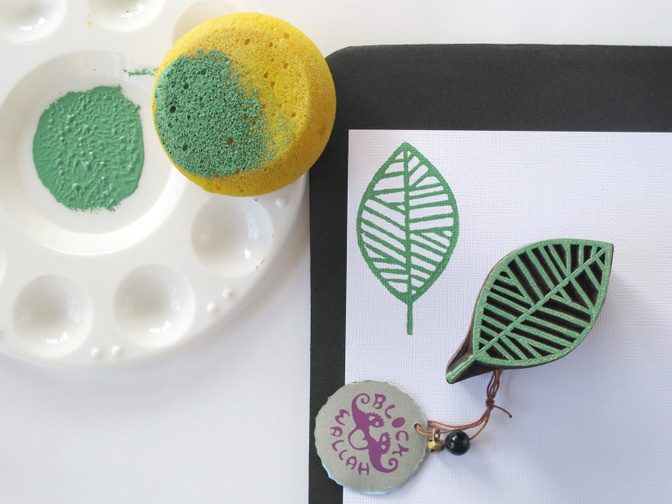
2. Dabbing the paint onto the wooden block means you can achieve some interesting results if you try applying different colours to different areas of the stamp.
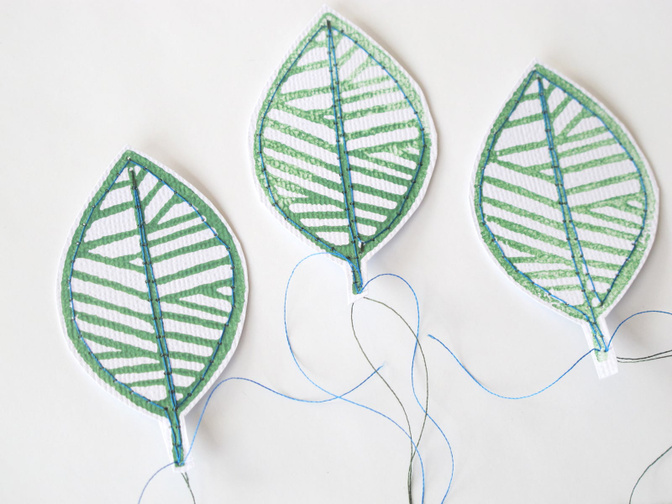
3. After they’re dry I add some detail by stitching around the outlines with my sewing machine.
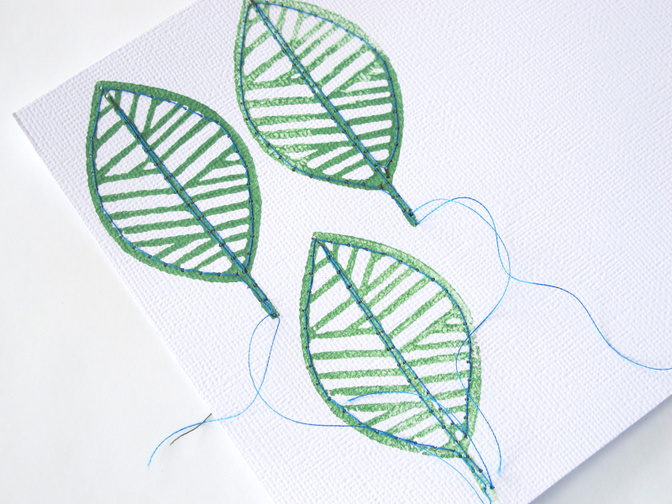
4. Next, I cut them out, making sure to keep the threads long and loose because they’ll add some interesting details to the finished project.
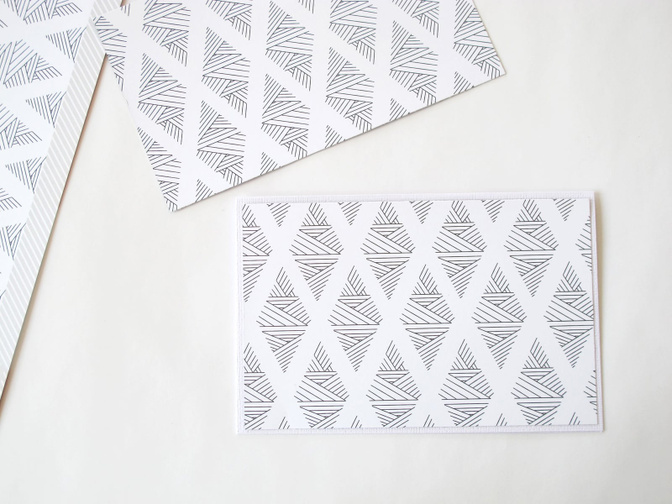
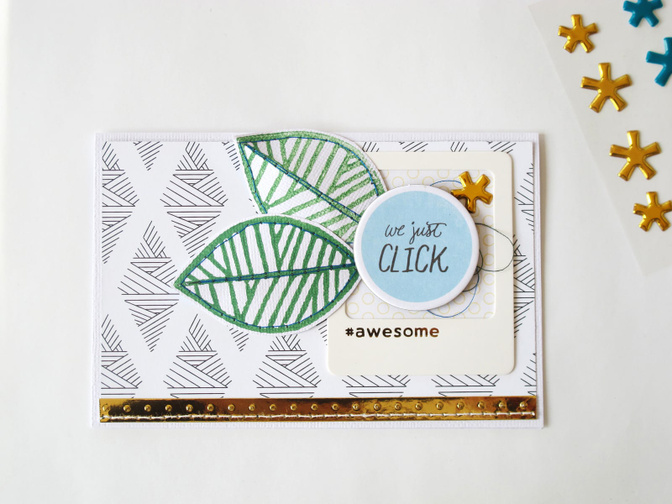
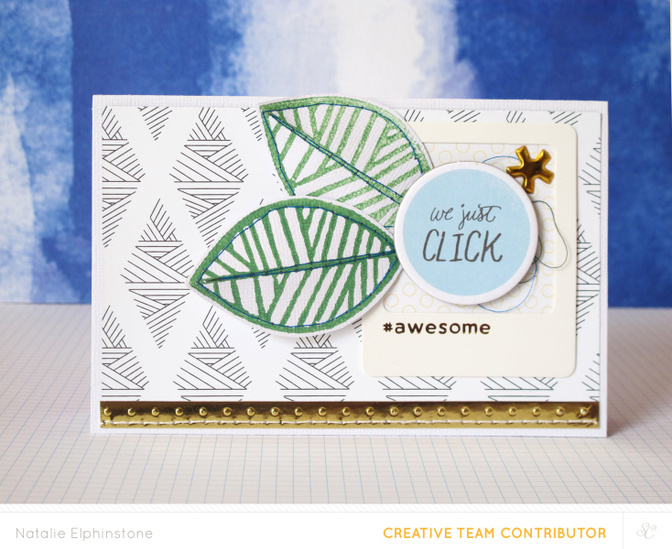
5. I’m going to make a quick and easy card to show off the newly made leaf embellishments. I use a white card base and adhere a front panel of patterned paper from the main Scrapbook Kit.
6. I can’t resist the shine of the gold embossed cardstock from the LOL kit so I trim a little strip of it to go along the bottom.

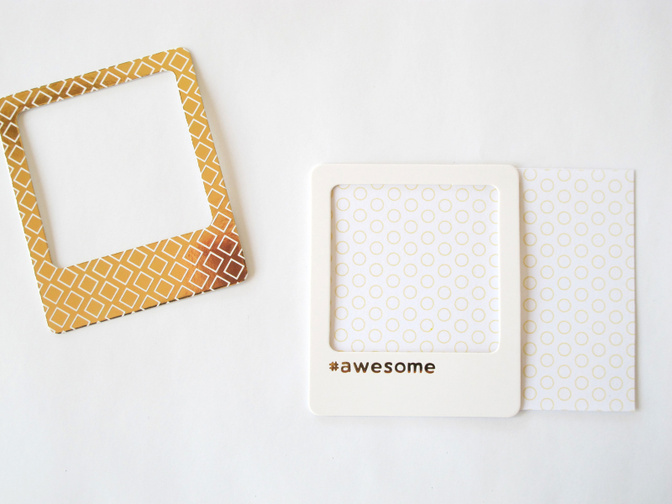
7. Adhere some backing paper to one of the frames and trim it to size.
8. Layer the frame and then the leaves onto the front of the card.
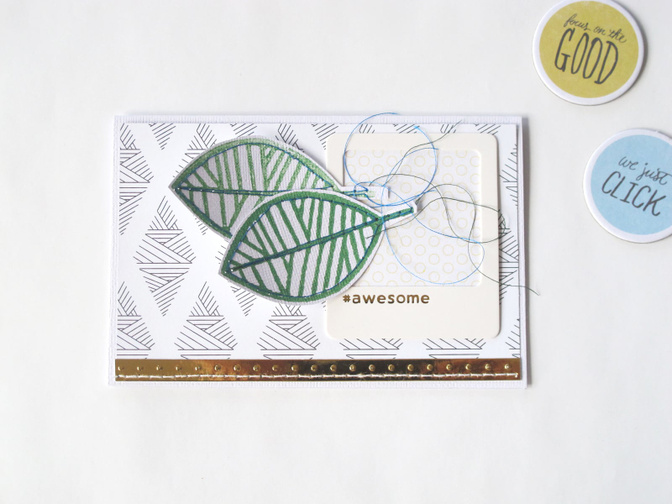
9. Finish it off with one of the chipboard circles adhered with foam tape for dimension, and one of the gold asterix. I also played with those leaves a bit more, bending them along the centre line for a more natural shape. This is just one simple idea of how to put those stamps to good use. I’d love to see how you’re using them on your projects.
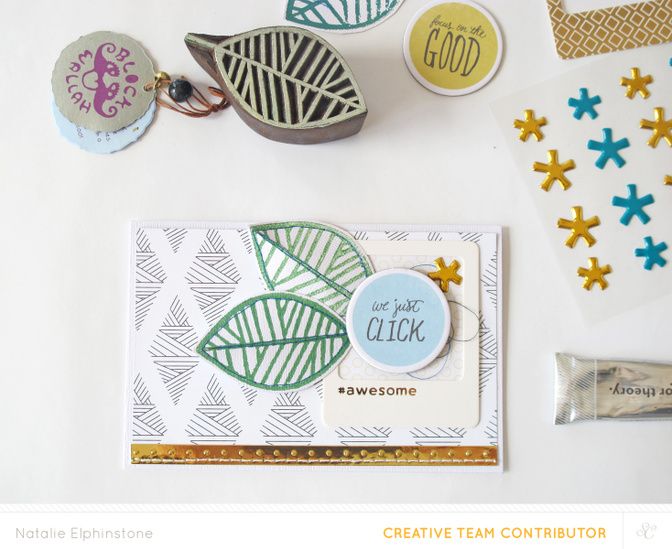
Supplies: Wink Wink Scrapbook kit, LOL, acrylic paint, white cardstock, Color Theory Acrylic Paint


Comments
Sign in or sign up to comment.
12 comments
Great tutorial!! xo
Replies to sideoats
Sign in or sign up to reply.
Really great tutorial and love knowing the story behind the stamps!
Replies to MichelleWedertz
Sign in or sign up to reply.
love this! Thanks Natalie.
Replies to kathyv
Sign in or sign up to reply.
Great info - thanks!
Replies to Janice15
Sign in or sign up to reply.
This is great, Natalie!
Replies to welobellie
Sign in or sign up to reply.
Looks great Nathalie!
Replies to aniamaria
Sign in or sign up to reply.
Very good. Simple and beautiful.
Replies to patriciaR
Sign in or sign up to reply.
So lovely!!
Replies to diestempelkueche
Sign in or sign up to reply.
SO pretty, Natalie!!! Love this!! ;)
Replies to photochic17
Sign in or sign up to reply.
wow, love it!!
thx for the inspiration
Replies to shirlc
Sign in or sign up to reply.
oooh that paint sponging is a good tip! the brush wasn't as effective!
Replies to jamiewaters
Sign in or sign up to reply.
How do you clean the stamp when you are done??
Replies to Cajon2003
Sign in or sign up to reply.