Tutorial: Creating a Watercolor Flower Card with Lisa Spangler
Hey hey! I'm so happy to be here on the blog today! I'll be sharing a start to finish tutorial showing an easy technique for watercoloring flowers. I'm using the stamps in Jasmine Jones' Encouragement set -- just love this set so much. Let's get started!
First, stamp the flowers with permanent black ink on watercolor paper. Make sure the ink is completely dry -- you can zap it with your heat gun if you like. :)

Now for my little watercolor trick that will get you cool results -- every time! I can't tell you how much I love this technique. What I love most is how unpredictable it is!
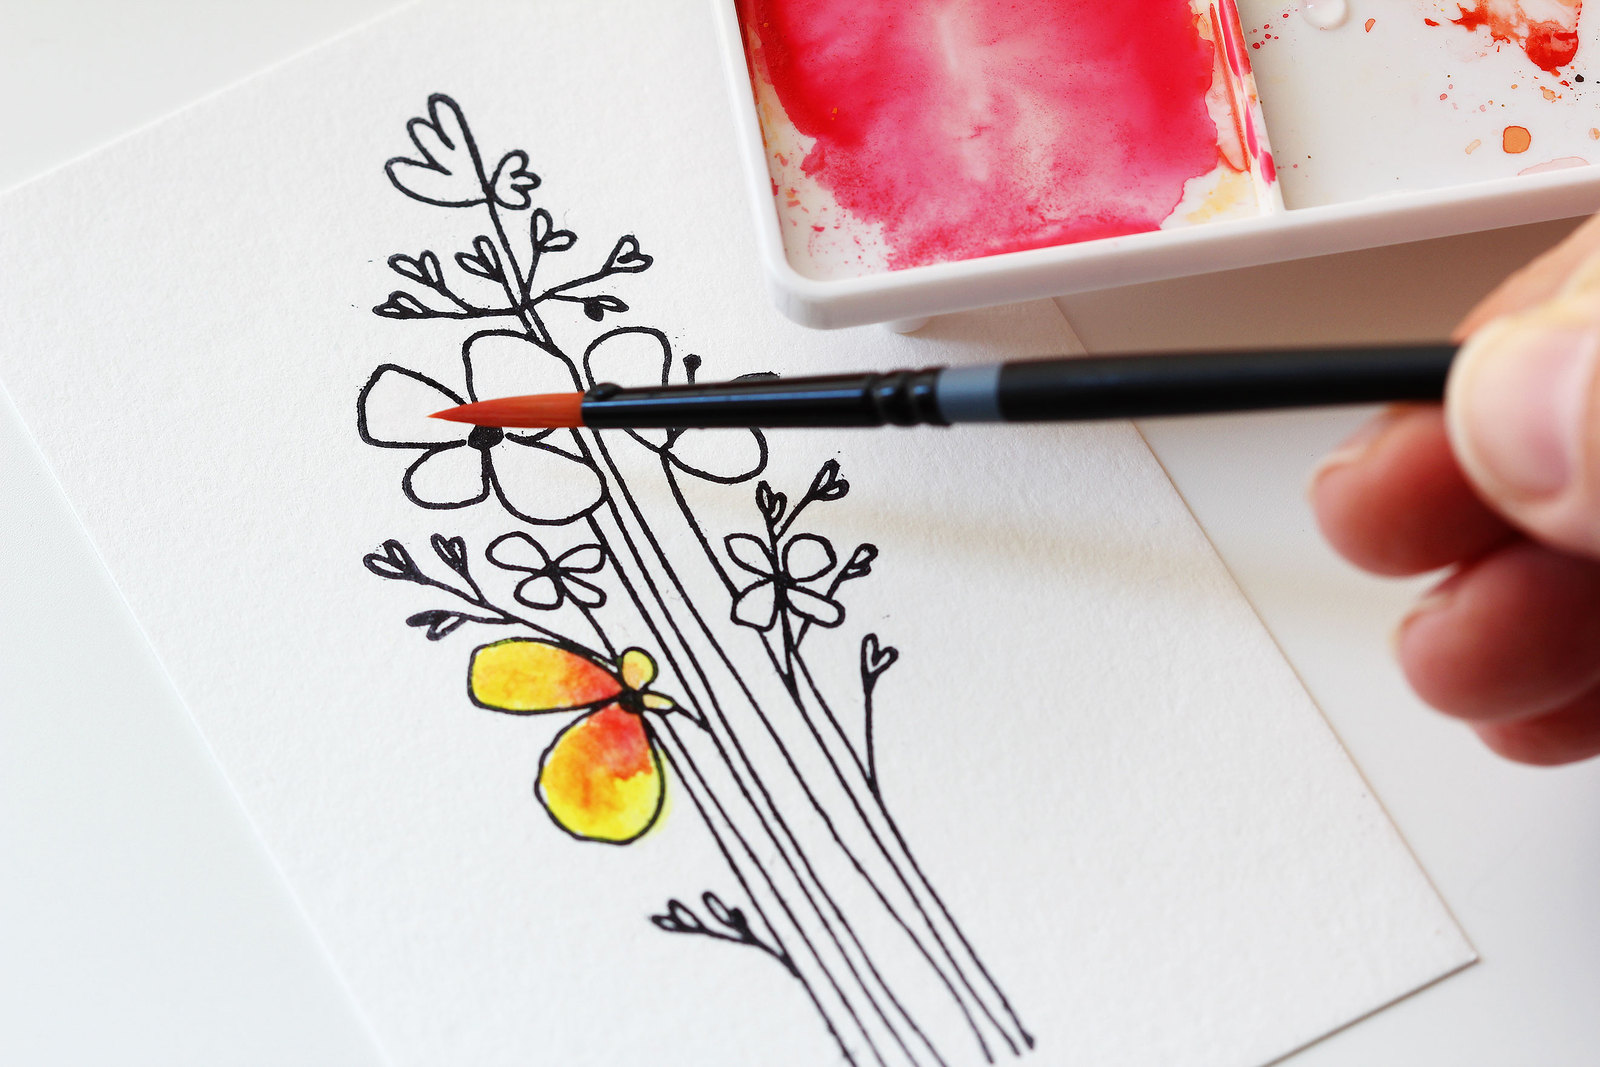
So here it is: paint a single petal with plain water. Let the water seep into the paper -- you're looking for the paper to have a sheen of water on it, but not a puddle.

Pick up some yellow paint on your brush, then touch your brush along the outer edge of the petal. You'll see the paint start to move toward the center of the flower.

Now quickly pick up some pink paint on your brush, and touch your brush to the paper where the petal attaches to the center of the flower. You'll see the pink start to blend with the yellow to make orange. So cool, right? :)
Resist the urge to fiddle with it or try to "fix" it -- just let the watercolors mix and mingle and do their thing. This is the hardest part for me LOL! Seriously! I have to be one of the most impatient crafters on the planet. But now I like sitting back and watching paint dry. HA!

Here's something nifty too -- I used the Koi watercolor paint set and I wanted to have a lighter pink than what's in the set. This was super easy to make -- I just mixed white + pink paints in one of the wells in the palette and added water. Ta dah! Love how the set has white.
Continue petal by petal, following the same process where you add yellow to the outside edge and pink at the center edge. The color will lighten as it dries, so don't worry about something being too dark. Allow all the flowers to dry before you paint the stems so that you don't wind up with green flowers. (Yeah, it's happened to me.)

While you're waiting for the flowers to dry, you can paint some color on patterned paper if you like. This paper is from the January 2016 6x6 pad. This is a great way to get matching paper.

Now go through your stash and cut little strips of papers and adhere them to the base of a white notecard to make a background. I happened to use all these from the same pad. Then I sewed them in place to add that extra little something.

Stamp "ALWAYS" with black as shown, then stamp "I got your back!" and cut out a strip. Adhere the flower and the sentiment with foam dots for added dimension -- and that's that!
Thanks so much for joining me today, and hope you'll give this technique a try! -- Lisa xoxo


Supplies: Stamp + Die Set: Encouragement by Jasmine Jones; Koi Watercolor Paint Set; January 2016 6x6 Paper Pad; watercolor paper; Ranger Archival black ink; paintbrush; sewing machine; white cardstock


Everything you touch is magic. Simply beautiful!!!
Sign in or sign up to comment.
So pretty Lisa!
Sign in or sign up to comment.
You make the most beautiful cards!
Sign in or sign up to comment.
LOVELY!!!!!!! So very pretty Lisa!! Anna xo
Sign in or sign up to comment.
I love the techniques and the card, so lovely! You are always an inspiration!
Sign in or sign up to comment.
so Amazing!! can't wait to try this :)
Sign in or sign up to comment.
Beautiful!
Sign in or sign up to comment.
Really lovely! Also, killing it with that YELLOW thread! Love that!!
Sign in or sign up to comment.
So pretty! I will definitely be trying this!!
Sign in or sign up to comment.
SImple but oh so beautiful!
Sign in or sign up to comment.
I
Sign in or sign up to comment.
Very pretty ll try this tommorow...
Sign in or sign up to comment.