Tutorial: Using Arendal Scrapbook Add-Ons with Geralyn Sy
Hi everyone! Today I’m sharing a fun and playful layout with you using the Arendal scrapbook add-ons. I wanted to show you how to create a simple but impactful page using some basic supplies and the cool snowflake stamp set! Let’s get started.
I began by cutting the Seven Paper patterned paper from the Lyngor add-on into a 8.5x11 sheet of paper. I wanted the design to still be centred so I trimmed the paper on all sides to maintain the design.

I printed out a 3x4 photo and positioned it on the center of my page. I found some diecuts in the scrapbook main kit that would work well with my layout and positioned them above my photograph. This gave me a feel for how my layout would look, but I did not adhere anything yet because I planned to decorate the background.

Using some scrap paper, I masked the white triangle on the right of the background. Doing this allowed me to stamp the snowflake stamps right to the edges of the triangle without getting any ink on the other parts of the patterned paper. I used silver ink for a fun sheen.

Next, I masked the plain pink triangle on the left of the paper. Using the circle and asterisk cluster stamp and pink lemonade Color Theory ink, I stamped right on top of the paper to create a subtle pattern.

Now that I finished decorating my background, I adhered my photo and die-cuts on my page with foam adhesive to add some dimension.

Since this layout was about our first snow day of 2016, I pulled out my snowflake punches so I could add a few snowflakes to my layout. I used three snowflakes, forming a visual triangle on my layout.

Time for a bit more embellishing. The snowflakes stamp set has a few tiny words and phrase stamps, so I stamped those on the middle of my snowflake die-cuts. I also added a puffy sticker from the embellishment kit.

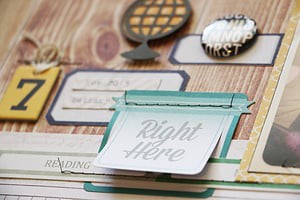
My final step was to add journaling. I decided to handwrite my journaling on some paper strips and adhere them on my layout with foam adhesive.

Thanks for taking a look! I hope this gives you some ideas and tips on how you can incorporate stamping on your layouts. Have a great day!


Supplies: Arendal Scrapbook Kit – die-cuts; Lyngor – patterned paper, stamps; Canal Street – puffy stickers; ink – Versafine, Color Theory; punches – Martha Stewart; pen - Muji


Love it! You always use the stamps in such inspiring ways.
Sign in or sign up to comment.
Beautiful layout! Thnx for sharing your process, it's so interesting to me to see how people get from the beginning to the end! Helps me to think through my own process. Love that it is simple and clean, but still visually impactful.
Sign in or sign up to comment.
I’m a huge fan of your work, and this layout does not disappoint. It’s fabulous! Thank you so much for the process walk-through. Since I’m a visual learner and can’t get enough tutorials, this is really appreciated!
Sign in or sign up to comment.
Love this. Thanks for the tutorial :)
Sign in or sign up to comment.
I love this also. I will have to lift this.
Sign in or sign up to comment.
Beautiful design- love the triangles- and the journaling on the paper strips.
Sign in or sign up to comment.
Love it!
Sign in or sign up to comment.
Simple yet stunning! The stamps added so much character to the page
Sign in or sign up to comment.