Travel + Project Life® | Barbara Picinich
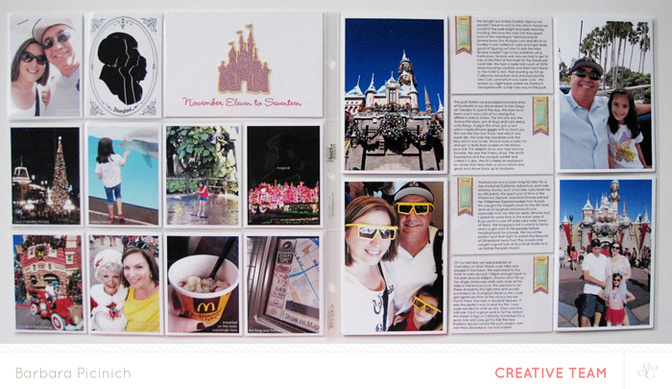
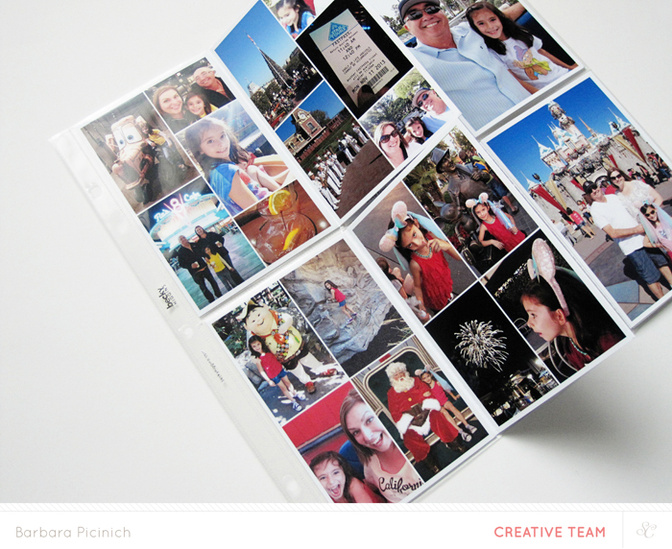
Tags:Typically my go to solution for an abundance of photos is to make more room, either with an insert or in this case below with flip outs. I have always been a fan of anything interactive and I think that’s why I’m always trying to find ways for readers to get involved while they are looking thru my albums. Some of my favorite ways to do that is with flip ups or adding in an envelope that they have to open, anything that requires action to reveal the hidden contents. For this spread I made the four key focal cards of the spread flip out. It worked out great because the trip to Disneyland was four days so I picked my favorite photos for the larger 4x6 slots and inside each of the 4x6 photos I had smaller collages of additional photos. My journaling that corresponded to each day ran down the middle so I didn’t have to journal on each photo. I was also able to capture some of the other favorites from the trip for the left side of the spread so if people viewing the album didn’t want to open and look at all of the flip outs they could still get the basic idea of our trip. This type of solution is really great if the trip is short or if it is somewhere you have been before that might not need a ton of explanation or lots of documentation.
This past spring we took our first major family road trip and it was a 10 day trip. A trip that I knew before we even left was going to be documented in a separate mini album. Because of that this spread was a bit easier to handle because it just needed to be a broad strokes kind of spread, it didn’t need to capture every day and it didn’t need to capture every detail. I also opted to make this spread cover more than my normal seven days. I did this because I wanted to keep the days leading up to and the days after on their own spreads so this one was just about the vacation.
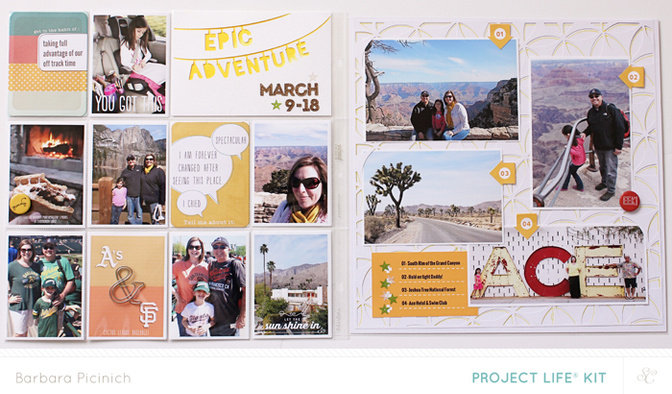
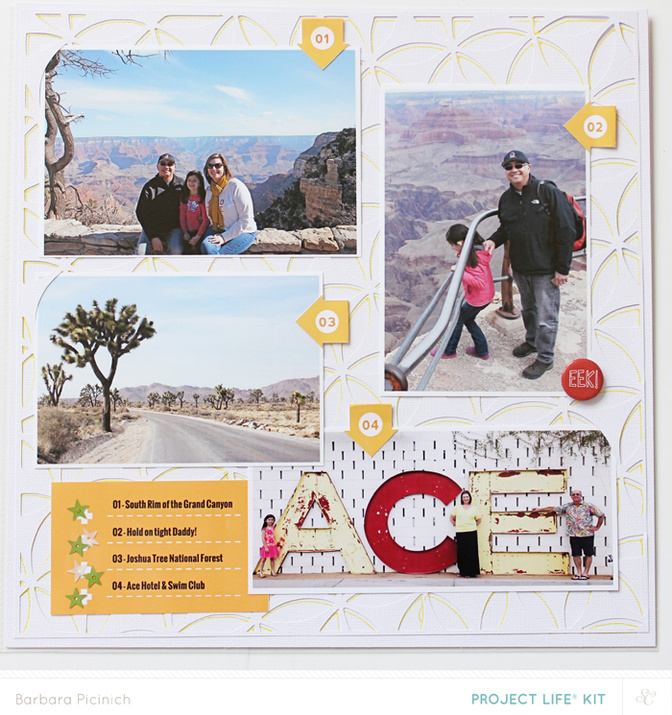
This was also the first time that I added a full 12x12 layout to my Project Life® album and I love the way this looked. It ended up being the perfect solution to me not wanting to have to crop my photos down; I wanted some photos to be larger and more impactful and definitely larger than 3x4 or 4x6. Because I made the full layout I was able to showcase some of my favorites on the right side and then pick out a few others for the smaller slots on the left side.
It was definitely easier for me to pick my photos when I knew that a mini album was going to be made from the others but if you aren’t planning to do anything additional with the photos I know that the editing down process can be hard. Here are the steps I typically take when I’m editing thru my photos.
1.I make sure all of my photos are in the same place. I transfer all of my iphone photos to my computer and also get the photos off of my big camera and placed into the same folder.
2.I then break the photos down into more manageable folders depending on a few factors. If the trip was to just one destination I break the photos down by day. If the trip was over multiple destinations I break the photos down by destination.
3.I then create a working folder where I can copy my favorites too. I like to keep all of the original photos intact and then work with the copies. That way if I decided to delete or go crazy with my photo edits I’m not ruining anything.
4.I then go thru each folder and pick my favorites and copy them into my working folder. Once I have all of the favorites in one place I can see what I’m working with and further edit down based on the space I have to work with.
You will find that once you get your true favorites in one place you will be in a much better position to make decisions on the layout, the color scheme (if any) and any sort of focus you want the spread to take. It is always way easier to make these types of decisions if you’re looking at 40 photos vs. 400 photos.
Another key factor in documenting a vacation in a Project Life® spread is to take really good notes. I don’t typically do my journaling until I’m at my desk creating a layout or a spread so having really great notes to refer back to is key for me, especially for the really long trips like our road trip. For that trip I had a notebook with me and carried it everywhere and I was super meticulous about noting all the details. The majority of my note taking ended up being done on the really long car days and in the hotel each night at the end of our day. These notes typically ended up being journaling dumps of everything I could remember about our day. It doesn’t always make perfect sense and it might not even be in the order of our day but I have found that some of my best journaling quotes can be taken right from those types of journaling dumps. So when in doubt I always write down what comes to my mind without worrying about the grammar, the spelling, or the neatness!
If you’re curious about the types of stuff I wrote down here is my list of some of the key items I journaled about on our road trip.
- States we visited
- Places we visited
- National parks we visited
- Total miles traveled
- How many gas stops we made and how many gallons we bought
- How many other Simone's we met (this happened and it was cool so be on the lookout for stuff like this)
- Elevations of the places we visited
- Number of hotels we stayed in
- Weather high and lows
- Bug splats on the car (feel free to estimate this one)
- How many different license plates we saw
- How many photos I took (counts from both my iphone and DSLR)
- How many ‘are we there yet's’ or any other fun phrases your kids say, it can be pretty funny to keep track of this kind of stuff.
It never hurts to write down more information than you think you might need. I would much rather have too much than not enough.
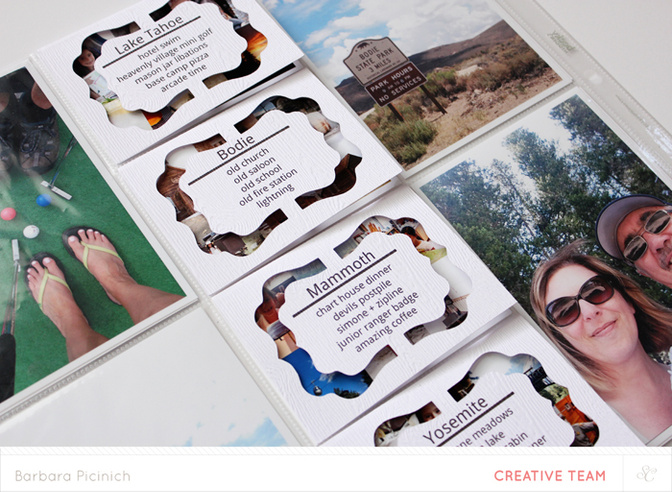
Another example of how I tackled some travel in my Project Life® album is this recent spread that I did for a short road trip we just took. I took a similar approach to my Disneyland spread and added a few collages in for each of the destinations but this time I placed them in the smaller 4x3 slots and added the journaling with a peek-a-boo cut out that flips up to reveal the collages.
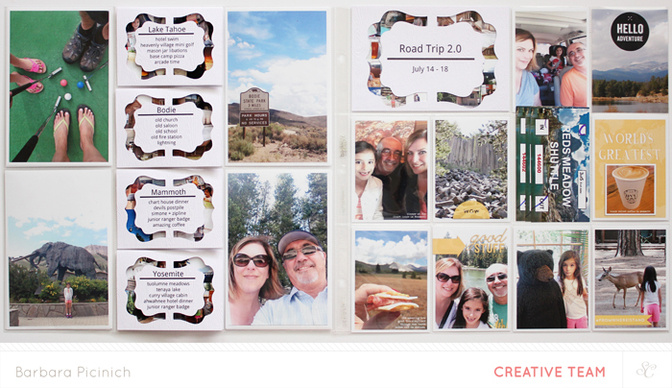

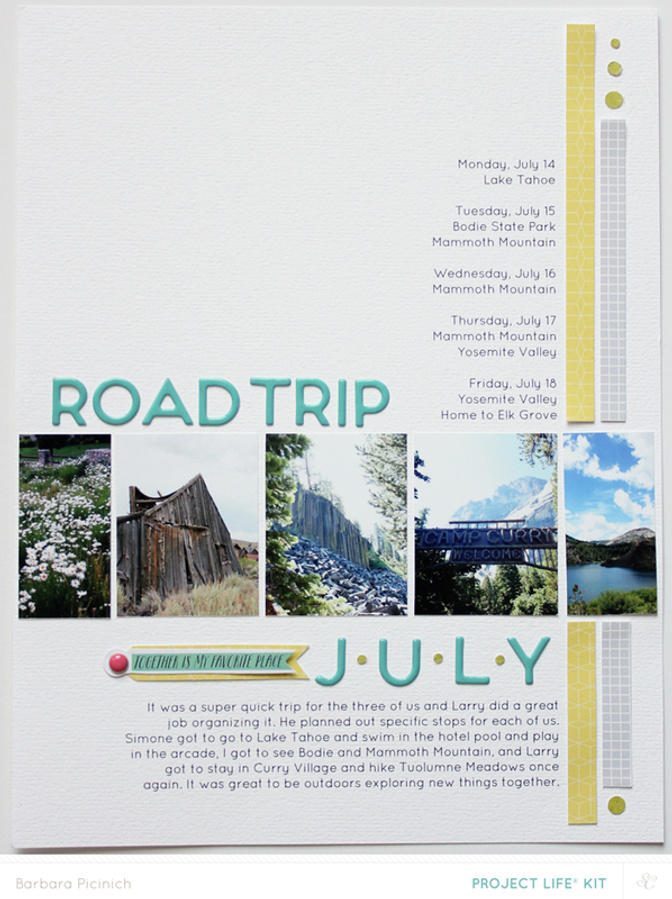
I will also add in this layout that I did with some of the scenic photos from the trip because it gives a lot more of the detail around the trip that I didn’t cover in my little journaling cards. I'm sharing this cut file on my blog today - please come over and check it out!
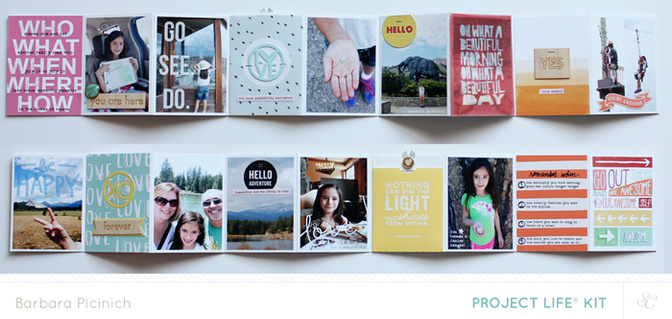
I also made this accordion fold mini album from the trip photos that could easily be put into a smaller protector and placed in the middle of my spread. I love adding little mini albums into my spreads and have done it several times in the past.
I sure hope your summers have been filled with travel and I hope that this has helped make what might seem a daunting task a bit more manageable and easier to handle. If you have any questions please let me know! I’m always happy to help.


Comments
Sign in or sign up to comment.
13 comments
Wow - what great ideas. Loved how you did the flip ups to incorporate more pictures into your spread. Loved the mini-album too. The list of what you journaled about is great. I'll be using that one for sure! Thank you so much for the great ideas...
Replies to Tamibr
Sign in or sign up to reply.
Love these! Genious! Would love it if you would care to share how you made the 'flip-ups' ❤️
Replies to annikw
Sign in or sign up to reply.
so fun - such great ideas.
Replies to toribissell
Sign in or sign up to reply.
I started project life style scrapbooking purely to document my travels (without kids, this is what most of my photos are from). I love that it allows me to use so many photos that I love, but maybe not enough for a whole layout. I hadn't seen photo flips before and love the idea - even more possibilities for photos!
Replies to lirathea
Sign in or sign up to reply.
Brilliant! Love the flip-ups! Thanks for sharing your gorgeous pages!
Replies to meegs
Sign in or sign up to reply.
I have a tutorial on how I make my flip ups on my blog, you can see it here
http://thepicinicbasket.blogspot.com/2013/01/tutorial-project-life-flip-ups.html?m=0
Replies to Babz510
Sign in or sign up to reply.
Thank you! Love your blog too ❤️
Replies to annikw
Sign in or sign up to reply.
Love this Babz!! ❤️❤️
Replies to laceyweeks
Sign in or sign up to reply.
These layouts are beautiful! Thank you for sharing with us your process!
Replies to 1Djc
Sign in or sign up to reply.
I love the mini accordions and the overlays!
Replies to danyamichelle
Sign in or sign up to reply.
you are so good!! you know I love these! Adore how you used the peek-a-boo cuts to show there were photos behind the cards. And the accordion books? Just awesome!! Love your style!!
Replies to AnnetteH
Sign in or sign up to reply.
Wow wow wow! Incredible travel post! Love it! Thank you!
Replies to amyscalze
Sign in or sign up to reply.
Wow, I Love all the layouts and creative designs! Thanks for the great ideas and inspiration! Question: What program do you use to make photo collages?
Replies to jorader57
Sign in or sign up to reply.