Contributor Center Stage - Gillian Nelson
Tags:For March, we thought it would be fun to focus on another one of our Creative Team Contributors! We hope you noticed Gillian Nelson's smiling face on the Reveal email yesterday (if you didn't, you missed a happy photo!). As one of our Creative Team Contributors, Gillian contributes projects on the site and the blog that let her personality and keen design ability shine. Be sure to check out her projects in the Gallery this month! Here's your chance to learn a little more about Gillian - scrapbooking history, organization tips, and more! We're so thankful for the talented team that helps to spread the joy of memory-keeping all over the world.
Tell us a little about yourself!
How long have you been scrapbooking?
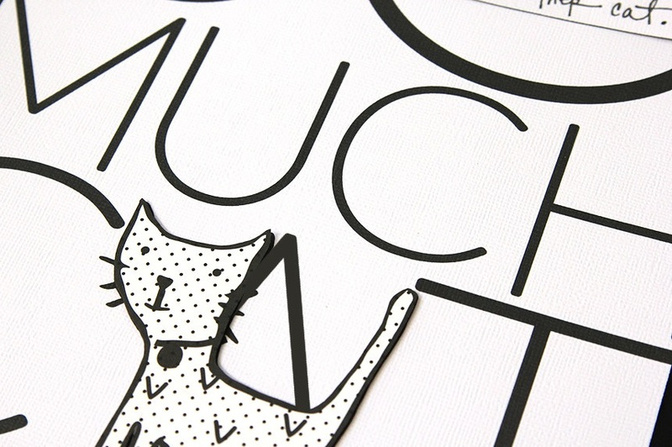
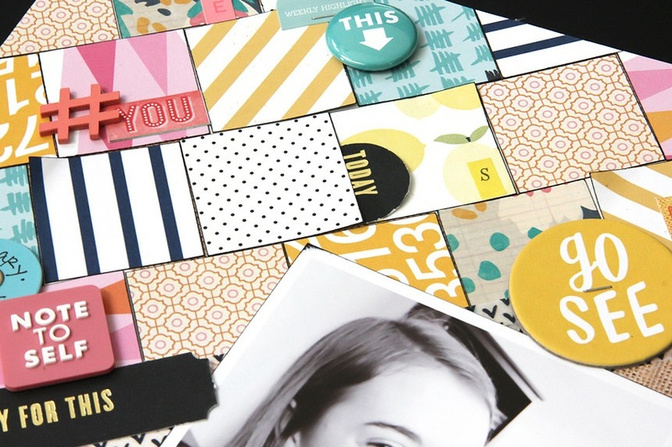
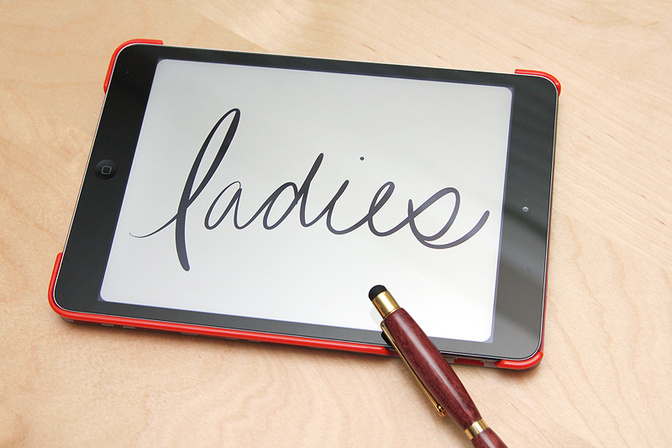
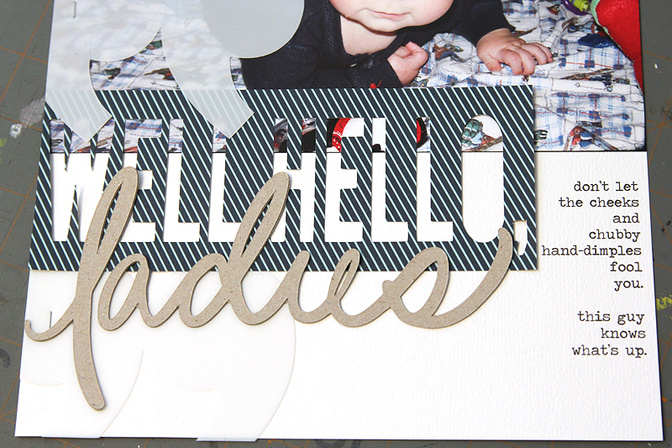
What’s your go-to technique? Would you mind sharing some photos of how one such project came together/some text describing the stages? I’ve never really considered myself a “technique” scrapper. I tend to lean to the simpler side of things. But one thing I do love to do and I frequently use on my pages is to incorporate my handwriting, both manually and digitally. Recently, I’ve been using the Silhouette to create cut files of my handwriting, that I then use for titles on my pages. I used this technique on my “Well Hello, Ladies” layout in the Odyssey gallery this month. I start by writing a word on my iPad using a stylus and the Paper app (by the company “53").
I send the file over to my computer, where I save the it as a .jpg. Next, I open the .jpg file with the Silhouette software and trace the image. Once it’s traced, I typically use the Offset tool to thicken up the lines of the script a bit to make for easier cutting. For this layout, I cut the word “ladies” from some Silhouette chipboard from the Studio Calico shop. I cut two copies so that I could glue them together for a little extra dimension, as the chipboard is a bit thin. 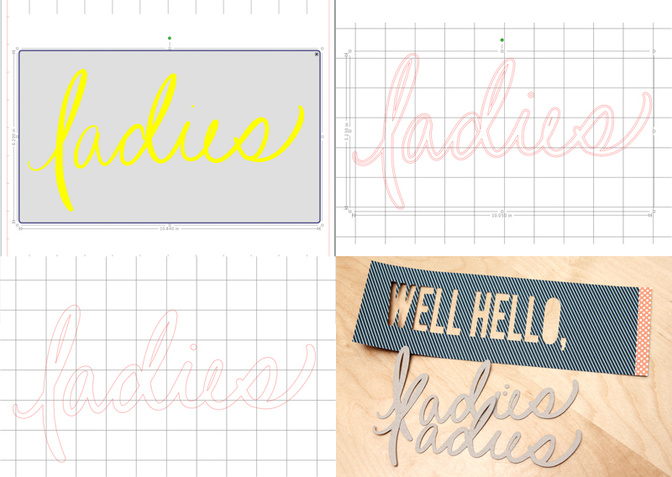
Once my title was cut, I printed my journaling on some 8.5x11 cardstock, and adhered my enlarged photo, and then added the title die cuts.
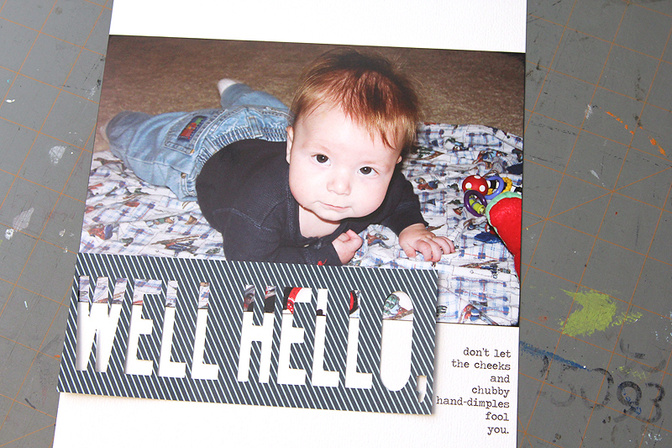
I layered the plastic quotation marks above and below the title words and attached them with mini staples.
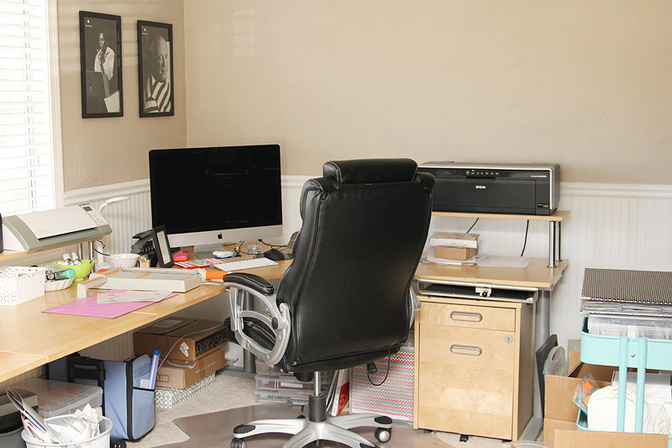
I finished off the layout with a strip of color across the bottom, a “hello” tag, and stamped a “hello” border above the photo. Simple! 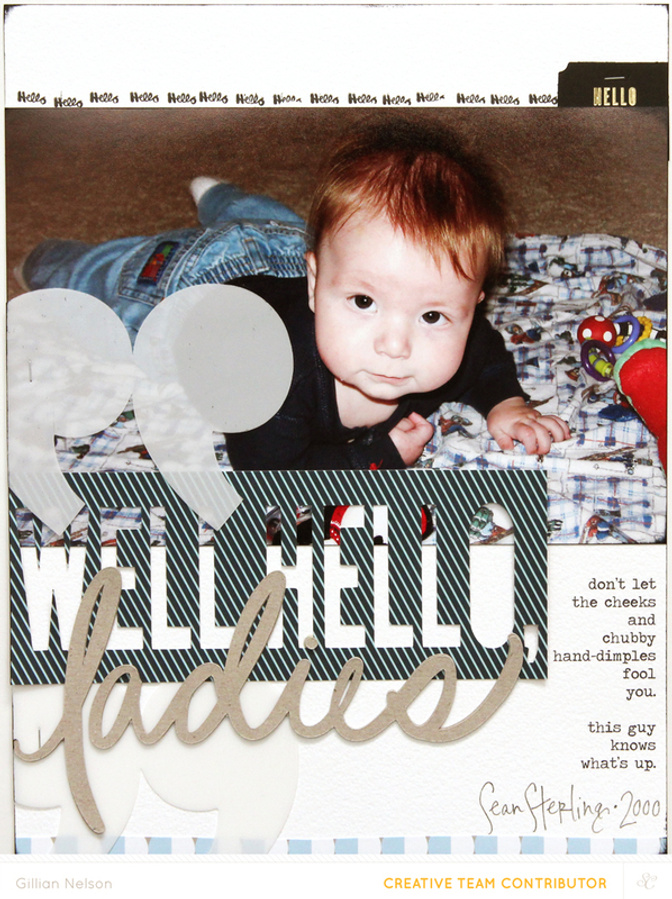 How do you stay organized? Organized? What is this word…organized? Ugh. I battle my clutter demons on a daily basis. I’ve seen some beautiful scrap spaces that our members and Creative Team have shared, but I’m going to keep it very real for you all today. I first thought, “I’d better clean this place up before I take pictures.” And then I decided against it. This is who I am…I love the idea of being organized, but the truth of the matter is that I struggle with it. So my scrap area usually looks like a bomb went off. And then another bomb. Followed by a grenade. I share this space with my patient and accepting husband, who occupies the other end of the desk. I don’t know how he puts up with me, as his end of the room is always in order and looks perfectly presentable. He even works from home, so he is surrounded by my mess more often than not. Bless that man. He’s a saint. (He says it helps that he’s busy looking at his computer screen all day, and thus has his back to the disaster zone.)
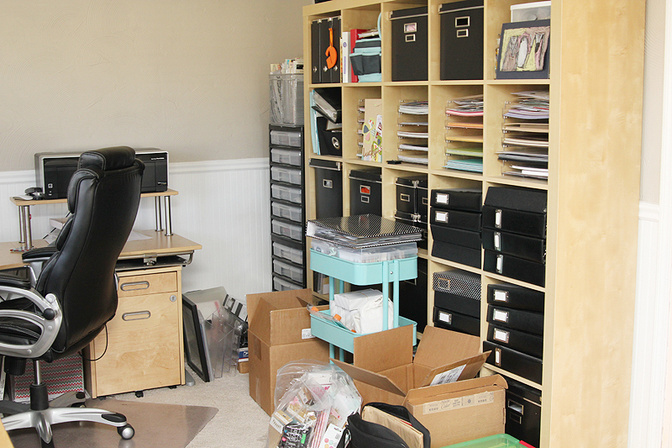
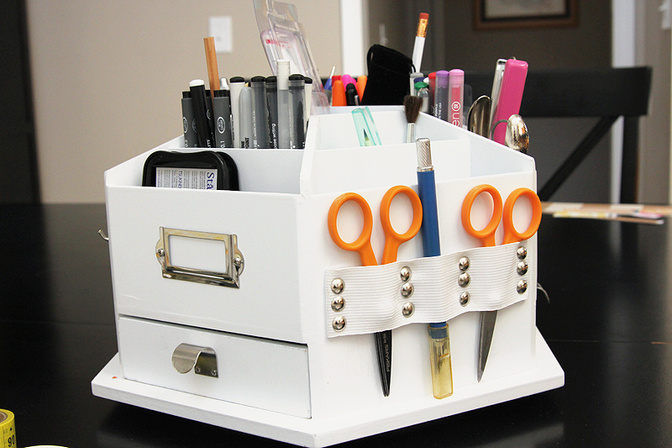
The one thing I do keep organized on a highly consistent basis is my spinning tool caddy. I keep all of my frequently used tools in this handy little gizmo, and everything has it’s place. I love knowing exactly where I can find my scissors and stapler and glue pen. Every single time. If I could just expand this organization to the rest of my space, I’d finally know peace in my life.
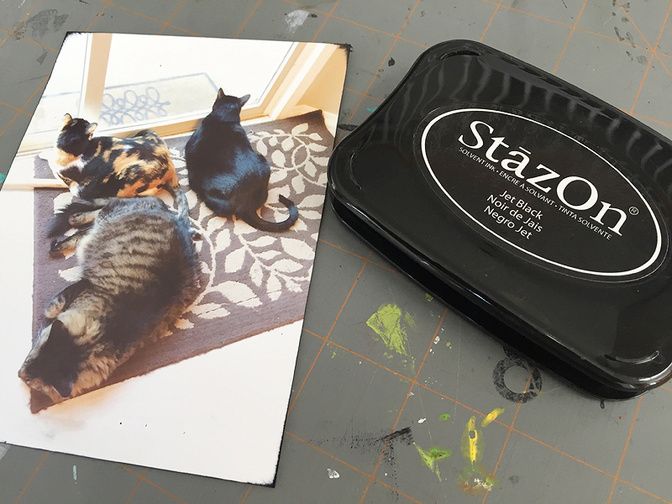
What is the crafting tool you can’t live without? This is probably going to sound dumb, but if I don’t have StazOn on hand, I don’t know what to do with myself. I use black StazOn to ink the edges of every photo I scrap, and usually on other paper layers on my layouts as well. It’s the only stamp pad I’ve ever (repeatedly) had to replace because I’ve used it entirely up. There’s just something about that thin black edge that helps the pieces of a page to pop. I’ve tried to go without inking the edges of things, and I had to go back and pull stuff off the page and ink them anyway. It’s a compulsion. My daughter watched me one day as I inked the edges of all the photos and Project Life cards I had ready for a spread, and she asked me why I bothered doing that if only I would notice. And I said, “Exactly. I will notice.” See? I’m odd. Whatever.
Where do you go to get ideas? Honestly, ideas and inspiration are everywhere. Sketches are always a fun starting point. I love to look to the member gallery here for design ideas, and Pinterest is also a great source of all kinds of inspiration, from graphic design to typeface to color combinations. I’m frequently inspired to create layouts based on conversations between family members. And mostly, I let the pictures inspire the direction a layout takes. I have a really difficult time putting a page together unless I have something specific to say about a particular photo. One of my favorite parts of this hobby is the storytelling aspect to it. I find stories to be hugely inspiring.
We hope you enjoyed getting to know Gillian a little better this month! Check this month's kits to see the materials Gillian used on these layouts, like Calypso and the Scrapbook Main kit (unless you're a subscriber, you won't be able to see the products until Reveal is in full swing tonight at midnight)!


Comments
Sign in or sign up to comment.
12 comments
Love your style G! It's so great to read this and find out more about you :) Love that you're keeping it real with your scrap space too :)
Replies to CatB22
Sign in or sign up to reply.
Looks pretty organized compared to my room!!! Loved reading about your approach and love the top layout!! Bless all husbands of crafters;)
Replies to Brinkleyboy
Sign in or sign up to reply.
I love your layouts, but I never noticed that you inked the edges of your photos. It does help them stand out.
Replies to kathyr
Sign in or sign up to reply.
I love your work and am so excited that you're contributing this month. It means some bright and happy and fun layouts in the gallery for sure
Replies to juliee
Sign in or sign up to reply.
Love your work and Silhouette tip! I think I need an Ipad now. :)
Replies to nicolemartel654
Sign in or sign up to reply.
Which app is that again?
Replies to needtime2scrap
Sign in or sign up to reply.
I also work in a large space that I share with my husband who has a home-based business. And yes, he is a saint, putting up with my messes and keeping his work incredibly organized. I'm glad you took pictures of the "as is," for all of us who also have an "as is"! Thanks for being willing to go without makeup!
Replies to hannaly
Sign in or sign up to reply.
She sounds so cool and down to earth! Definitely someone I'd be friends with "IRL," as they say. Thanks for letting us get to know you a bit better!
Replies to justyna
Sign in or sign up to reply.
So excited to see you in the gallery this month G!
Replies to supertoni
Sign in or sign up to reply.
I love that app!!!
Also, I want your space. Just saying. Want it.
Replies to PaigeR
Sign in or sign up to reply.
Thanks for the tips on how to cut out your own handwriting. I need to try that.
My space looks worse than yours. You talk about war zone! Ha! But it's filled with things I love. Yours looks the same.
Thanks for letting us into your mind and into your world.
Replies to threekidneys
Sign in or sign up to reply.
Oh, G. I just adore your fun attitude and I love that it shines through your projects. So happy to see you in the gallery this month!!
Replies to welobellie
Sign in or sign up to reply.