Tutorial - Document Your Travels with Project Life® | Tracy Armstrong
Tags: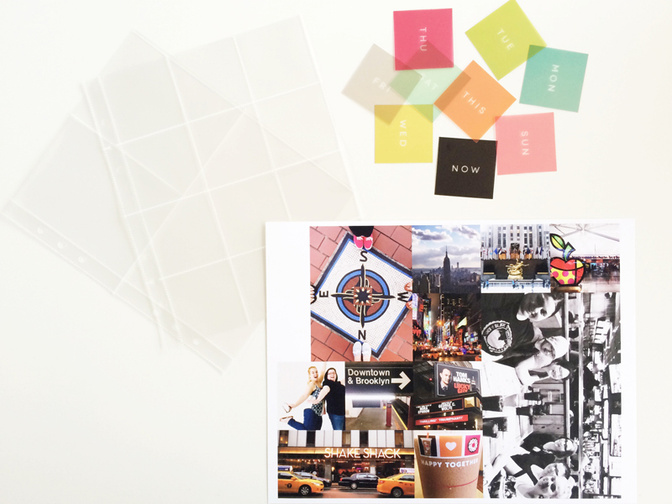
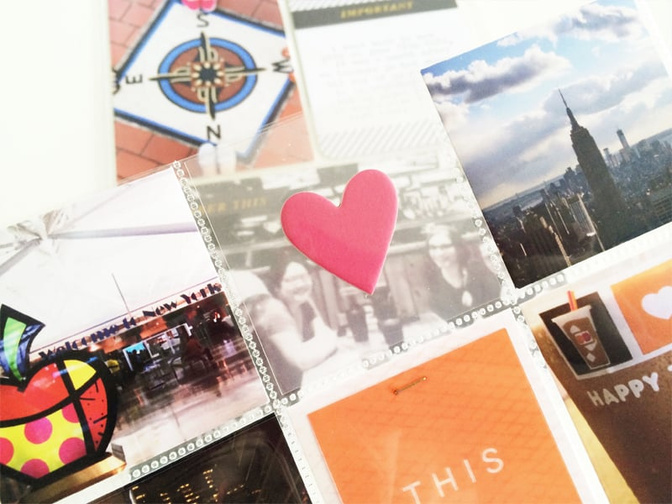
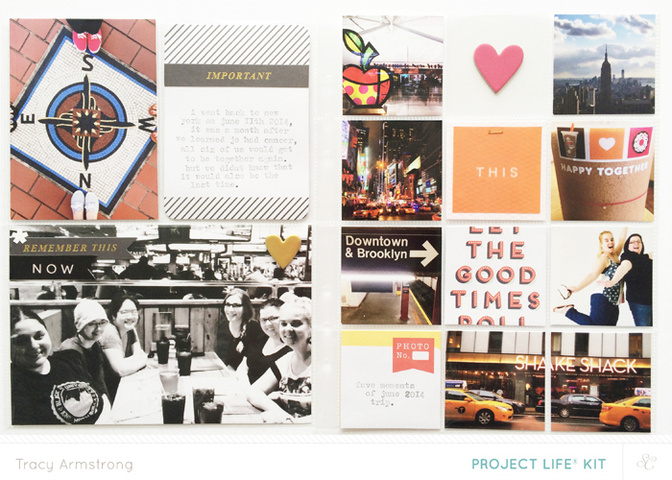
I went through dozens of pictures and picked ones I thought would look cute as little 2x2s. I printed them out a home onto a piece of 8.5x11 matt photo paper (I use Staples brand) using Photoshop and my Epson XP610 printer. I try to fit as many pictures on a single piece of photo paper as possible to save on paper. Here I was able to print one 3x4, one 4x6, one 2x4 and eight 2x2s. I'm using the new Studio Calico 6x8 page protectors; one that's all 2x2s and one that is two 3x4s and one 4x6.
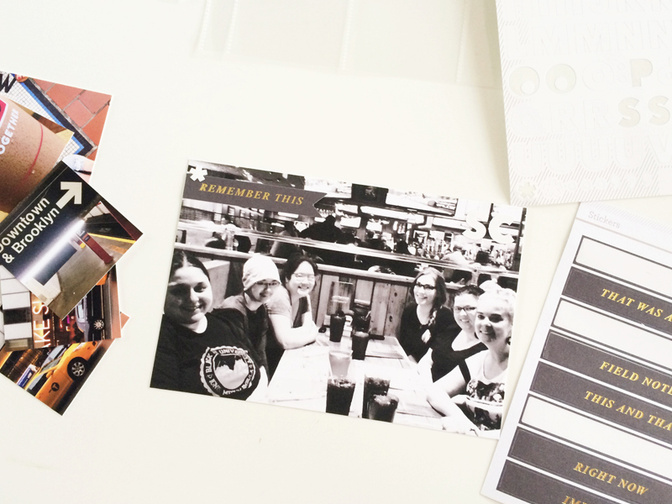
After I cut the pictures out using my paper trimmer, I took the 4x6 picture and used the "remember this" black and gold phrase sticker from the Cirque Project Life Kit and I cut the end to make it look like a banner. These black and gold stickers are one of my favourite embellishments from the kit. "Hoard these" definitely crossed my mind several times!
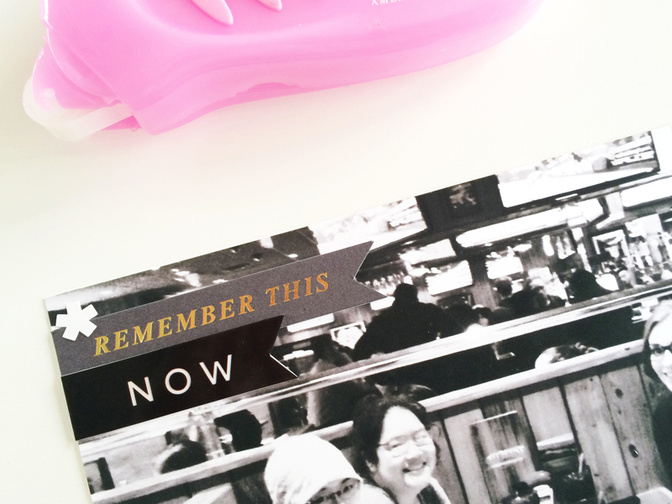
I really loved these adorably colourful transparent squares by Hello Forever and wanted to use them in my layout. I used the black "now" one underneath the "remember this" banner because it's a very important picture for me. I cut the square own to a banner and used my solid glue runner to adhere it to the page. I also added an asterisk using the white alphas, also from the Cirque Project Life kit.
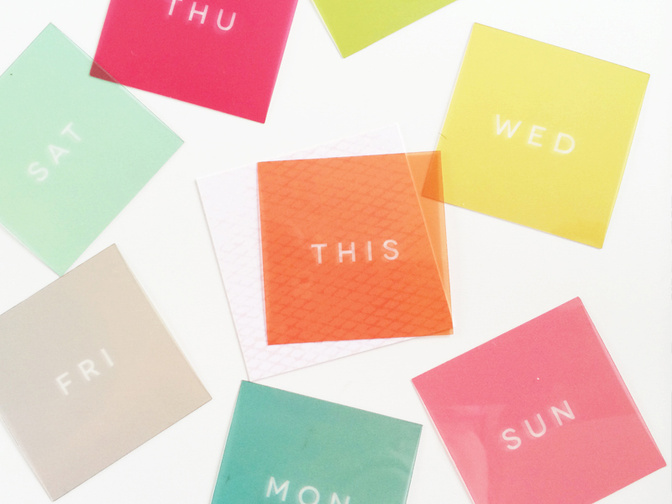
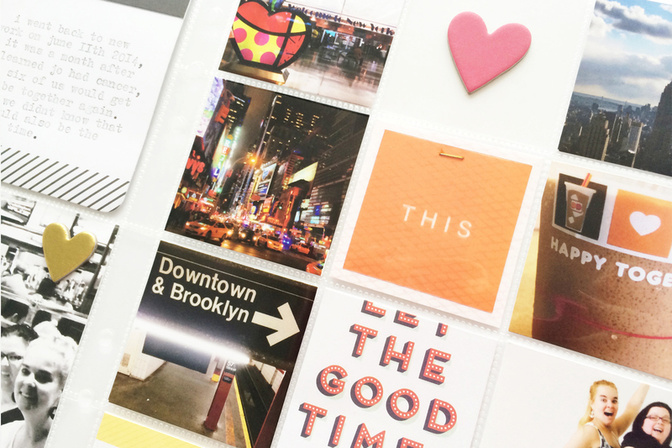
I thought it would be cute to add another pop of colour to the all 2x2 page, so I used the bright orange square that said "this' to highlight a few of my favourite pictures from that trip. Now I have Sunday to Saturday left over and I'm thinking they would be great in a mini 4x4 week in the life album!
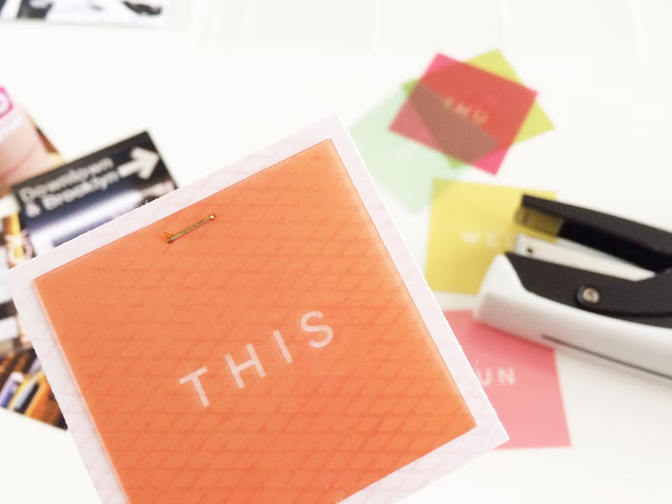
Because the squares are slightly smaller than 2x2, I cut down a piece of light pink patterned paper and used my tiny attacher to attach the transparent square to the 2x2 square. Little tip! The colourful mini staples that are in the shop fit into the tiny attacher! I love them because I love the little gold staples! So cute!
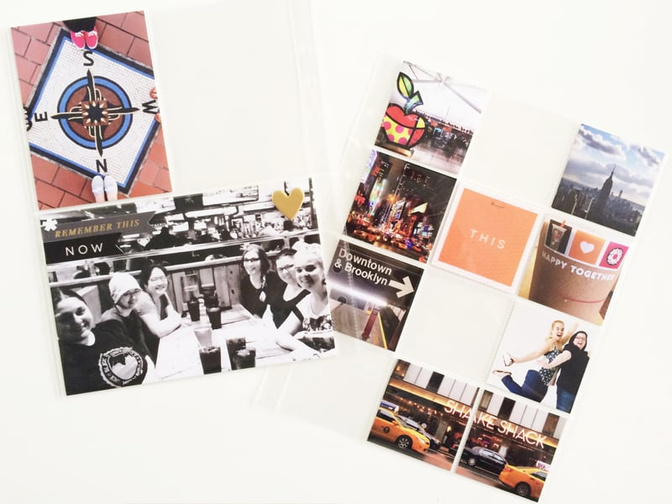
I love this kind of scrapbooking because I love that I can so easily move things around. I must have moved the things around four times before I decided on this picture configuration!
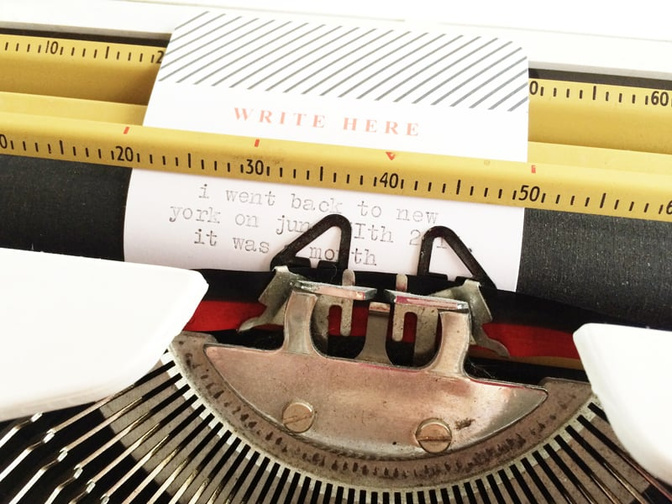
I wanted to add one 3x4 of text, so I took this black and white card from the Far Far Away Project Life® Kit
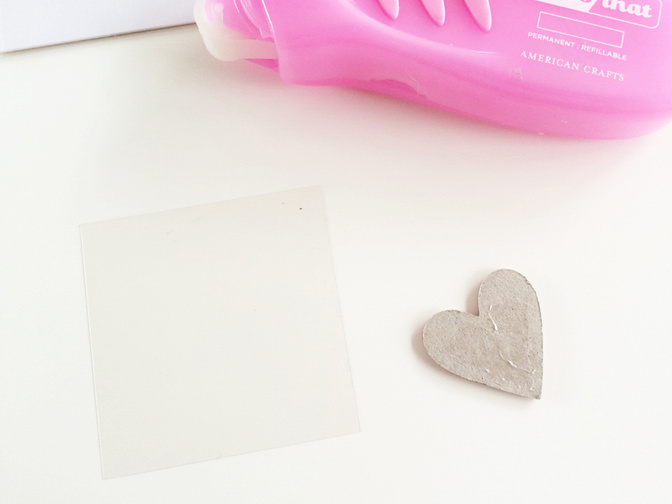
Adding little extra things is a great way to keep your pages fun and different! I love the look of "floating" objects. You could add little things directly into the pocket and then sew it closed, or you could adhere an object directly onto a piece of transparency paper. You can easily slip it into a pocket and no sewing required!
I hope you enjoyed my start to finish tutorial, have a lovely day!
Cirque Project Life® kit; Far Far Away Project Life® Kit;6x8" Page Protector 5ATiny AttacherMini Stapler Refill ColoredSolid Glue Runner


Comments
Sign in or sign up to comment.
9 comments
Beautiful as always Tracy! Thanks for sharing your process!
Replies to toribissell
Sign in or sign up to reply.
Awesome! Please tell me how you printed so many photos on one sheet?!
Replies to angymuse
Sign in or sign up to reply.
@toribissell thanks lady! :) // @angymuse I use Photoshop to size my photos and then I add them to a 8.5x11 canvas and then print that!
Replies to tracyxo
Sign in or sign up to reply.
Looks great!
Replies to IsGurra
Sign in or sign up to reply.
This is wonderful! NYC is my favorite place too. I can't believe you got so much city in a 2x2 size!
Replies to pinksoup
Sign in or sign up to reply.
Thank you for sharing. Never been to NYC but travel to Disney every year so this this would be a good idea to use for those trips.
Replies to MX5Scrapper
Sign in or sign up to reply.
So where did u get the colorful transparent squares? Very nice layout.
Replies to astoria150
Sign in or sign up to reply.
@astoria150 they are from the Cirque PL main :)
Replies to tracyxo
Sign in or sign up to reply.
love this tracy! i've never been to NYC but it's something i'd love to do soon! :)
Replies to donnanicole1025
Sign in or sign up to reply.