Tutorial - Make Your Own Lettering with Digital Files | Ginny Hughes
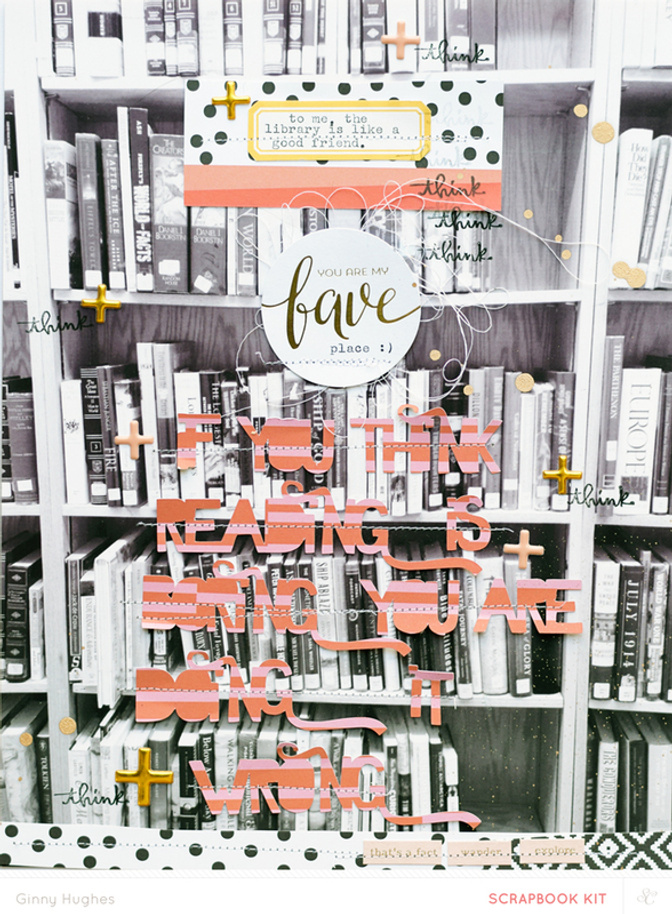
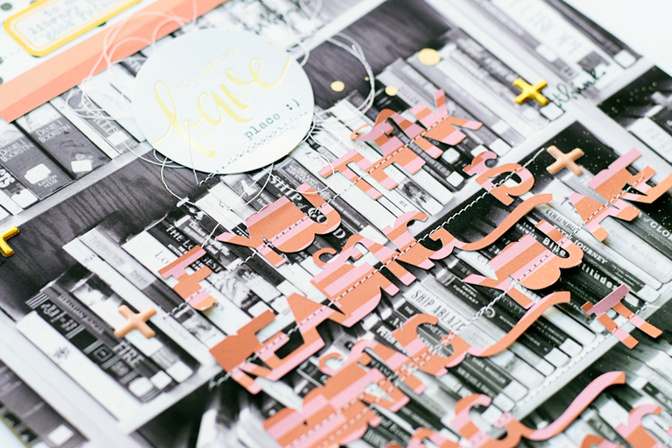
Tags:Here is the finished layout. It is easy to get those letters connected to make your own words come to life. I'll show you all the steps!
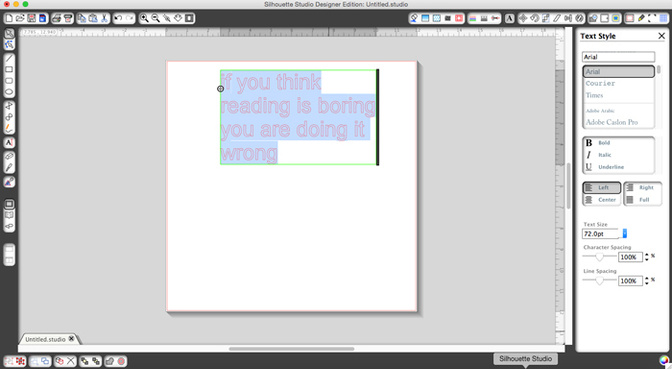
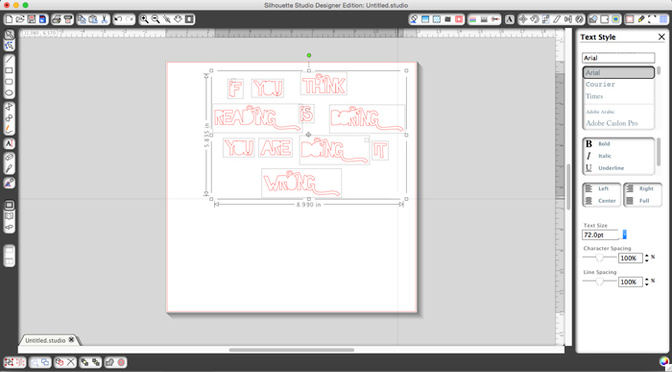
First step is to type your title in the Silhouette software. Don't worry what font you are using just yet, because once you type it out you can highlight the whole thing then scroll through your font list and it will change depending on what font you are highlighting on the sidebar. I love this feature!
The font I chose is called Ghosttown. It has some really fun flourishes. Not all fonts will work with the weld feature; it is easiest just to play around and see which fonts work best. Once you have the font you like picked out, right click and choose weld. Any letters that are close enough to each other will weld together. Then you can see which letters you need to move closer to touch the rest of them. As long as the letters are touching they will weld together. It just takes a little time and some patience.
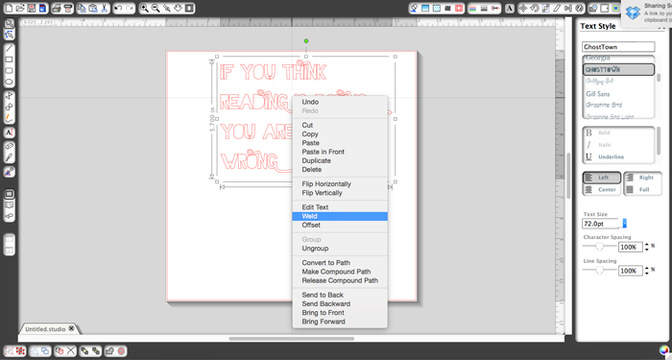
This is what it will look like when you still need to weld some of your letters together. See the multiple boxes around each word? That means that they aren't welded completely together.
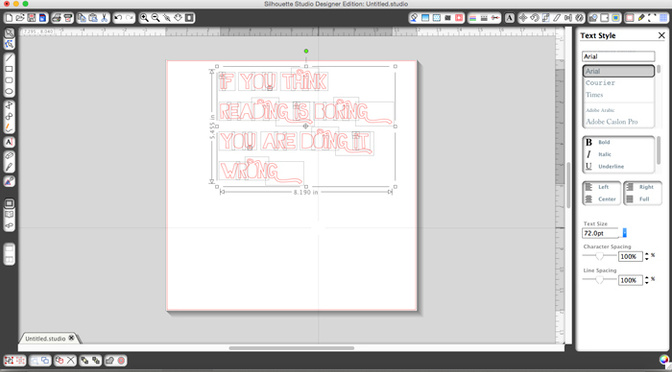
Now this is what it will look like when you are done. Each words has its own box.
This is a super fun & easy technique to personalize your layouts, cards, or pocket page projects. You can weld together a whole group of words so they cut out in just one piece too!
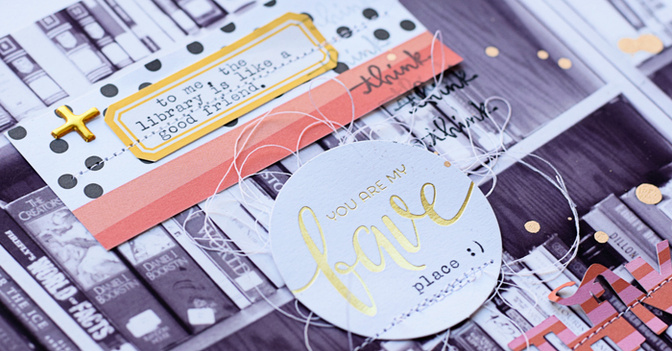
Supplies: Lisse Street Scrapbook kit, Tulip add-on, Daffodil add-on, Inky Black ink pad


Comments
Sign in or sign up to comment.
8 comments
So pretty Ginny! I love it!
Replies to cariilup
Sign in or sign up to reply.
Now that I'm really getting into playing with my Silhouette, I get so excited to learn things like this! Thank you!!
Replies to justyna
Sign in or sign up to reply.
I'm working on making something exactly like this right now! Did you get the font from the silhouette store? Thanks for the tip, Ginny!
Replies to teabiscuit
Sign in or sign up to reply.
I think I need a silhouette now....
high five to the Library love!
Replies to JenThomas
Sign in or sign up to reply.
oh i've always wondered how that was done. thanks for the help. Can't wait to try.
Replies to toribissell
Sign in or sign up to reply.
@teabiscuit It was a free font, don't remember where I got it though, Google it and I am sure you will be able to find it :)
Replies to ginny
Sign in or sign up to reply.
I love your page and your quote. I am now going to try and weld some of my pinterst quotes for titles. Thanks for the tips.
Replies to tpgirl
Sign in or sign up to reply.
Wow this is so amazing!
Replies to jamiewaters
Sign in or sign up to reply.