Tutorial | Making a Mother's Day Card from Start to Finish with Keisha Campbell
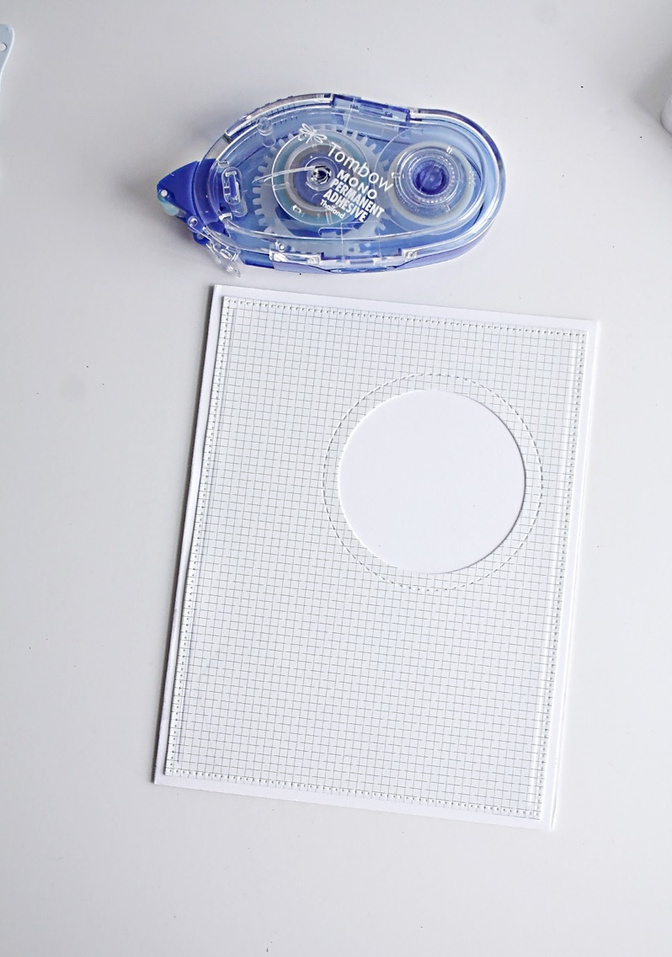
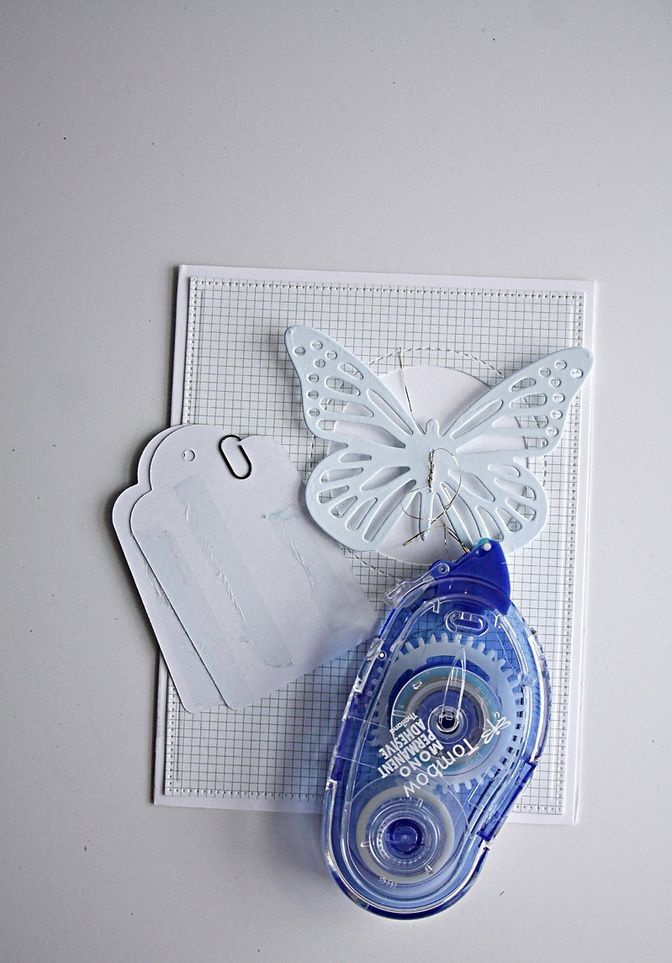
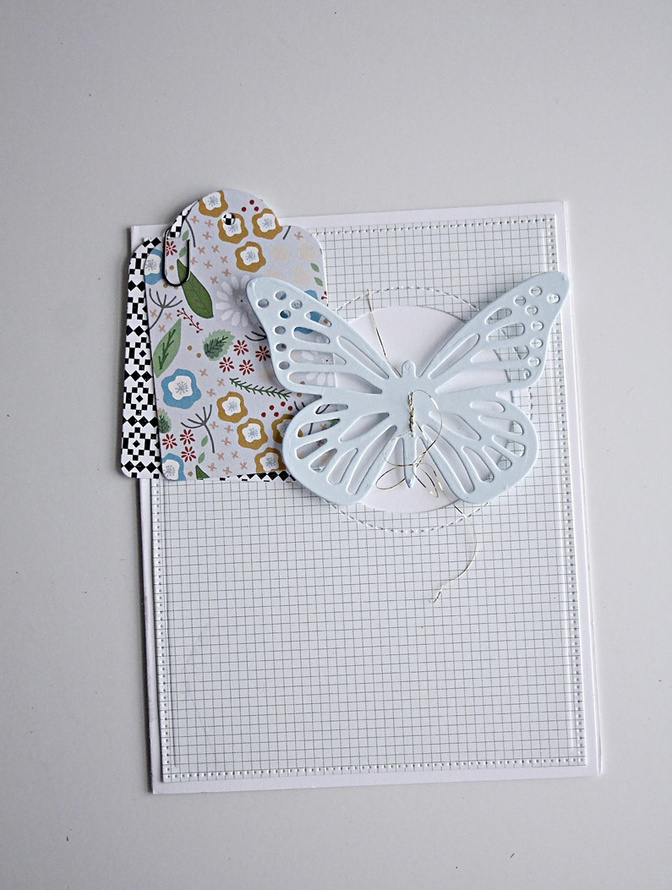
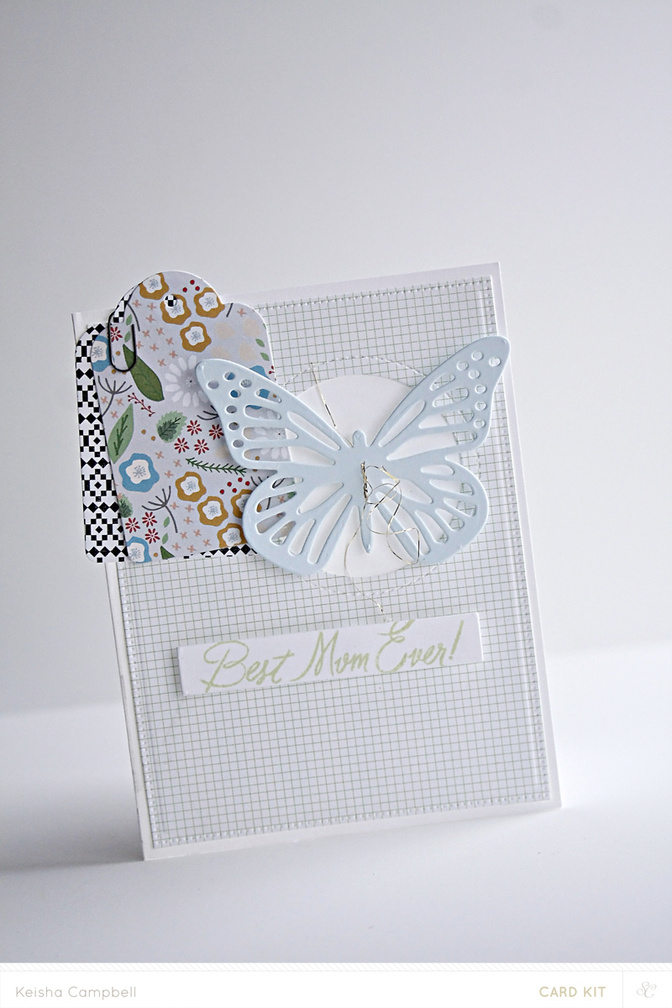
Tags:1. I used an A2 card and cut my pattern paper to fit the card.
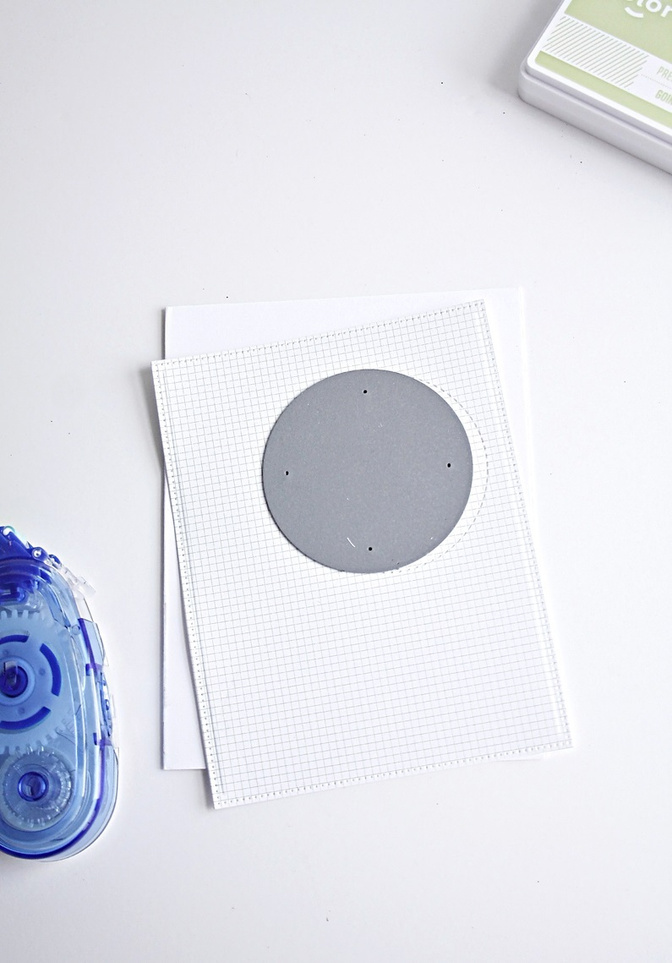
2. Use a 2in circle die to cut the peek-a-boo window into the pattern paper.
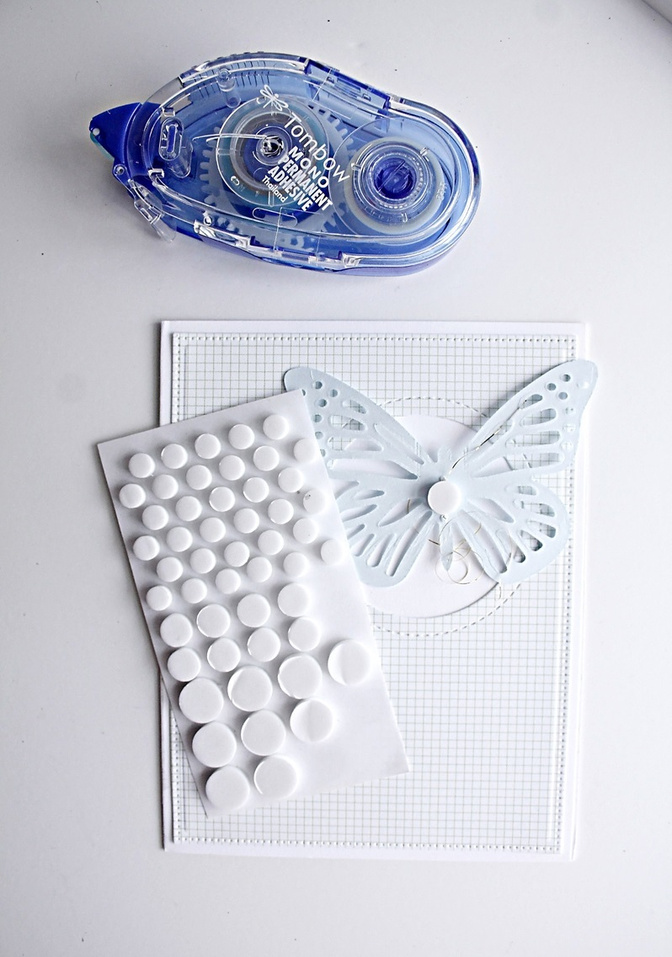
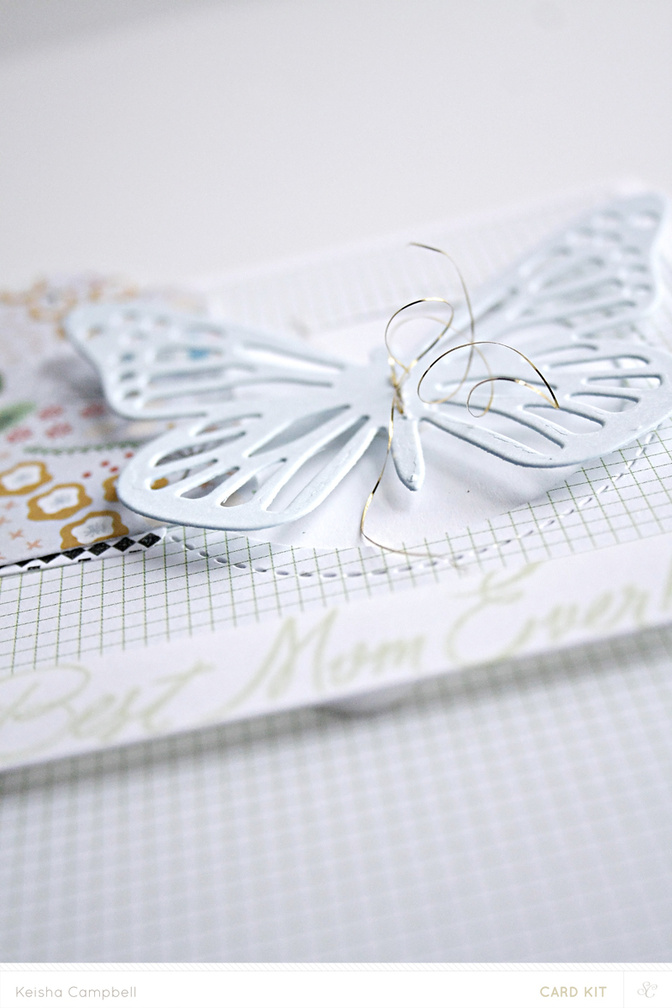
3. Punch or die-cut a 3in butterfly.
4. Adhere butterfly to the center of circle cutout with a popdot. I did a little stitching on the butterfly before adding to my card.
5. Using a tag die, I cut two tags out of two different pattern papers.
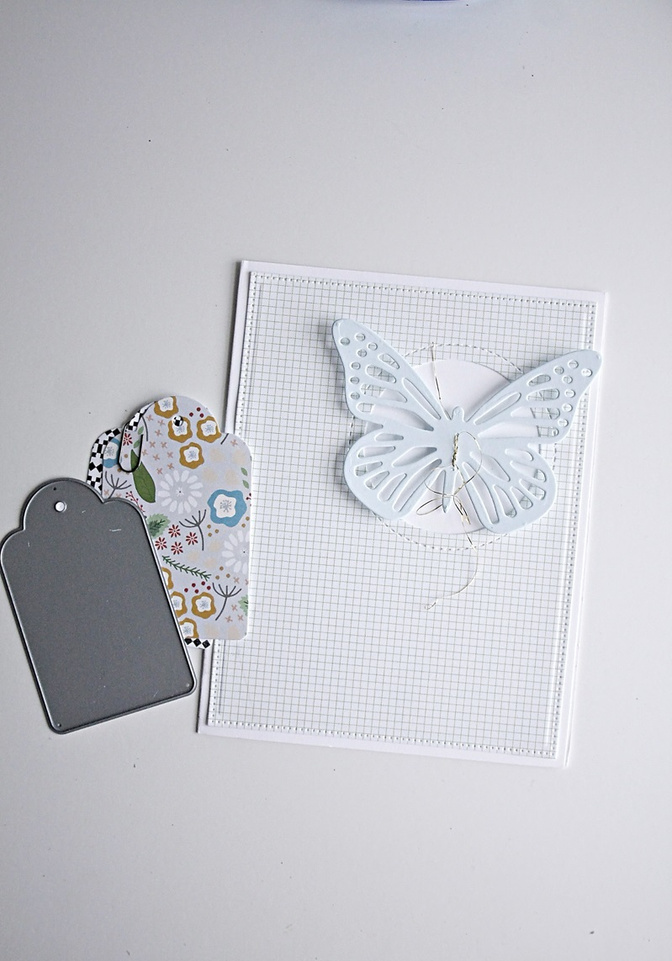
6. Tape the tags together, add a mini paper clip then add to the card.
7. On a small strip, stamp sentiment.
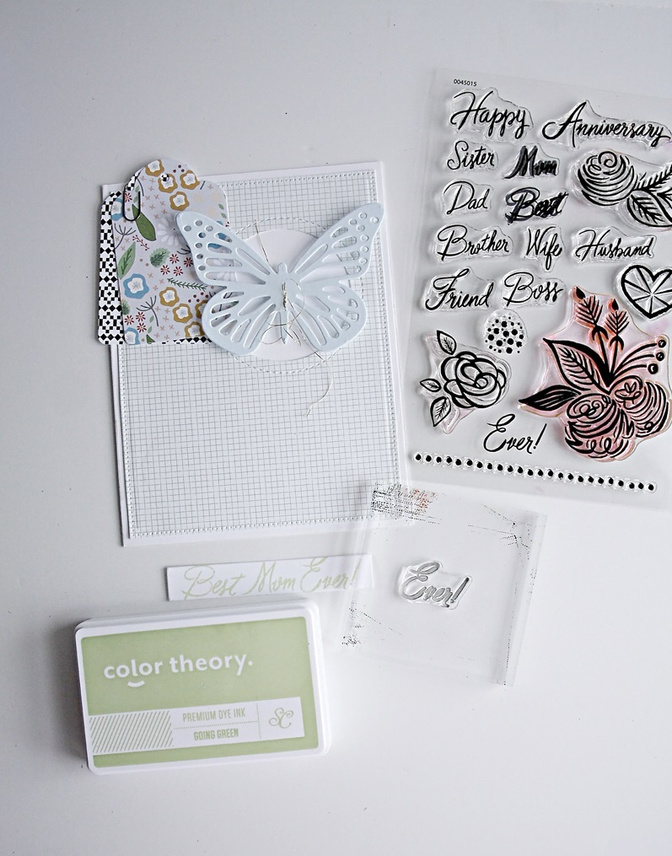
8. Using popdots, adhere the sentiment strip to the card.

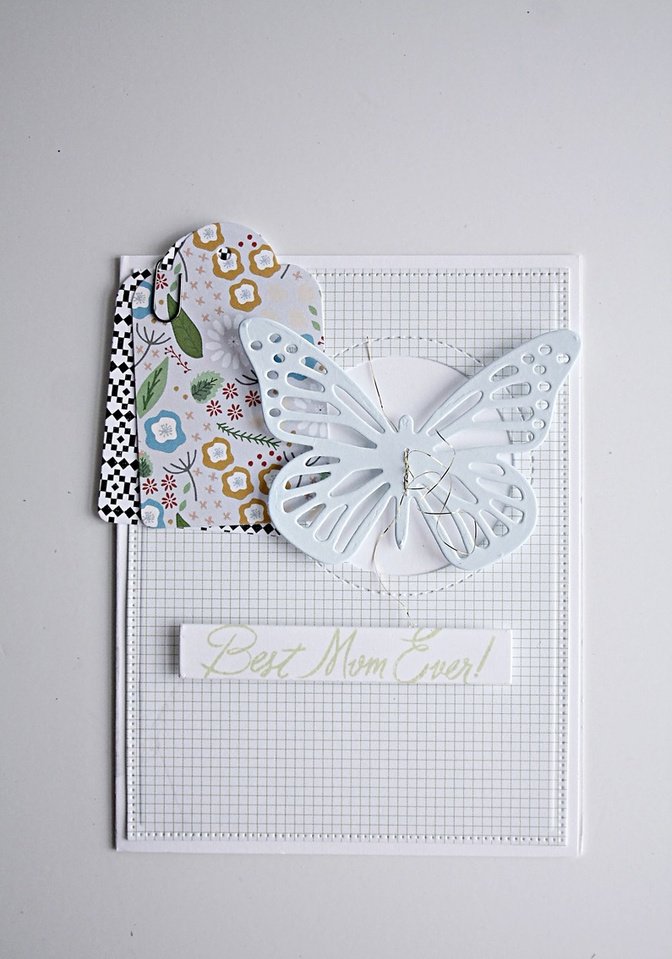
And you're done! Nothing beats a handmade card for mom on her big day. This design is versatile enough to use for many occasions, but I hope you find use for it on Mother's Day this year, and if you do, link your project in the comments! Thanks for stopping by!
- Keisha
 Supplies: Best Stamp Ever by MID, Lisse Street Paper Pad, More Solar White, Odyssey Paper Pad, Color Theory Ink Pad: Going Green, More Color Card April 2015


Comments
Sign in or sign up to comment.
6 comments
I love your start-to-finish tutorials! Keep 'em coming. Sometimes getting started is the hardest part, and these get me going, kick-starting my creativity and providing a sense of accomplishment. Thank you.
Replies to Kristi_
Sign in or sign up to reply.
so pretty!
Replies to toribissell
Sign in or sign up to reply.
Love it Keisha!
Replies to sideoats
Sign in or sign up to reply.
So lovely!
Replies to pixnglue
Sign in or sign up to reply.
such a pretty mix!
Replies to jamiewaters
Sign in or sign up to reply.
Beautiful! Great idea to clip the tags in that position. I'd never think of that.
Replies to theslowcrafter
Sign in or sign up to reply.