Create a Confetti Pocket on a Layout Tutorial | Marcy Penner
Tags:I love the idea of confetti pockets in Project Life® spreads. They're just so fun. But why should they be limited to just those spreads. Why not on pages as well? Today I'll take you through creating a confetti-type pocket on your layout and we'll use up some of our smaller supplies and embellishments at the same time! Bonus!
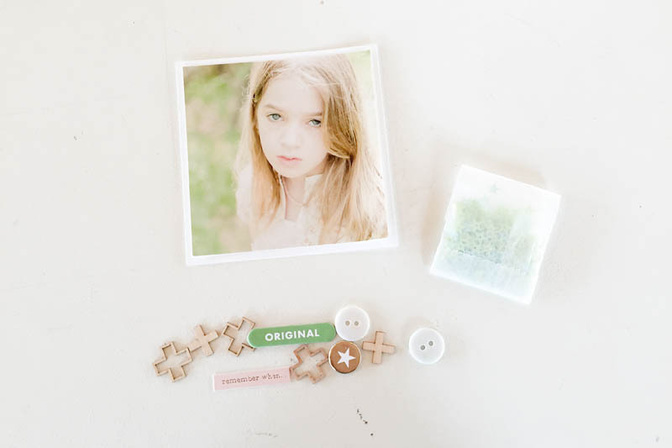
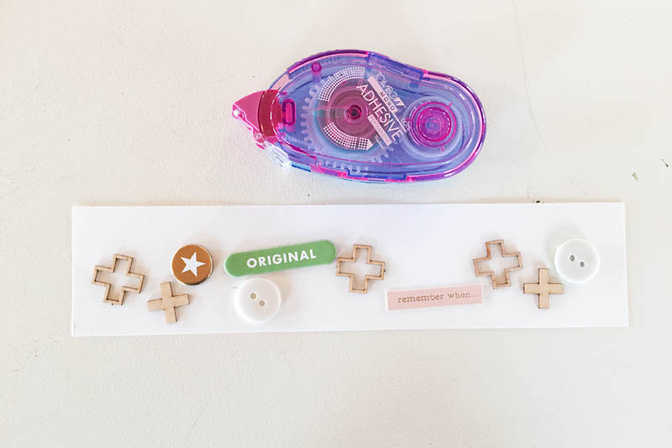
I started by selecti
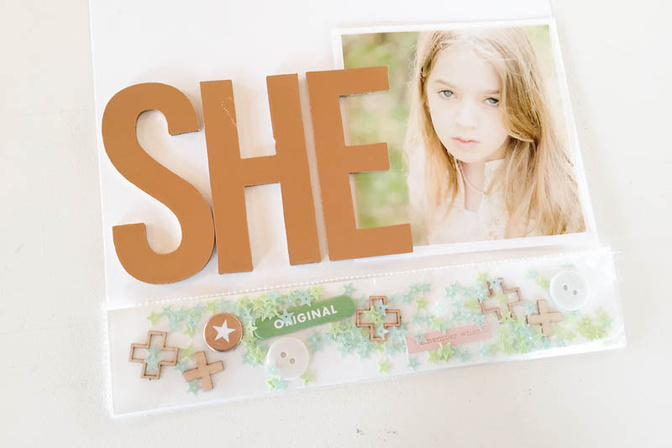
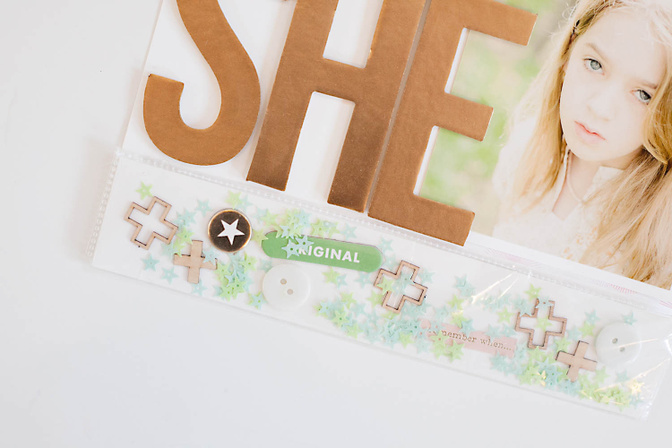
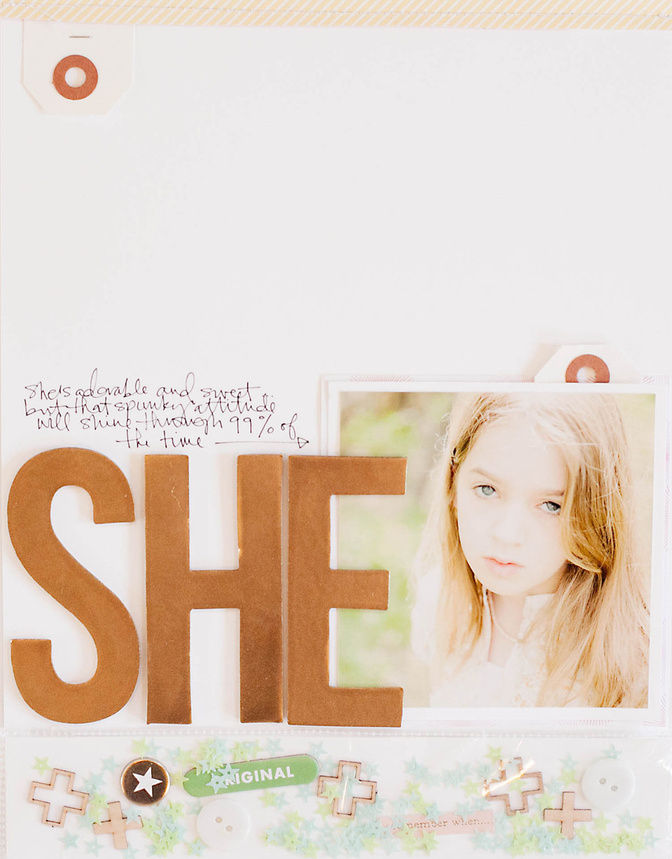
I moved them around on my page before deciding that a skinny horizonal pocket at the bottom of my page might be fun.
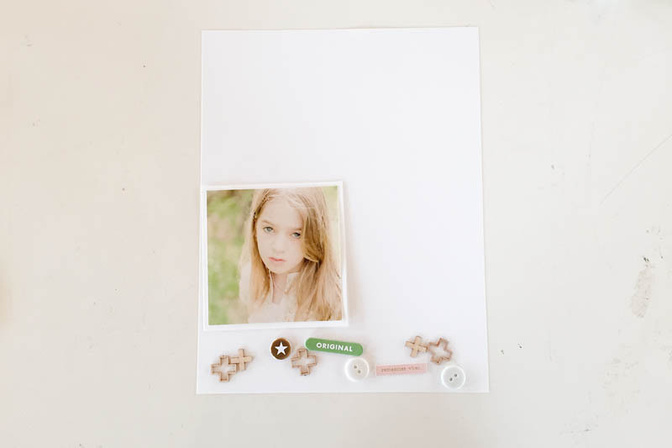
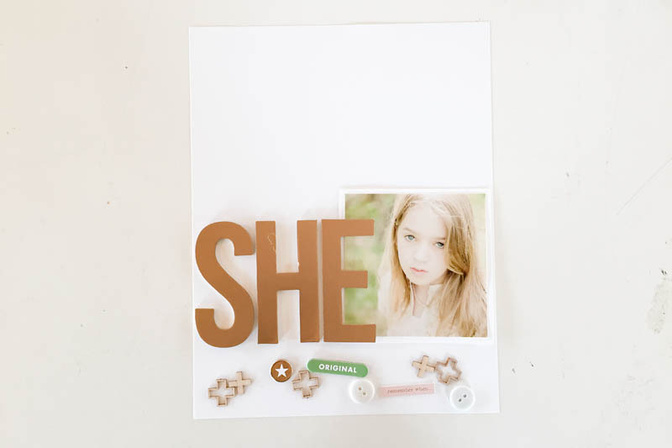
I decided to spray paint the chipboard letters from the main scrapbook kit gold so that they'd play off the strong gold tones in my photo. I arranged them beside my photo so that those two items created a barrier for my skinny confetti rectangle.
To make my confetti pocket I trimmed a piece of cardstock the size of my pocket. I arranged all my larger embellishments on it and then trimmed it down a touch more so they filled the space better.
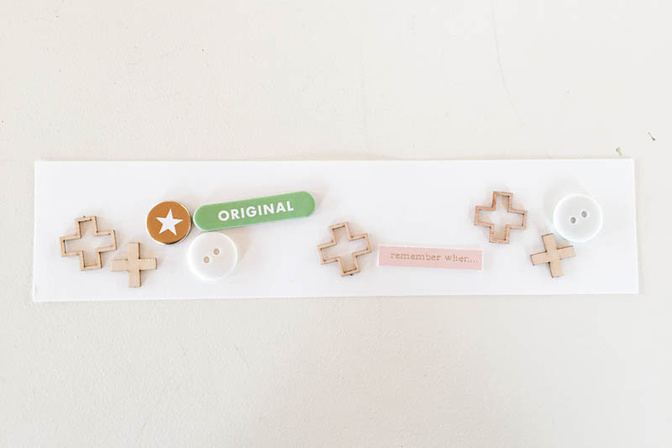
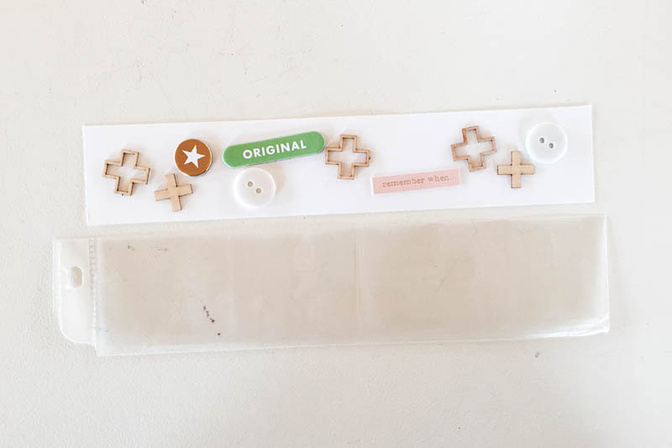
When I had them spread out the way I wanted I glued them down. When I'm creating a confetti pocket I like to adhere some of the larger elements in the pocket. This ensures that some of the contents will still look scattered in the pocket... even when most of them sink to the bottom of the pocket.
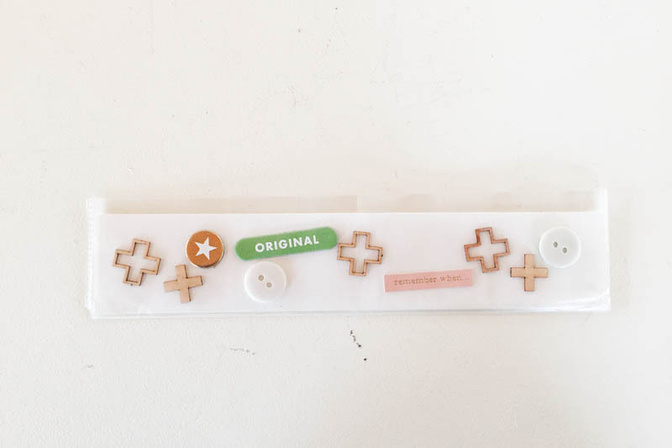
Next I took a 8.5x11 page protector and trimmed it down so that it was slightly taller than my piece of cardstock. I placed the cardstock with the adhered embellishments in the pocket and trimmed the spine with the holes off the side.
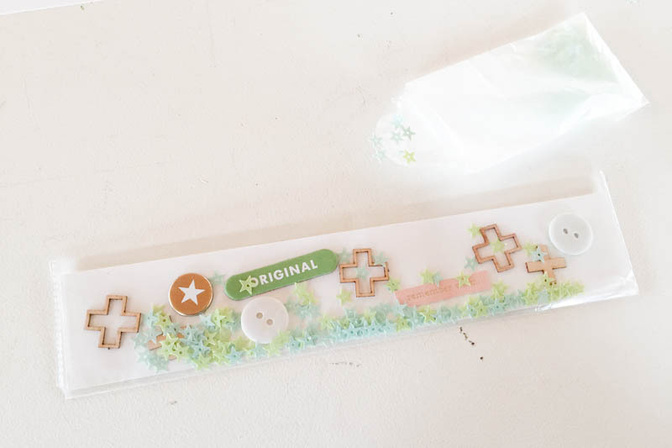
Now, that pocket's not nearly full enough to be considered a confetti pocket... so I added in some small star sequins as well. These will just be floating in there loosely. Some will sink to the bottom. Some will get held up by the embellishments that are adhered to the cardstock.
From there I carefully took the pocket over to my sewing machine and sewed it shut. Now, if you have the Fuse tool then you can simply seal the page protector closed and then trim it down. With or without a special tool it will work.
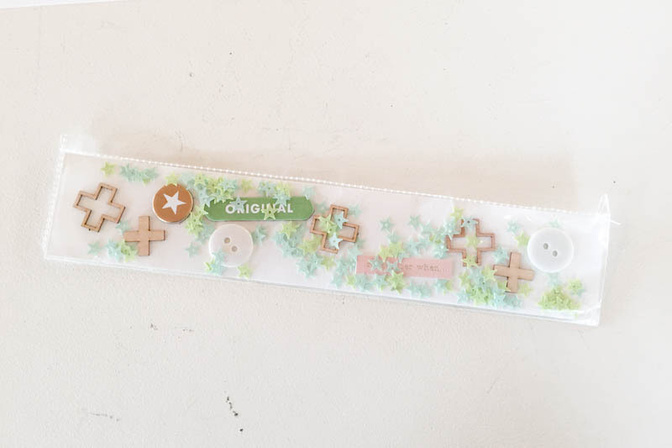
Because I have that piece of white cardstock in the pocket I can simply adhere the back of the pocket and glue it down. I don't have to worry about seeing my adhesive.
To finish off the page I matted my photo with some patterned paper and added a few small tags to create a bit of layering.

Confetti pockets are just one way to include some interaction in your projects. I hope you'll give it a try!


Comments
Sign in or sign up to comment.
13 comments
Love your confetti pocket.
Replies to JuliaSchueler
Sign in or sign up to reply.
I absolutely love this idea. I'd like to try this in my next layout! Do I have to do anything special to sew over the plastic and paper, or will my sewing machine handle it by default? I'm very new to sewing, I only got the machine last month and still refer to the user guide to thread it! Haha
Thanks,
Carly
http://eclectic-home.co.uk
Replies to SuperCarly
Sign in or sign up to reply.
What a wonderful idea! Can't wait to try it out! Thanks @marcypenner
Replies to tburley
Sign in or sign up to reply.
Love this, Marcy!
Replies to welobellie
Sign in or sign up to reply.
you are so cool! and so is this layout!
Replies to Leah
Sign in or sign up to reply.
You are the bomb! Such a fun layout!
Replies to cele
Sign in or sign up to reply.
so pretty!
Replies to jamiewaters
Sign in or sign up to reply.
Yay, love this idea Marcy, why not add confetti pockets to a scrap layout? My fuse tool is going to come in handy that's for sure! :)
Replies to HelloTodayCreate
Sign in or sign up to reply.
This is such a beautiful layout! The pocket is genius!
Replies to Fivepops
Sign in or sign up to reply.
Lovely idea and Lovely layout....I will be lifting this....for some reason I love that title of "She".
Replies to tpgirl
Sign in or sign up to reply.
I'm going to do this right now! Thanks for the inspiration @marcypenner !
Replies to andreahoneyfire
Sign in or sign up to reply.
Brilliant, Marcy! Doing this asap.
Replies to goldenblind221
Sign in or sign up to reply.
Hey @supercarly... I just sew away. I don't change any settings on my machine at all.
Replies to marcypenner
Sign in or sign up to reply.