Tutorial: Start to Finish Project Life® Spread with Geralyn Syn
Tags: I always begin a spread by choosing my photos. I printed them all out at home on 4x6 photo paper and trimmed them if necessary. 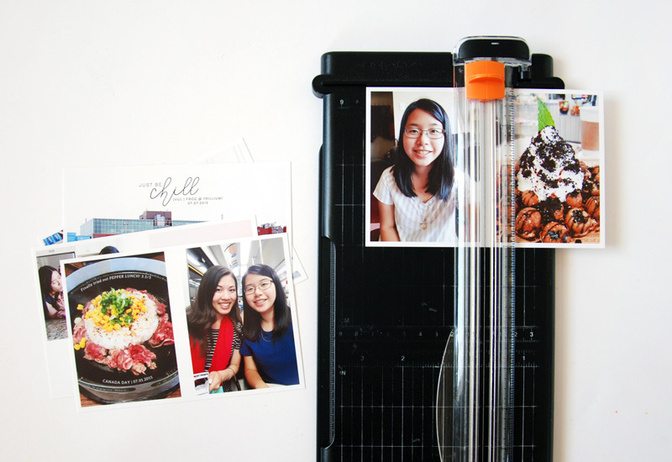
I laid out my photos on my page protector to get an idea of how the spread looks as a whole. My favorite page protector to use is an altered 12x12 Design A page protector. I recently got the Fuse tool and it is a game changer. It saves me so much time, is easy to use, and is perfect for pocket scrapping since my ideal page configuration has two 4x6 pockets and eight 3x4 pockets. I simply fused two of the four 4x6 pockets to create more 3x4 ones. 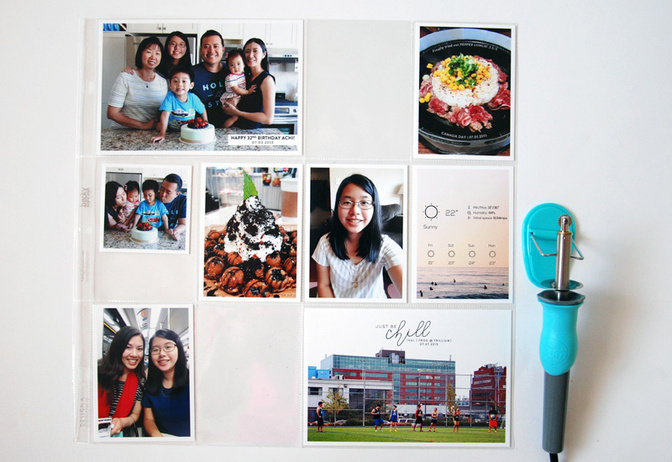
To adhere some of the transparency circles from the Pop Art scrapbook kit to one of my 4x6 photos, I used an old xyron sticker maker. This would ensure that the adhesive would be applied evenly and I wouldn’t get odd, uneven patches of adhesive showing through. I love how the transparency circles add whimsical pops of color to my photo. 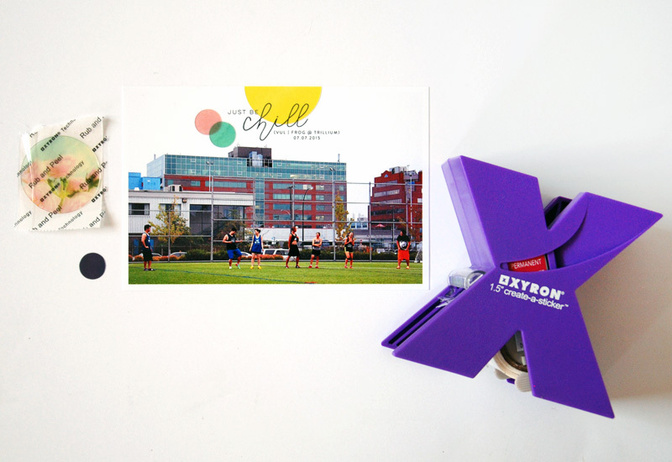
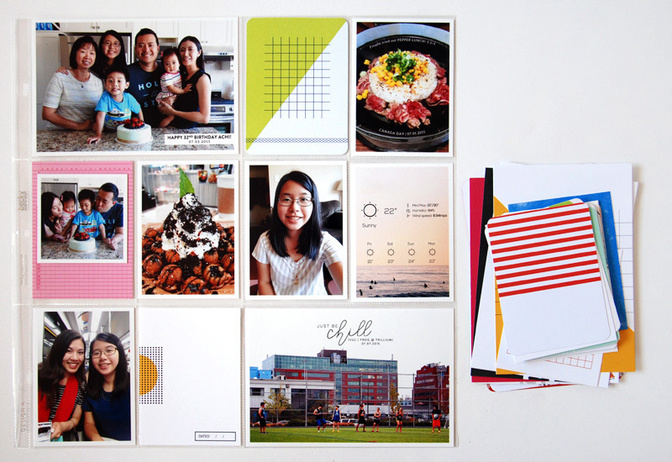
I also wanted to use some labels on my spread. I stamped various labels using the Label stamp set on plain white cardstock. The Color Theory inks were perfect for creating colorful and vibrant labels yet still keeping the stamped images clean and crisp.
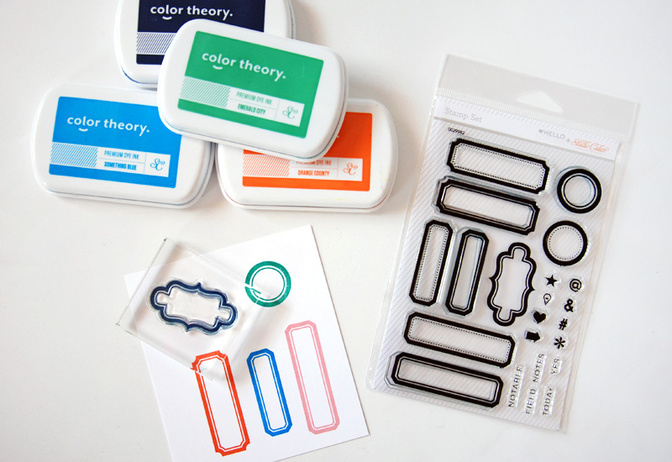
After stamping, I cut out the labels using the coordinating labels dies and my Big Shot. 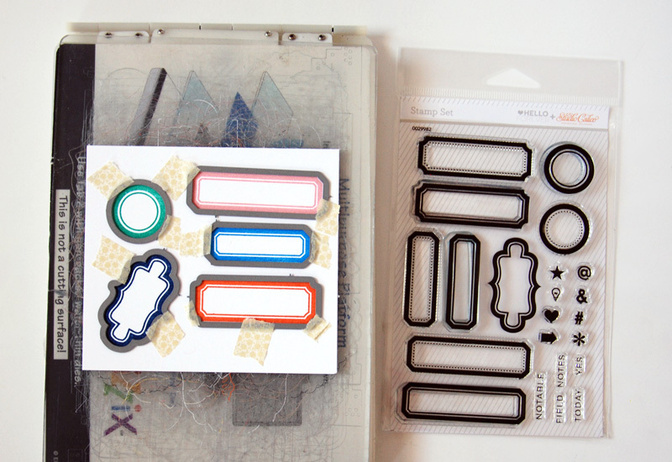
The labels are the perfect size for Project Life. I used a few of them on my cards and photos and added a bit more stamping and journaling.
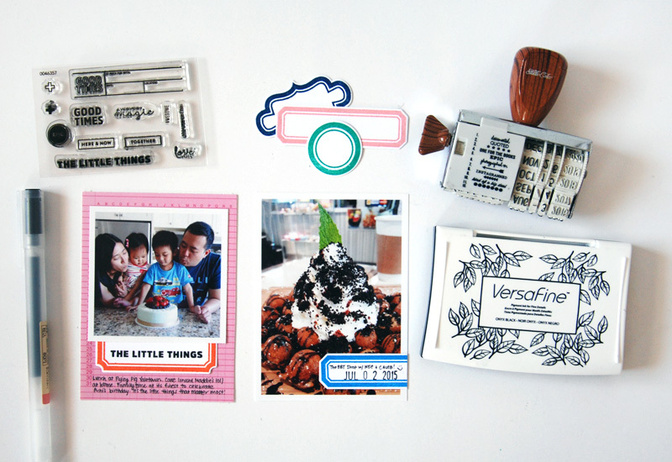
On another journal card, I wrote my journaling and stamped a sentiment using my stamp set from the Pop Art Project Life kit. The puffy plus sign adds a little dimension and highlights the various pops of green on other parts of my spread. 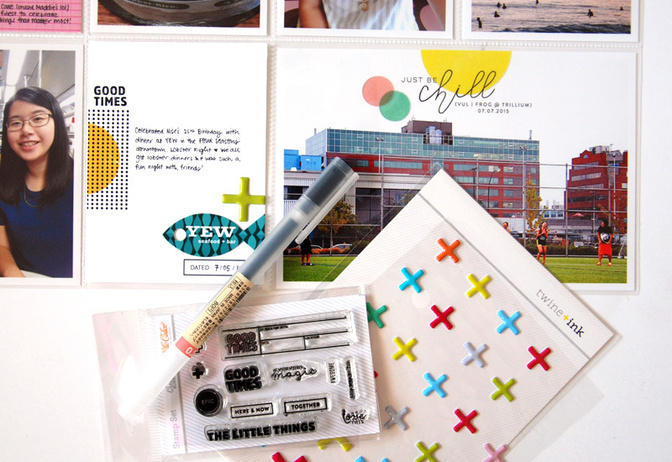
And here’s my finished spread! As you can see, I kept it fairly simple with a focus on my photos and words. I also used the labels and a basic circle shape throughout my spread to help unify everything. Hope this shows you that simple doesn’t have to be boring and you can still play with color and have fun! Thanks for joining me today! 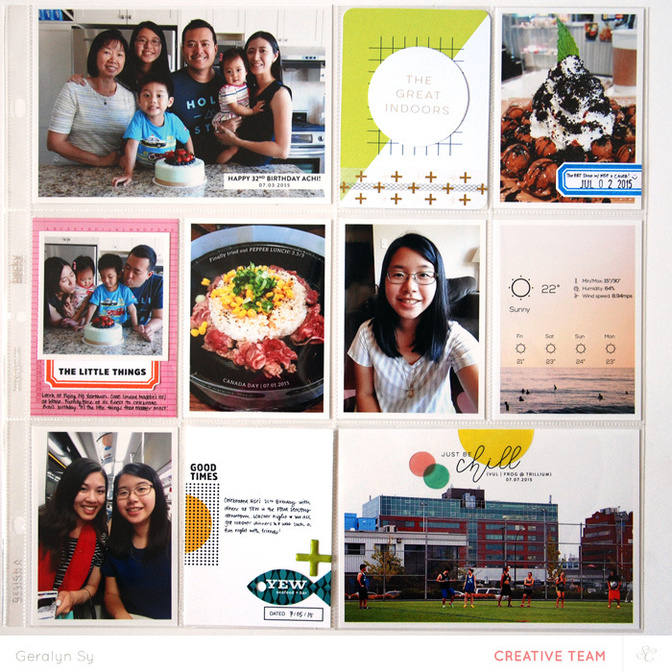
Pop Art Project Life kit – stamp set, journaling cardsPop Art Scrapbook KitHaringHockneyWRMK Fuse;Labels by Hello ForeverLabels diesColor TheoryVersafine


Comments
Sign in or sign up to comment.
13 comments
I love your work! You really do make it look easy. I also choose my photos first, and I stamp before cutting :-) Thank you for sharing this look at your process.
Replies to Kristi_
Sign in or sign up to reply.
I too print my photos at home using my Selphy, but every time I try stamping on them with either Color Theory or Staz On ink, it smears. Any advice?? Love the clean look to your spreads.
Replies to Brinkleyboy
Sign in or sign up to reply.
@brinkleyboy, I think @qingmei used digital stamps on these photos. For stamping on photos I've found that Color Theory ink doesn't work so well although it looks great on white cardstock. I used Staz On on my photos and it needs a moment to dry before you can slip it into the pocket or touch it and then it won't smear.
Replies to lindalovescreating
Sign in or sign up to reply.
@brinkleyboy Unfortunately, I heard that Selphy paper is too slick for even Staz-on. You should try asking on the forums what ink people use when stamping on photos since I know a lot of people use the Selphy!
Replies to qingmei
Sign in or sign up to reply.
@qingmei, that's what I was thinking too with the Staz-On. I will inquire on the boards, great idea! Thanks.
Replies to Brinkleyboy
Sign in or sign up to reply.
This spread is so clean and colorful! So much there and it doesn't look cluttered. Love your work!!!
Replies to pinksoup
Sign in or sign up to reply.
Great to see the process! What are your favorite fonts to use on your photos? I especially like the one where you wrote happy birthday.
Replies to MaryMichelle
Sign in or sign up to reply.
Thanks for sharing! Love your process!
Replies to TaraElias
Sign in or sign up to reply.
Love your work!, so beautiful so complete
Replies to aralara
Sign in or sign up to reply.
Lovely work! I'm considering getting a fuse tool, I love the way you've altered your page protectors here! Thank you for sharing your process :)
Replies to lk_berlin
Sign in or sign up to reply.
Love your work! I also print at home on a Selphy mostly, and was wondering what software you are using to print your 3x4 prints?
Replies to vshadlyn
Sign in or sign up to reply.
always love your PL spread!
Replies to geekgalz
Sign in or sign up to reply.
Love seeing your process Geralyn! You truly are the Queen of PL pages! You make it look so "doable"!!
Replies to Msaula
Sign in or sign up to reply.