Tutorial: How to turn dies into a background stamp with Carson Riutta
Tags:Hello friends! Carson here, and I’m excited to share a fun technique with you that will stretch your supplies, save you time during the holidays, and help you personalize those Christmas cards. Today I’m going to show you how to turn your dies into a unique background stamp which you can stamp again and again to create any number of Christmas cards. This technique takes a little time on the front end, but saves you time when you are mass producing your holiday cards.
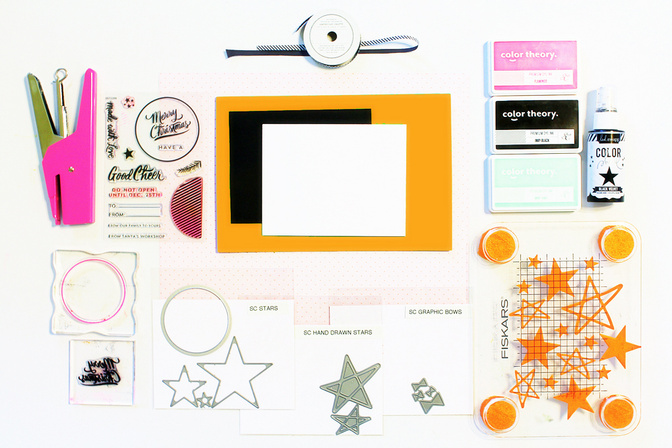
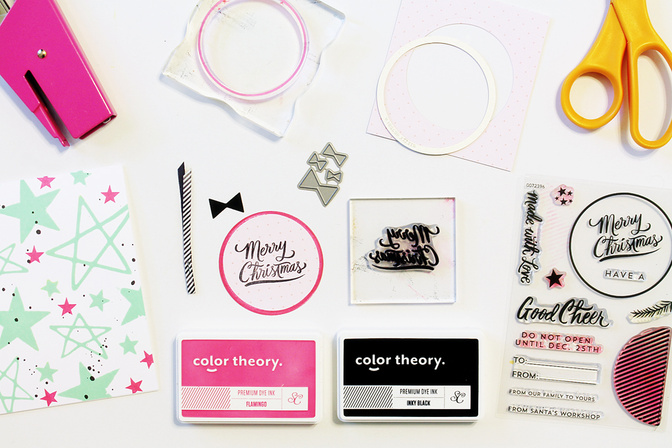
Pictured here are all the supplies you will need to recreate this card, however if you are simply creating your background stamp, you will need:
·Assorted dies (I used the Studio Calico Stars and Hand Drawn Stars)
·A die cut machine
·Adhesive backed fun foam (very inexpensive at the big box craft stores)
·And a large stamping block (you can also use a flat plastic piece for this if you don’t have a large block, perhaps a lid of some sort)
To create your stamp, you will need to:
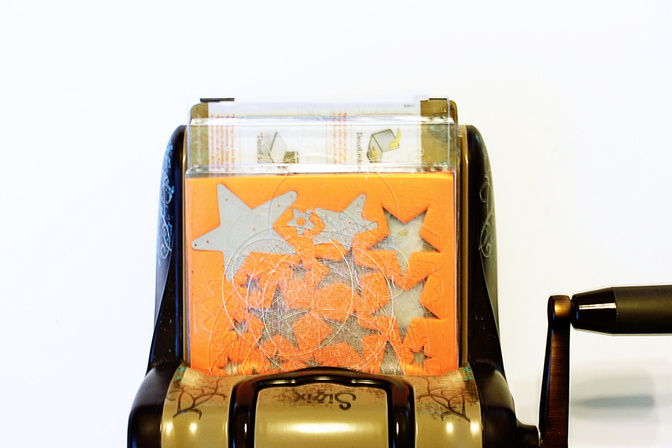
1. Repeatedly die-cut your chosen shapes from your foam, the color of the foam does not matter here, although a lighter color foam will make it easier to see how well the stamp is inked.
2. Pull off the backing and adhere your die-cut shapes to your block until you are pleased with the pattern
3. Ink it up and stamp
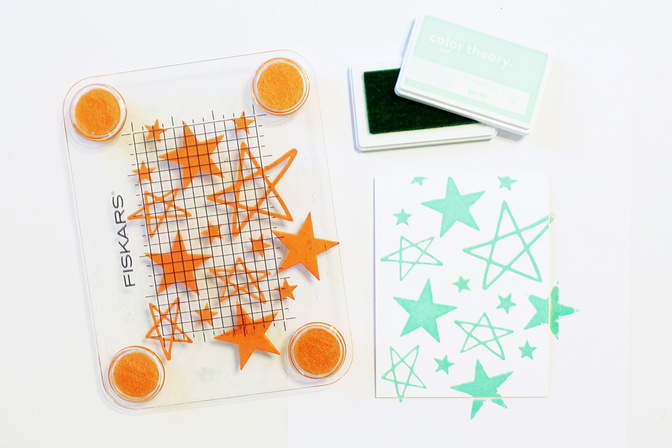
There you have it, you’ve created your own unique background stamp and you’re ready to stamp as many cards as you like, in as many colors as you like. I’m going to try this technique with a set of my snowflake dies as well!
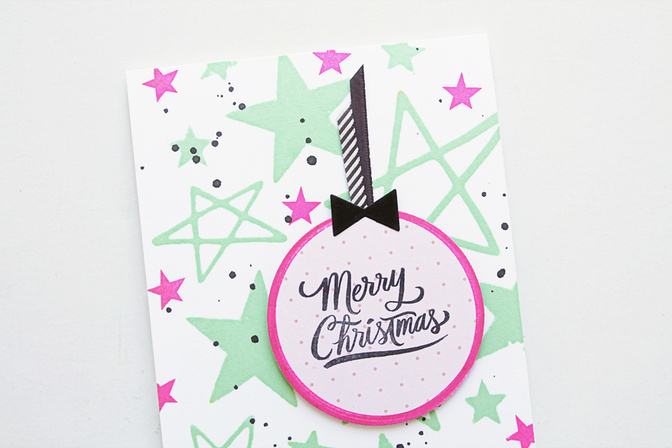
Once my image was stamped in Mint Hint I thought the background needed a little more color to make the card really pop. I used the small star stamp from the Ornament stamp set and stamped with Flamingo ink across the card.
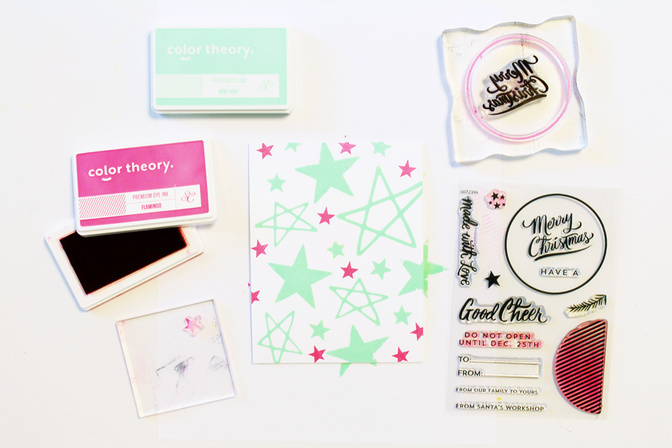
I them splattered a little black ink to add contrast and began building my ornament with a nesting circle die and the gorgeous ornament stamp set. The paper I used to create the ornament is a lovely pink pattern from the Brimfield Main Kit.
Once my ornament was cut and stamped, I added a die-cut Graphic Bow in black and stapled and length of black and white ribbon behind the ornament which I popped up on the card with more fun foam.
I hope you’ll try this technique with your own holiday cards. Happy Holiday Crafting!


Comments
Sign in or sign up to comment.
19 comments
Hello, genius!!!
Replies to ginny
Sign in or sign up to reply.
Beautiful!! If I had more dies, I would do this... I still might try it though with the few I do have! Thanks for the tutorial, Carson! :)
Replies to photochic17
Sign in or sign up to reply.
I just saw this technique on another designer's blog and thought this was so smart and was going to give it a try! I never thought I would ever purchase that foam but I guess I am now! Love your card, beautiful!
Replies to Brinkleyboy
Sign in or sign up to reply.
@brinkleyboy Yes, when Jennifer posted it last week I had a small panic attack :) But I'm pretty sure I learned the technique from her in the first place (I think I've learned almost everything from her!) I thought the background stamp was a good spin on the DIY foam stamps and a great application for the holidays. I have gone through my stack of foam so fast, I don't think you'll regret the purchase!
Replies to Carson
Sign in or sign up to reply.
@ginny @photochic17 Thanks so much for the lovely comments. It's a fun technique, I hope you try itand tag me so I can see!
Replies to Carson
Sign in or sign up to reply.
@Carson, so this may be dumb but where in the craft section do you find such foam? I love your help in nudging me to do this and love your color combination you used with your card! I think I might have all the dies you used too:)
Replies to Brinkleyboy
Sign in or sign up to reply.
@brinkleyboy I think you can get it in the kid craft section with all the Crayola stuff. I recommend the adhesive backed kind, so handy for so many things. I'm so glad you're going to give it a try!
Replies to Carson
Sign in or sign up to reply.
Love that idea. I need to do that with some of my dies. Thanks for the tutorial Carson!
Melissa
Replies to buggin2stamp
Sign in or sign up to reply.
great card and fun technique....good way to get extra mileage out of the dies.
Replies to tpgirl
Sign in or sign up to reply.
Wow, that is SUCH a clever idea! Glad you shared that technique, that's such a great way even to make little stamps for my kiddos to use!! Your card is beautiful, and I love the color scheme. I work at a camp, and I'm pretty sure I have a ridiculous stock-pile of fun foam sheets from past VBS crafts, lol. Now I can put them to use! (Just need to get a die cut machine....) But we do camps for special needs folks, and this would be a great idea for creating foam stamps out of simple designs they could make themselves, awesome!
Replies to cmsplitt
Sign in or sign up to reply.
how inventive @Carson!!! Also love how you used the bow tie die also for the ornament bulb.
Replies to shirlc
Sign in or sign up to reply.
Such a great idea!!
Replies to art944
Sign in or sign up to reply.
You're amazing! And I love the Flamingo, Mint Hint and black combo for a non-traditional Christmas colour scheme. Might need to borrow that idea for a start ;-)
xx
Replies to natalieelph
Sign in or sign up to reply.
LOVE this idea!!! Gotta try it!
Replies to sideoats
Sign in or sign up to reply.
You are so awesome!
Replies to clippergirl
Sign in or sign up to reply.
I have so many dies....thanks for the clever idea on how to get even more use out of them!
Replies to Msaula
Sign in or sign up to reply.
Ummm...genius. LOVE this, Carson!
Replies to maggie_massey
Sign in or sign up to reply.
I love this!
Replies to JulieCampbell
Sign in or sign up to reply.
awesome idea! I need to try this ASAP :)
Replies to jennshurkus
Sign in or sign up to reply.