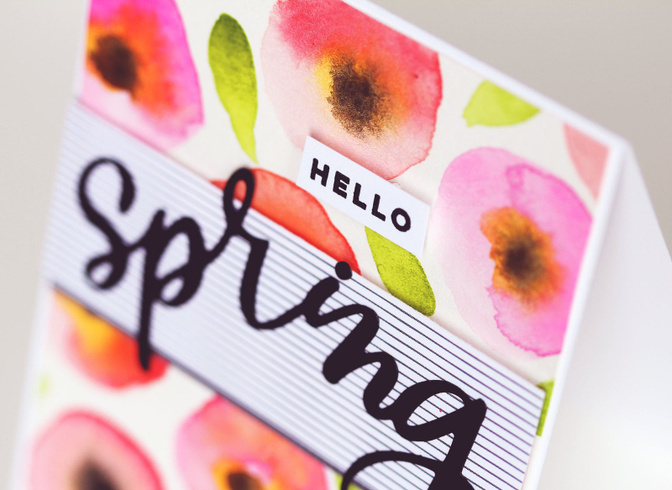
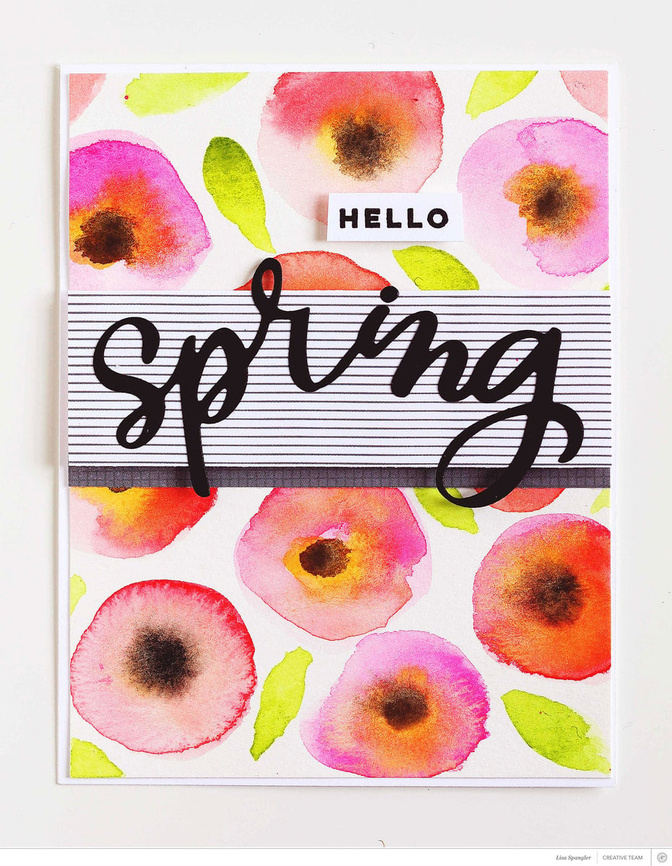
Tutorial: Watercolor Spring Card by Lisa Spangler
Hi hi! Are you all ready for SPRING? It already feels like spring here in Texas -- don't shoot me, but we were up to 86 on Monday! Whoa! Anyhow, I had spring on my mind when I made this card for the Savannah gallery.
I had a bunch of requests for a tutorial on how I made the background -- so here you go! It's pretty easy once ya know the secrets, and it's so relaxing too. I could just do this all day! In fact, if ever I'm in a creative slump then this technique really helps to get me going again.

Start off by painting a rough circle on watercolor paper with a big ole round tipped brush -- the biggest brush you have. I used a size 14 and a dark pink color. Your circle doesn't have to be perfect. In fact, it looks better when it's not! If you don't have a big brush, you can make smaller circles and do the same technique, no worries.
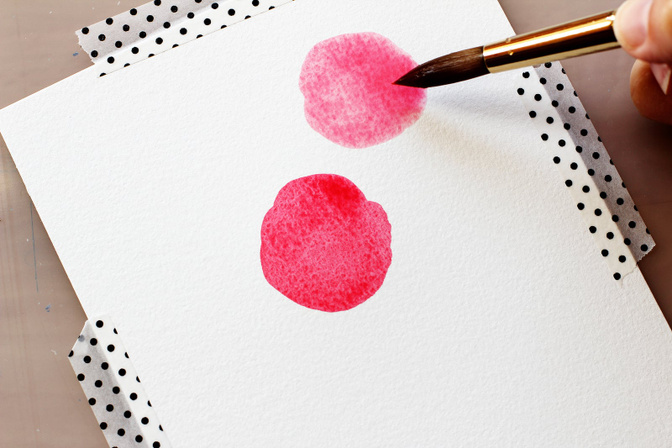
Dip your brush in water -- but don't clean it. This will lighten your color so you can keep going and make more circles in lighter tones. If it's too light, pick up some color and dab it in on one side. You won't believe how many color variations you can get this way. Plus it's a great way to get more from your supplies.
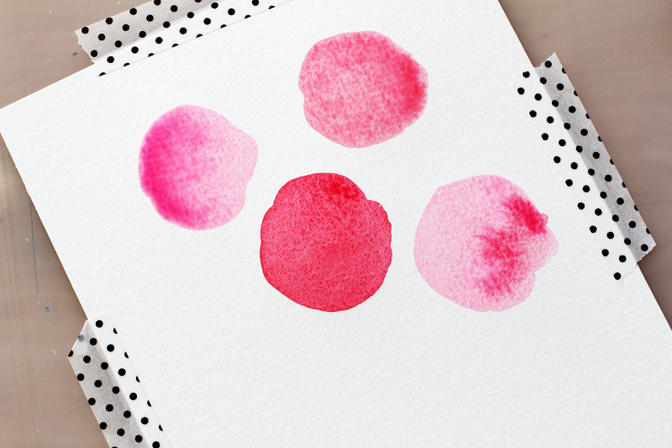
Next I cleaned my brush and switched to a lighter pink and painted the circle in the upper left. Then I did the same technique where I dipped the brush in water to make the circle in the lower right. Keep going until you've got as many circles as you like.
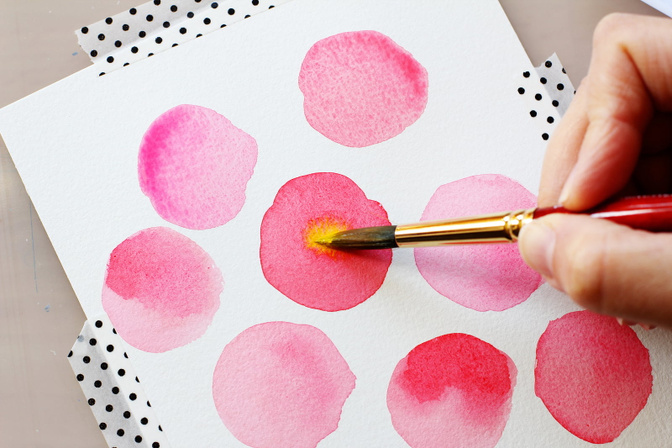
Now for the flower centers! I switched my brush to a size 10 and loaded it up with yellow. Touch the brush to the circle and then lift up and watch the magic happen!
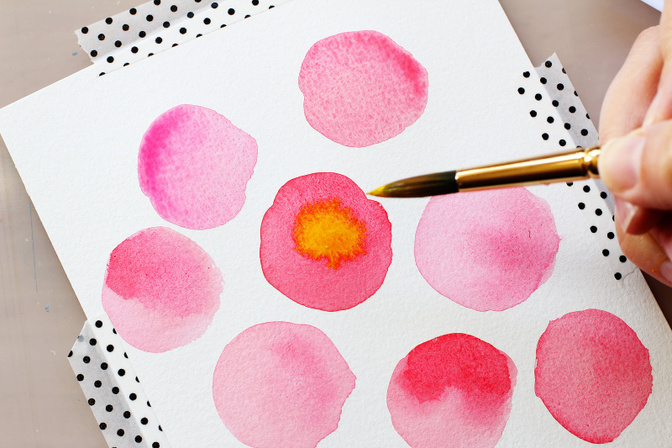
I had enough paint on my brush to do all the flower centers, but if you don't you can always reload with more yellow.
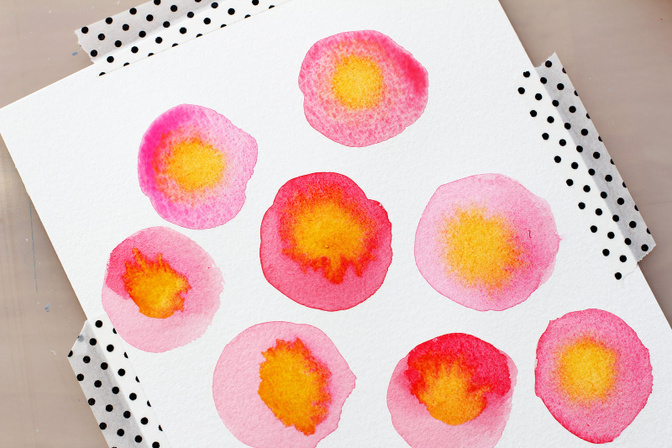
Go ahead and fill in all the centers. Notice the difference in how the paint moves in the flowers that have dried a little more or are lighter in color. Love love love how they're all different!
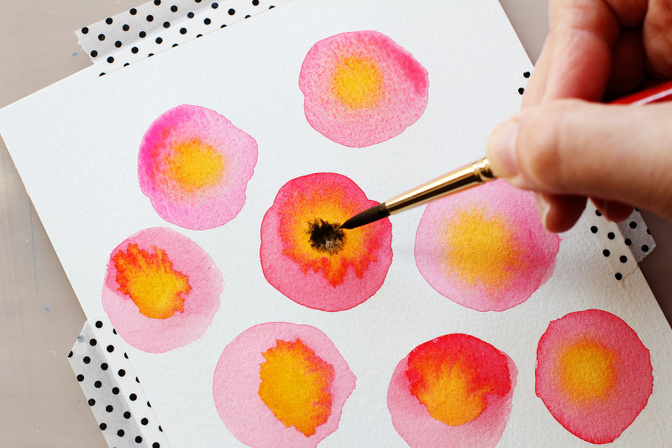
Next I switched to a smaller size 6 brush and did the same thing, only with black paint this time.
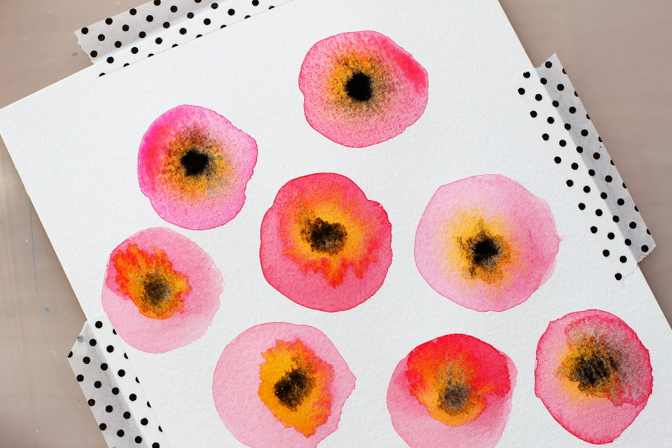
After they've dried a little, you can go back and add a tiny bit more black to the center for more definition. I only had to do this on a few of the flowers.
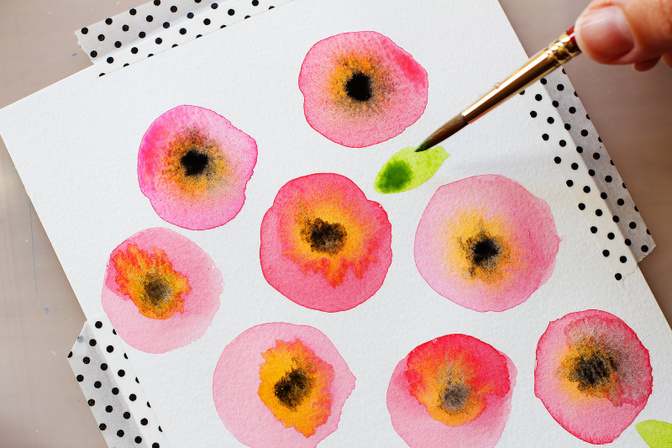
To finish up, paint some simple leaf shapes here and there. I like to dab a little bit of darker green to one end of the leaf to add that extra little something.
So there you have it -- hope you give this technique a try!
Oh and! If any of you have any SNOW you don't want then send it my way! I grew up in Ohio and I really miss snow. Yeah, my family all thinks I'm nuts haha!
Hugs,
Supplies: Craft Die: Spring by Jasmine Jones; Koi Watercolor Paint Set; Stamp Set: 4x6 Card Builder by Life.Love.Paper; Savannah 6x6 paper pad
Comments
Sign in or sign up to comment.
10 comments
So gorgeous!! Thank you so much for the step-by-step!
Replies to CristinaC
Sign in or sign up to reply.
I miss snow too. I grew up in New England. Not hoping for an early spring.
Replies to CeliseMcL
Sign in or sign up to reply.
Thanks so much for your tutorial! Can't wait to try to make my own flower garden here... I spent three hours yesterday shoveling our ten inches of wet, heavy snow! I'm sure you don't miss that!! Just when I'd get the driveway clean the plow would go by again! Today I am going to stay in and craft
Replies to Brinkleyboy
Sign in or sign up to reply.
I was hoping you would show us how you made this card. It is beautiful! You make the best cards.
Replies to kathyv
Sign in or sign up to reply.
gorgeous!!
Replies to jennshurkus
Sign in or sign up to reply.
YAY & thank you!! i'm so glad you made us this tutorial- i super LOVE your gorgeous Spring card and was wondering what the amazing flower background was! LOVE LOVE!!
Replies to gabber
Sign in or sign up to reply.
Thank you so much for this tutorial! The card is stunning and the technique is gorgeous!
Replies to Carson
Sign in or sign up to reply.
Beautiful! Love the process steps!
Replies to stacieD
Sign in or sign up to reply.
Thanks for the tutorial :)
Replies to veronccl
Sign in or sign up to reply.
Thanks so much you all! So glad you liked the tutorial xoxoxo!
Replies to sideoats
Sign in or sign up to reply.