Tutorial: Mother's Day Card with Lisa Spangler
Hey, hey! Did you know that Mother's Day is Sunday, May 8? Don't worry though, we've got you covered with this gorgeous stamp by Jasmine Jones.
Today, I'm sharing a step-by-step tutorial while I make cards for Jason's mom + my step-mom, both at the same time. I'll be sharing how I make a watercolor background plus tips on card insides. I get asked these questions all the time, so hopefully this will help ya! :)
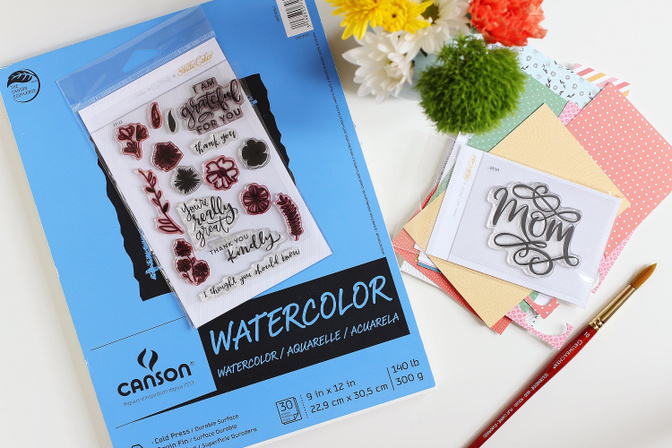
To start off, I gathered all my supplies + some flowers for inspiration. This always helps get my creative juices going and helps me pick out my color combos. Choosing colors is often the hardest part of making a card for me! I love the monthly kits for just that reason.
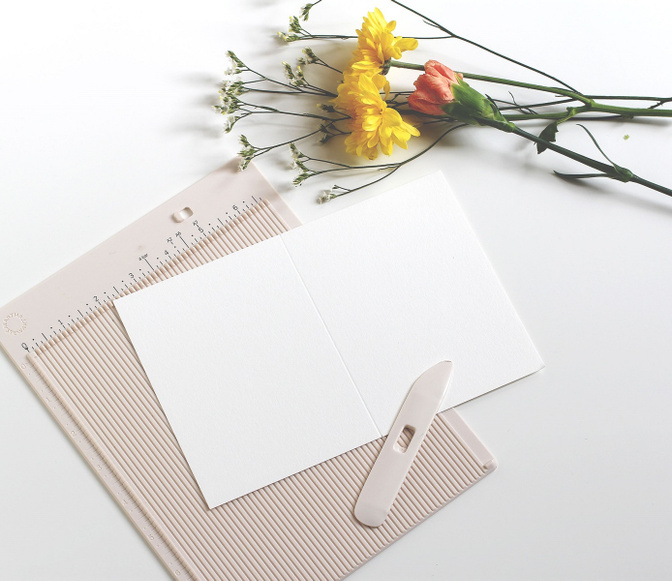
Start off by cutting and scoring two base cards out of watercolor paper, but do NOT fold them yet. It's so much easier to stamp on paper when it hasn't been folded.
I was able to get two cards out of this paper plus I had some scraps. I always save my scraps to test swatches of watercolor.
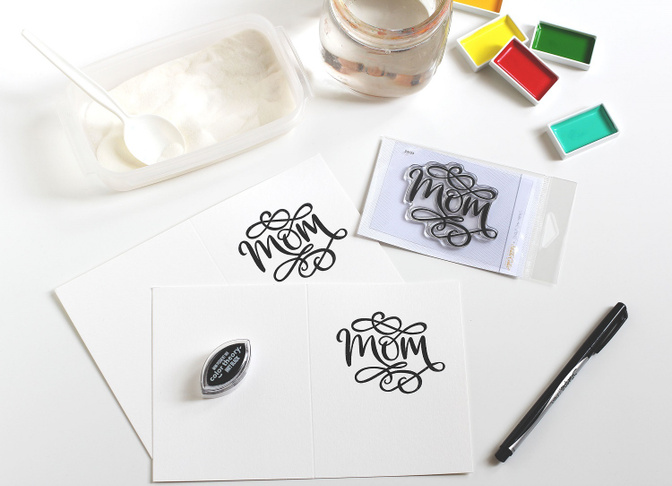
Next, stamp "MOM" in black on the front. Here are all my top secret tips for stamping on watercolor paper, LOL! :)
- I like using pigment ink on rough papers like watercolor paper because it gets into all those little nooks and crannies, plus it doesn't feather across the little hills the way that dye ink does. Here I used Color Theory Inky Black pigment ink.
- Then, I emboss it with clear. Clear powder rocks for this because you don't have to worry about stray bits of black here and there on your project! As a bonus, clear powder works with any color pigment ink, so it's great to have some in your toolbox.
- I always use an anti-static tool so I don't have to take time to clean off stray bits of powder. If ya don't have one, you can just rub your paper with a dryer sheet.
- Sometimes when you stamp on rough paper, you'll have a few places where the ink doesn't transfer. Never fear -- just grab a sharpie pen and fill in the holes and no one will ever know.
- One last tip! When I'm working with larger stamps like this one, or I'm making several cards at once, I love having my MISTI. It's not needed, by any means! But it does make stamping easier, not to mention less stressful because you know your placement for sure. If the ink doesn't transfer you can just stamp it in place again.
Now the fun begins! Pre-wet the area around the stamped image with clean water and let it dry a little. You want the paper to have a nice wet sheen, but no puddles. If you get some puddles, you can blot them up with a paper towel.
As a bonus, the watercolors won't go beyond the water, so you don't have to worry about messing up. If you get water where you don't want it, just wait for it to completely dry and start over.
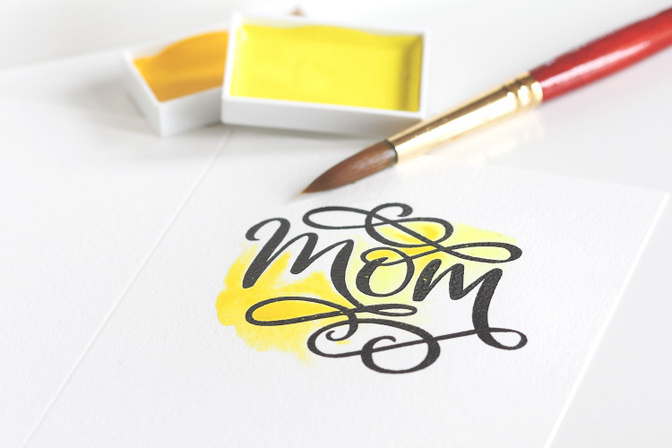
Add some yellow paint here and there. I used two shades of yellow for even more interest.

While the paint is still wet, dot in some pink paint and let them mix and mingle! I love watching watercolors do their thing -- magic!
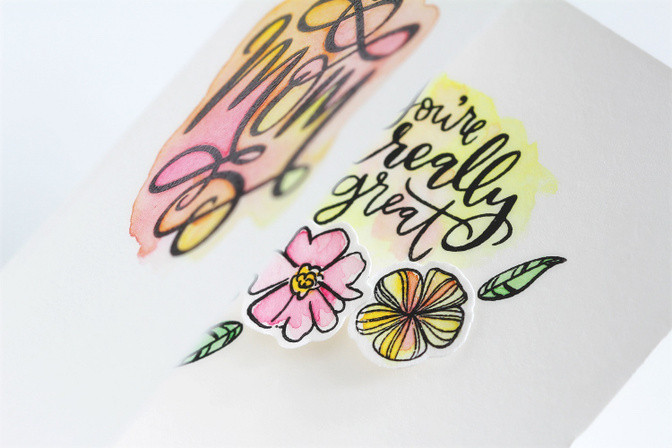
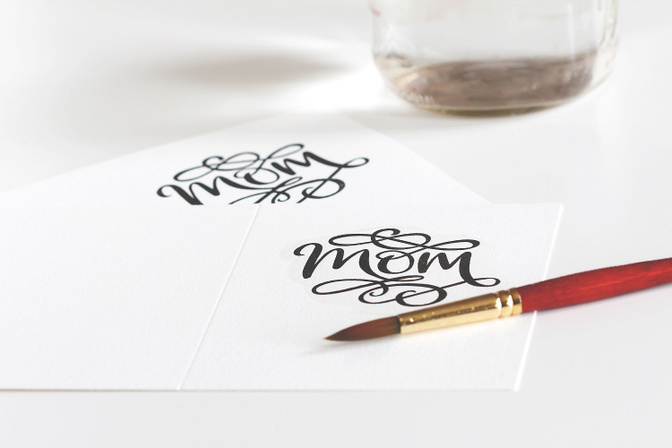
Once the front has dried, it's time to do the inside!
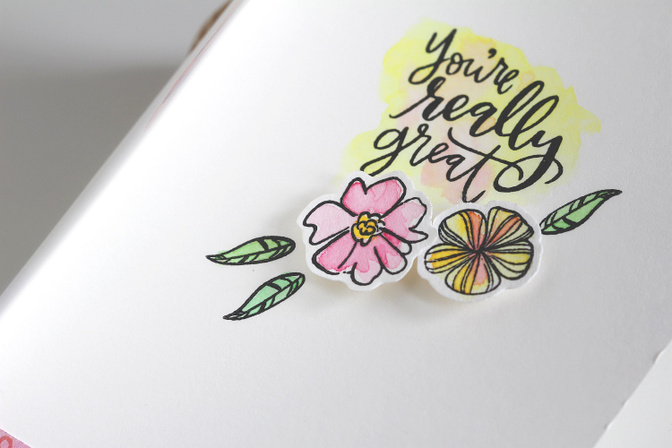
Stamp the sentiment with Inky Black pigment ink and emboss it in clear, then watercolor just like the front. While that's drying, go ahead and stamp some flowers on scraps of watercolor paper with Inky Black and emboss them too, then color and cut out when dry.
Position the flowers on the card, and then stamp and clear emboss the leaves. By stamping them directly on the card, you don't have to cut them out! :)
Once everything is dry, you can adhere the flowers with foam dots.
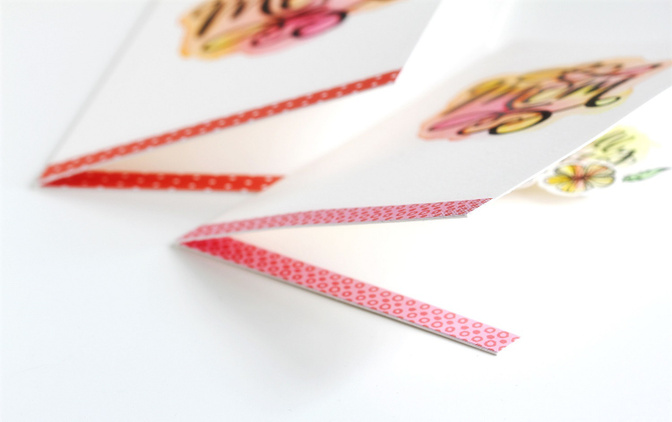
For a finishing touch, add some strips of paper to the bottom of the cards on the front and the inside. This ties everything together.
And that was that. Hope you enjoyed the tutorial and give these techniques a try! Happy Mother's Day to all the moms out there! xoxoxo
Comments
Sign in or sign up to comment.
4 comments
gorgeous!
Replies to AngelaTombari
Sign in or sign up to reply.
Thanks so much @AngelaTombari! :)
Replies to sideoats
Sign in or sign up to reply.
Love this technique and card!!! Can't wait to try, thanks for all the great tips too
Replies to tburley
Sign in or sign up to reply.
these are beautiful! i can't wait to try this-thanks for another awesome tutorial!
Replies to gabber
Sign in or sign up to reply.