Tutorial: Using the Jolly Holiday Scrapbook Kit with Geralyn Sy
Hi everyone! I’m back again this month with a look into my layout process using the Jolly Holiday kits. I found inspiration for my page from Lisa Truesdell’s beautiful Forecast layout, and her vellum cloud was definitely the element that sparked this layout idea. I love browsing the SC galleries and being inspired by my fellow CT members and this community! Here’s my layout, from start to finish:
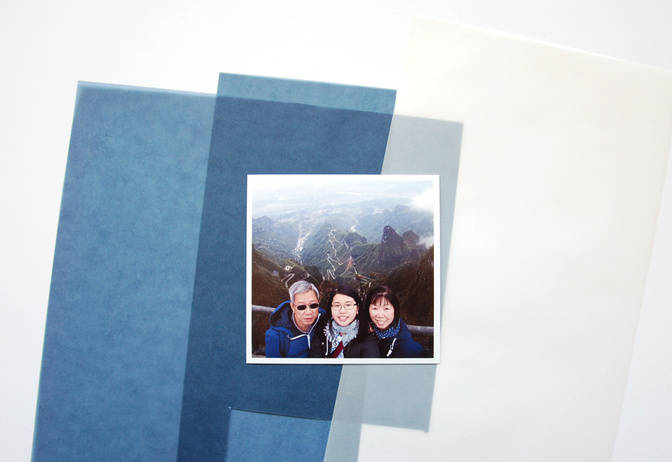
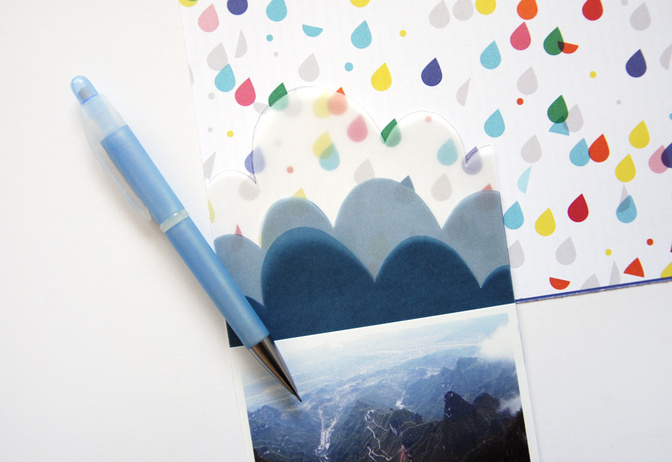
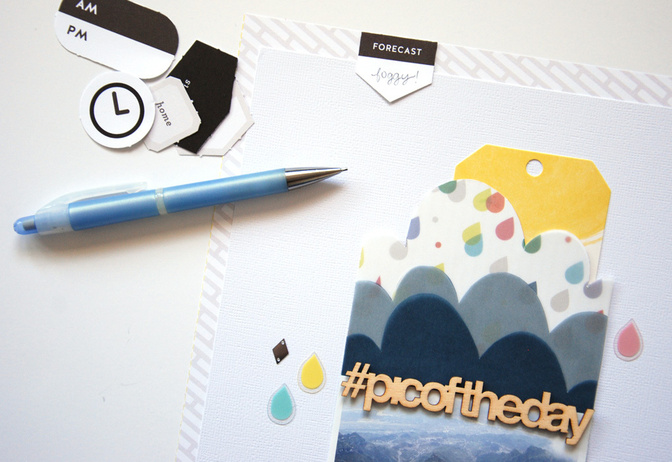
I began with a few sheets of colored vellum (navy blue) and regular vellum from my stash, as well as a photo I printed out at 4" x 4”.
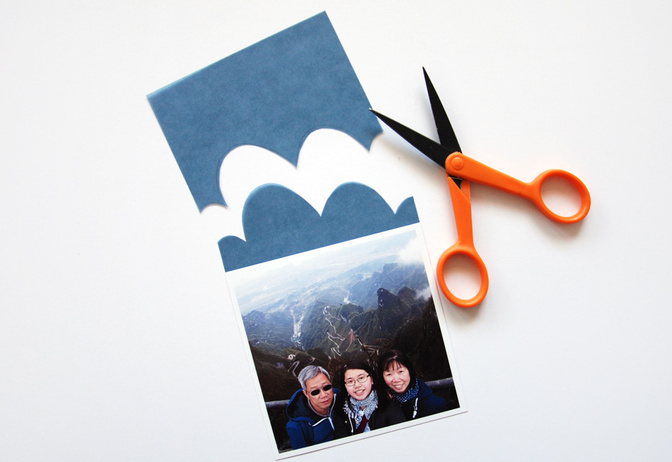
I lightly drew a cloud shape on my navy blue vellum with a pencil and then hand-cut it. This became my first layer of clouds, which I glued behind my photo.
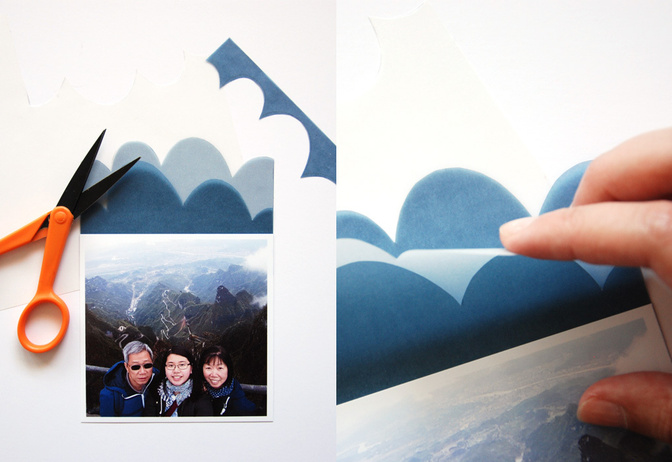
For my second layer of clouds, I hand-cut cloud shapes again and overlaid two pieces of vellum together - a piece of regular vellum and a piece of navy blue vellum. I made sure that this second layer was taller than my first layer so that the second would peek out from behind the first.
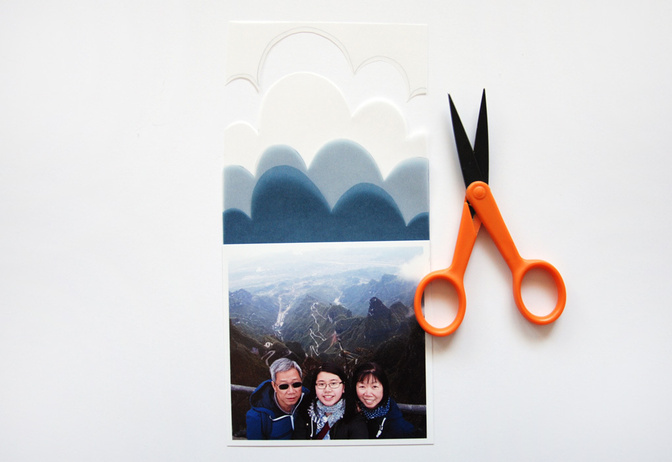
For my third and final layer of clouds, I once again drew a cloud shape on regular vellum and cut it out, making sure that this (tallest) layer would appear behind the first two. The regular vellum seemed too plain though, so I decided to back it with one of the patterned papers from the Jolly Holiday scrapbook kit. Using the vellum cloud shape I had already cut out as a guide, I traced the design on the patterned paper and cut it out.
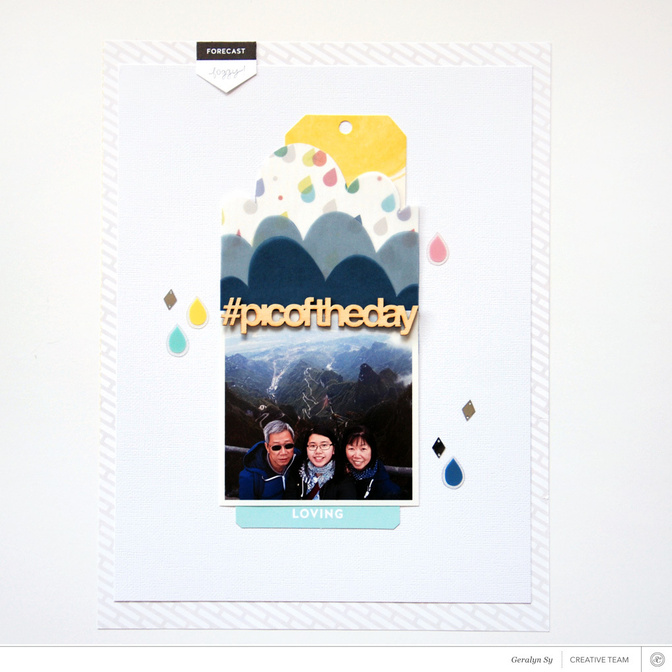
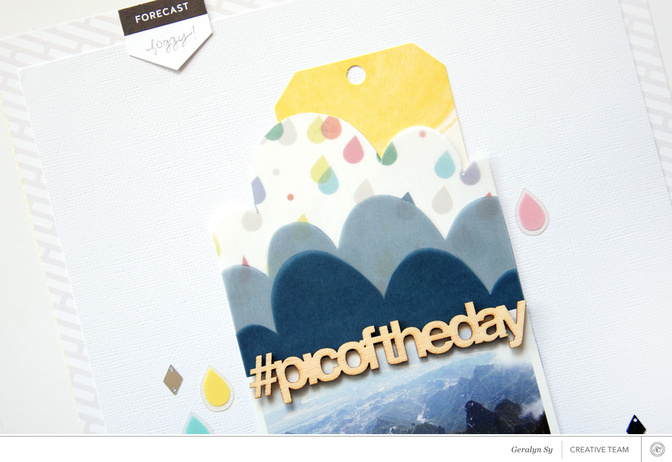
Now that the focal point of my layout was complete, it was time to assemble my layout. I decided to adhere my clouds/photo piece onto a sheet of white cardstock. I added a few die-cuts to my page as well as a wood veneer phrase for my title. Note that I only added adhesive to my photo and the left/right/bottom edges of the clouds. By leaving the top part of the clouds bare, I could pull out the yellow tag and use it to jot down some hidden journaling.
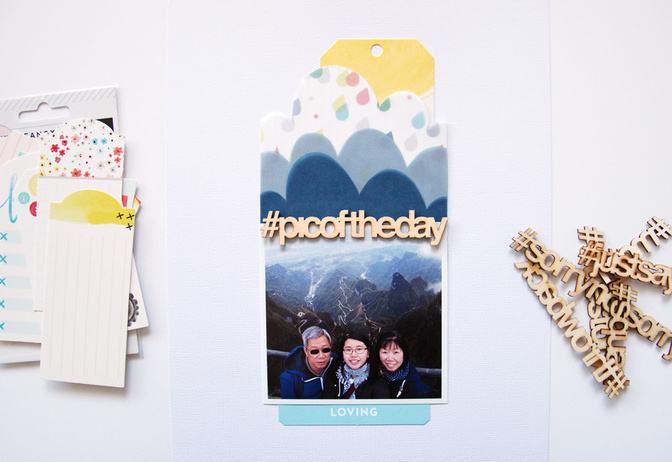
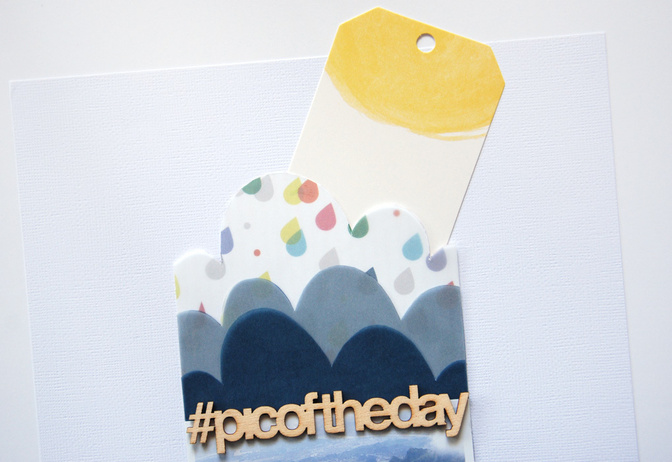
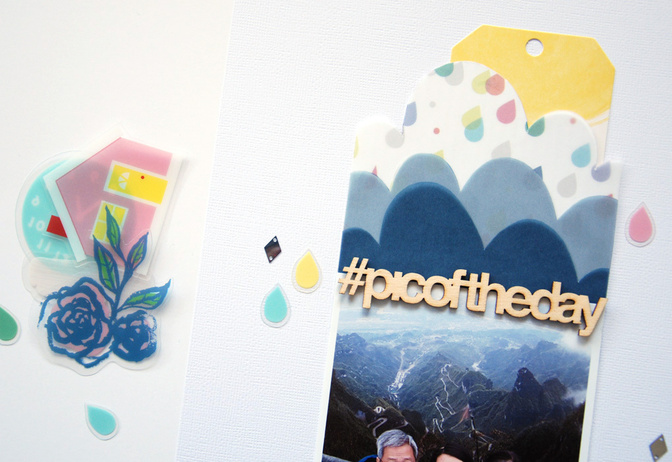
Next, I added some sequins and die-cut transparencies from the scrapbook kit. I adore the colorful raindrops, and they were so appropriate for the rainy morning we had the day this picture was taken!
Finally, I backed my white cardstock with a sheet of gray patterned paper and added a die-cut tag to the top left side to complete my page. The white cardstock originally seemed too stark, so the addition of the gray patterned paper behind it added a subtle but interesting visual look.
Here’s my completed layout! Thanks for checking this out, and I encourage you to browse through the CT and member galleries to find inspiration for your next project!
Comments
Sign in or sign up to comment.
5 comments
This is gorgeous, Geralyn!
Replies to CristinaC
Sign in or sign up to reply.
Love your tutorials, very inspiring! Thanks!
Replies to terriblygreat
Sign in or sign up to reply.
Super cute layout, Geralyn!
Replies to kathleen
Sign in or sign up to reply.
This is simply so cute! Love it!
Replies to jendcnguyen
Sign in or sign up to reply.
love it Geralyn!!
Replies to gabber
Sign in or sign up to reply.