Catching up with Project Life® | Barbara Picinich
Tags: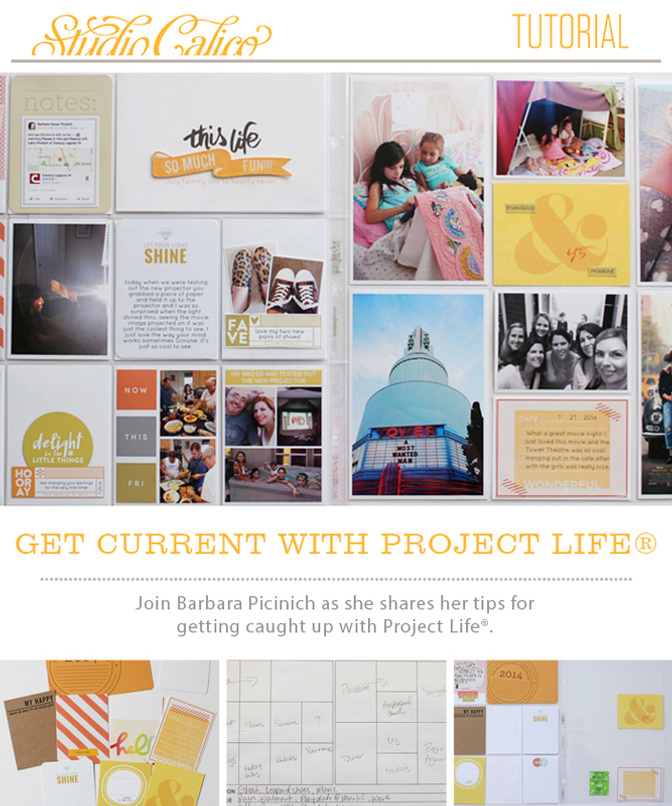
The first thing I do when I get behind is get my photos in order. That means make sure that I have everything from my phone on my computer and removed from the memory card on my DSLR camera. I organize all my photos on my computer by month and place all the photos I’ve taken from my DSLR in that folder and then make a separate folder for my phone photos. Since I take mostly phone photos these days it makes sense to me to keep them this way. I use the Dropbox app to transfer my phone photos to my computer and I love it because the file name is the date and time the photo was taken. This makes it so much easier for me to keep track of what I have and what happened on each day because it’s all there for me. When and if I get behind it’s a major stress reliever not having to figure out what happened on what day. Once all the photos are organized I go through them and write down what happened each day on my planning sheets.
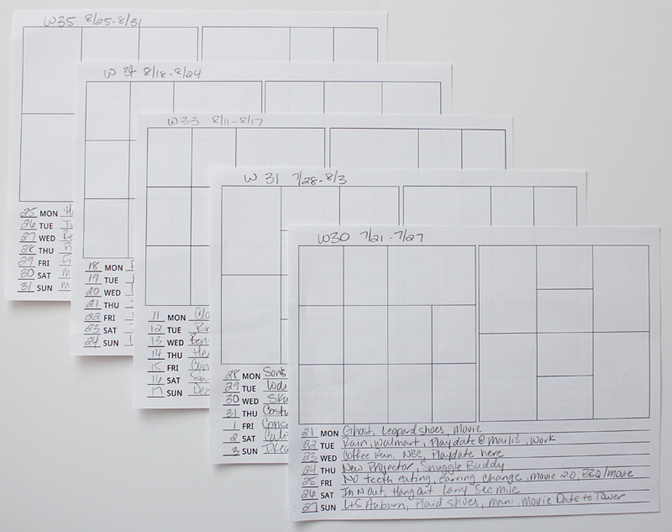
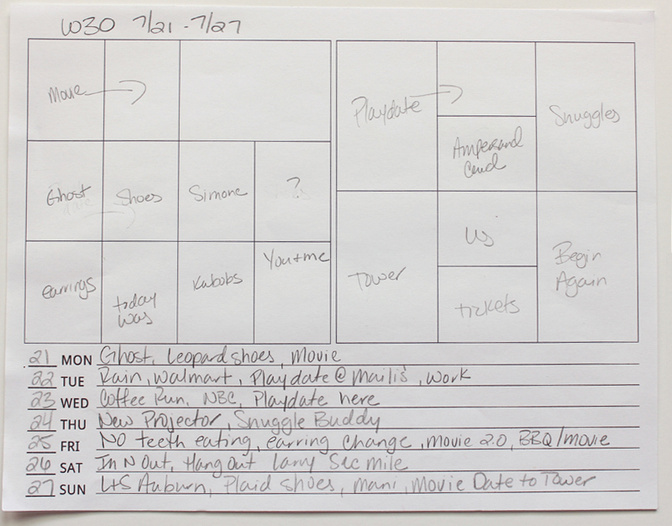
I use Marcy’s planning sheets that she provided on her blog as a free download a few years ago; these sheets have proved invaluable to my planning process. I modified the sheets to my needs and have the two protectors I use each week on one sheet and made a space below for my notes. I like to have the dates listed just so I know where I’m at date wise. My notes are really rough but it helps me remember at a glance I what I have photos for.
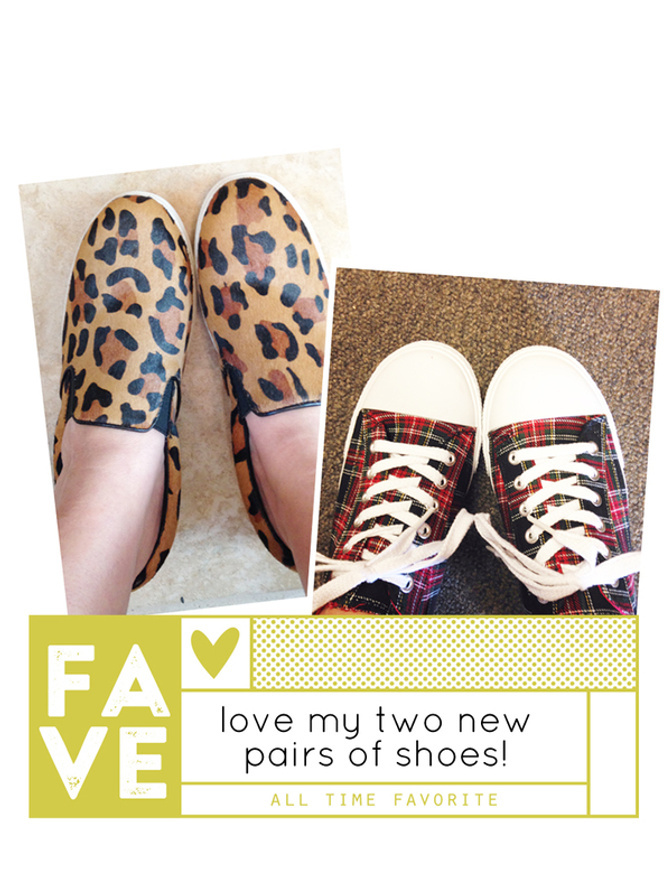
One thing that I do as I go about my weeks is snap photos of things purely for a reminder. I’m not much of a note taker but I’m very used to snapping photos so I use my camera roll as my virtual diary and since my photos are time and date stamped it really helps me keep track of what I’m doing. I don’t expect to use all the photos I take but having a visual reminder is key for me. For example these photos here :
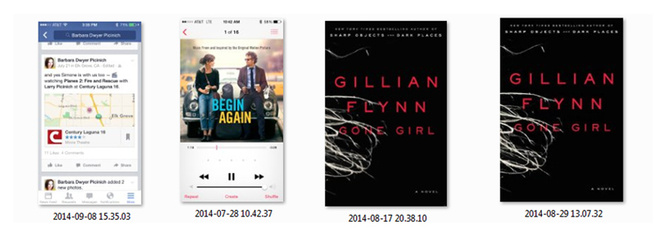
A screen grab of a Facebook status update I made, a song I’m listening too, a photo the day I started a book and the day I finished the book. I would probably not have remembered that I put a status update on Facebook about going to the movie, that I listened to that soundtrack over and over again and I know for a fact that I wouldn’t remember what day I started and finished that book so these little reminders are so helpful to have.
Once I have all my notes taken I go through each week’s photos and grab my favorites that I think I might want to use and place them in their own folder. It helps to start the weeding down process now but I don’t get too bogged down with it just yet. As of right now these are all my favorites and they will get paired down even more later on based on what else I decide to add to the spread.
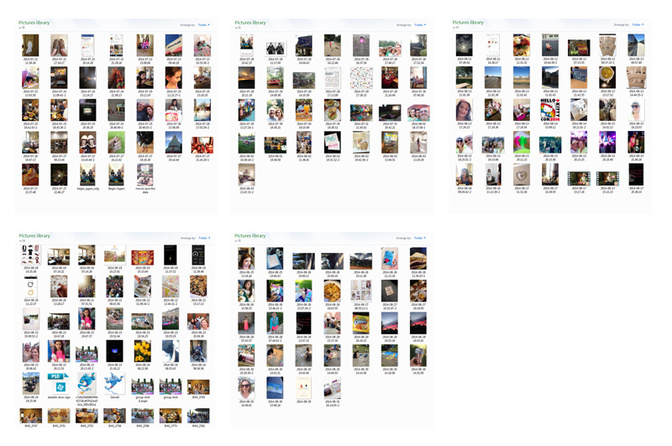
Because I’m so visual seeing the photos in one spot really helps me identify any color stories I might want to work with or any specific theme that might pop out. These days I’m not so worried about having a photo from each day on every spread. I’m totally okay with using a whole side of one spread on one event if I have really great photos that I want to use.
After I’ve reviewed all of the photos I start looking thru my supplies to see what pops out at me as a theme or a particular piece that inspires me. I find that if I limit my choices I can catch up that much more quickly so I decided to stick with my Poet Society Project Life® kits and addons to tackle some of these missing weeks. I loved all the oranges and neutrals I had not used yet so I pulled anything in that color family that looked good together. I figured I would just start at the oldest week and go with it. It’s always great if your photos have colors that match what you are working with but my photos for this week don’t. I’m pretty sure that I can still make the orange color story work for me though especially if I add in some printables to help tie everything together and maybe even some paint on the title card.
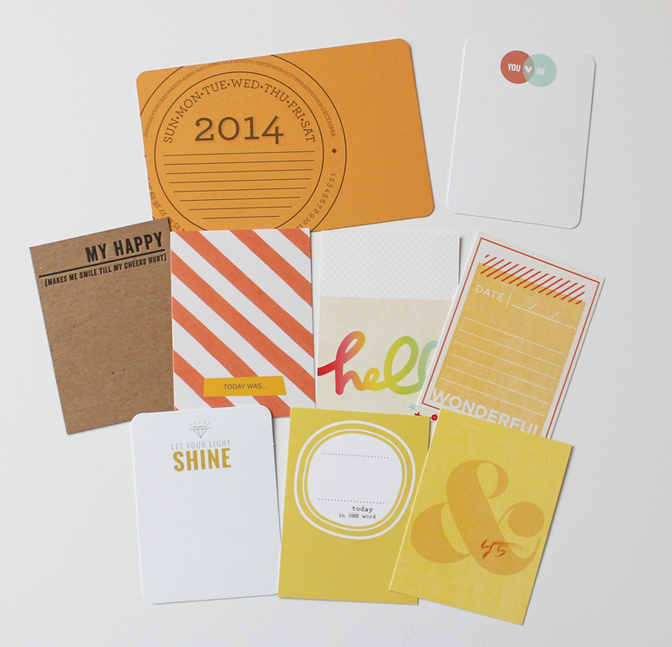
Once I have an idea of the cards I’m interested in using I fill in the rest of my planning sheet based on the photos I really want to use that work with the cards I’ve chosen.
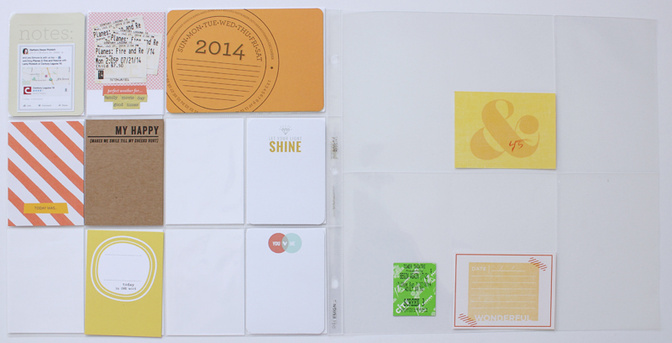
After I decide what’s going where I start laying out the cards right on the protector. It helps me visually to see where I’m at. I’m very much a plan as I go person when I actually sit down to work on the photos but having the cards laid out helps keep me on track and headed in a focused direction. As you can see I’ve already started a few of the slots so I’m heading in a good direction.
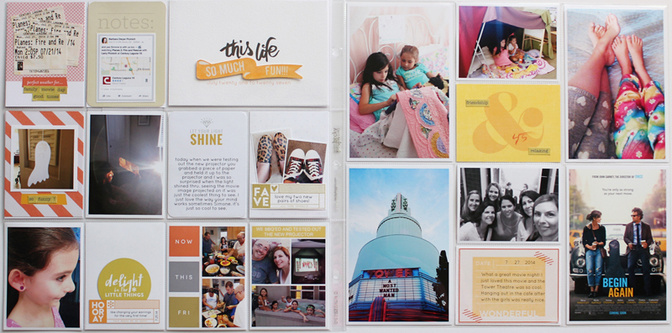
One of my favorite things to do with my spreads is have a full 3x4 photo and just leave it plain. I have the hardest time sometimes adding lots of stuff to my photos and for me I just love the way a simple photo looks on my spreads. I think it’s a really nice balance to have some slots kept really plain while others are embellished. If a photo or two pops out as something that I know will stay plain I typically work with them right away.
I find the easiest and quickest way to do the simple white border is to just crop my photos down to 2.75” wide by 3.75” tall and place them on a 3” x 4” canvas.
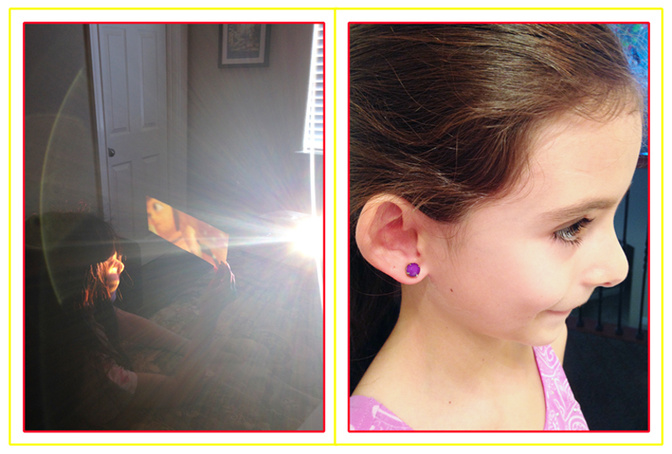
As you can see here the red lines show the cropping of the photos and the yellow lines are the 3” x 4” canvas that the photos sit on. When placed on to a 6” x 4” canvas it can be printed out easily and just cut right down the middle.
I repeated the same steps but horizontally for the two 4” x 3” photos I left plain on the right hand side of my spread and also for the four vertical 4” x 6” photos that I left plain on that side as well.
I also love to use the printables that pair with each months kits and I typically will plan out the placement and size of them before I print them out. Because the colors are designed to match the kit cards this is a great way to further enhance the color story you might be working with. I find if I plan out the size and lay everything out including my text before I print anything it saves a bit of time and definitely printer ink if I get the size right before I print it out.
The last slot I always work on is my title card slot. Here is where I get to tie up any loose ends and add one more splash of color to my spread to tie everything together. Looking back thru my albums I noticed that most of my title cards have a white background and some sort of pop of color. It’s clearly my go to formula for title cards and this week’s was no exception.
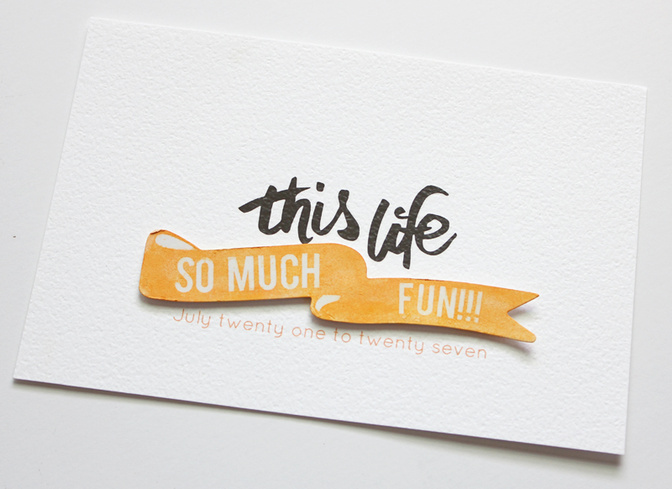
Here I just added in my dates printed right on a piece of white cardstock and then paired it with one of the super cute resist embellishments in the Oliver addon. I used my Mister Huey’s watercolors to paint it a nice orange color to tie it all in and with the added graphic pop from the rub on also from the Oliver addon the title card was done in minutes.
Because I used so many full size photos on this spread it came together really quickly. By using this formula I’m sure I will have no problem getting the other spreads completed really quickly as well and even with the lack of orange in my photos I think the spread looks great and cohesive and tells a really great story of our week. I didn’t end up using everything that I pulled or that I had initially laid out but luckily for me I have a few other spreads to get done so I’m happy that I have plenty of other weeks where they can get used.
I hope some of these ideas will help you tackle some of your unfinished weeks and maybe encourage you to decide on a color story even though your photos might not have any of that color in them. It’s a fun challenge for sure!
Supplies :Project Life® kitOliver addonYeats addonMister Huey’s Watercolor paintGlue Glider Pro Plus GunFoam Tab SquaresIn a Creative Bubble printablesHello Forever printables design Ddesign F


Comments
Sign in or sign up to comment.
14 comments
Love hearing about your process! Thanks for sharing.
Replies to toribissell
Sign in or sign up to reply.
It's great to see your process! Love how organized your photo library is! A great way to "catch up" fast. Lovely layout.
Replies to 1Djc
Sign in or sign up to reply.
I really love how you organize your photos and how you modified the planner pages. Great post!
Replies to supertoni
Sign in or sign up to reply.
Love those planning sheets!! So enjoyed the walk through of your process. I love seeing how everyone approaches their layouts/spreads. :) Thanks for sharing!!
Replies to bckueser
Sign in or sign up to reply.
Oh...and cool shoes! ;)
Replies to bckueser
Sign in or sign up to reply.
This is awesome!! I love those sheets. Do you think they are still on Mary's blog!! :D gonna go look..hehehe
Replies to GinaPonce
Sign in or sign up to reply.
@ginaponce they were the last time I checked, if you can't find them let me know I'll dig up a link for you.
Replies to Babz510
Sign in or sign up to reply.
Love hearing about your PL process
Replies to kymkt
Sign in or sign up to reply.
Thanks for taking us through your process. This was really helpful :-)
Replies to natalieelph
Sign in or sign up to reply.
wow, this was really helpful -- thanks for sharing your organizing process :)
Replies to shirlc
Sign in or sign up to reply.
Wonderful post, help me a lot. Tks and please sharing with us a model of sheets plans. Kisses
Replies to tapjanuario
Sign in or sign up to reply.
Thanks so much! Great tips to take screen shots!
Replies to cherie4bling
Sign in or sign up to reply.
Great post, so many useful tips! I love your style!!
Replies to madheartslife
Sign in or sign up to reply.
great process, the next time I get some me time and a babysitter I'm going to try this ;)
Replies to mugsie
Sign in or sign up to reply.