The Underground Tutorial Project Life | Nicole Reaves
Tags: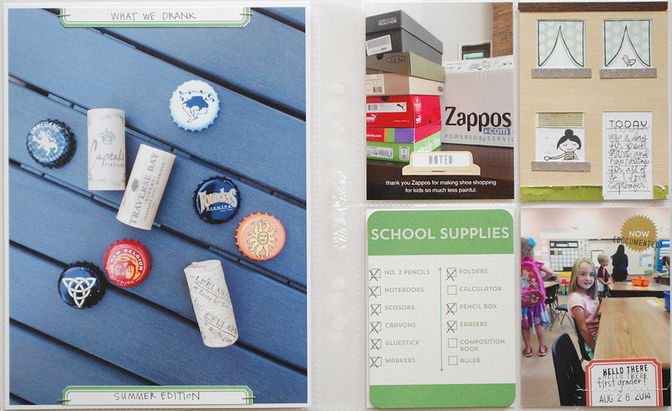
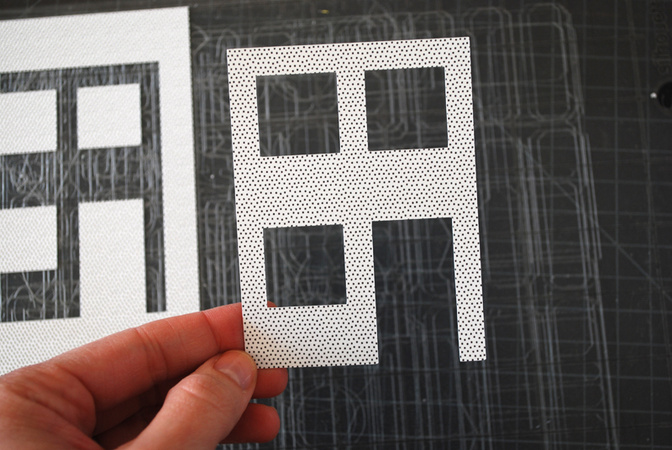
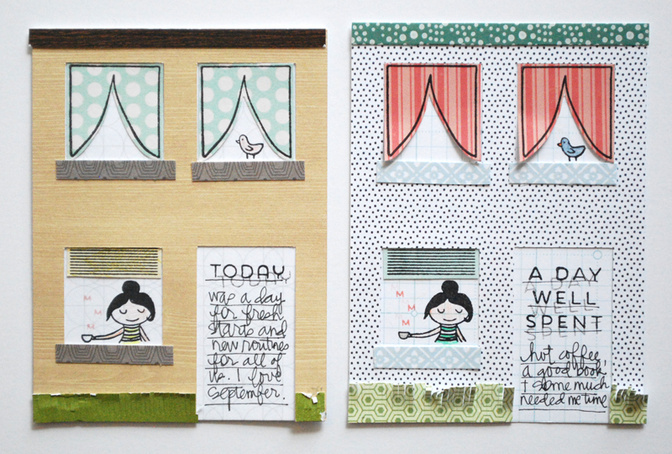
1. Open the house_guests.studio file in Silhouette Studio and cut out from cardstock or patterned paper. Cut a background paper to 3x4 and back the house cut with it.*
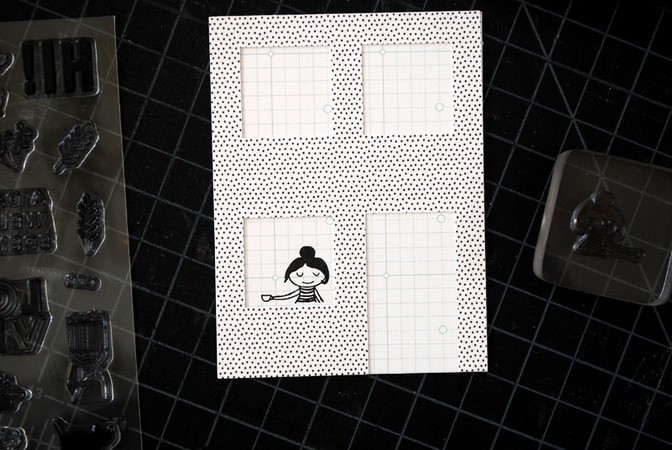
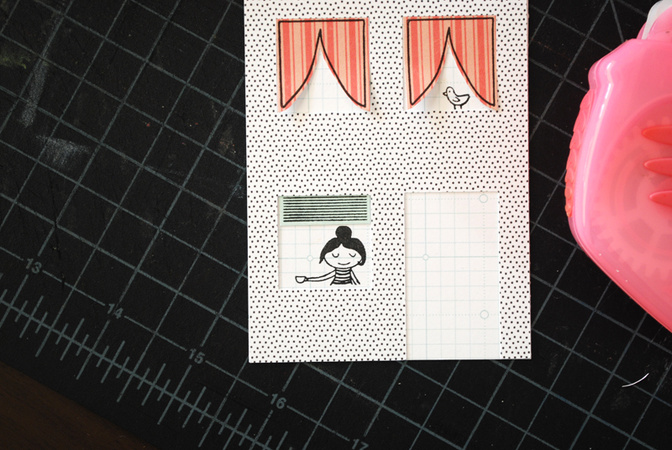
2. Start stamping your background images – anything that would be inside the house – with black ink. I began with the cute girl with the mug in the first floor window.
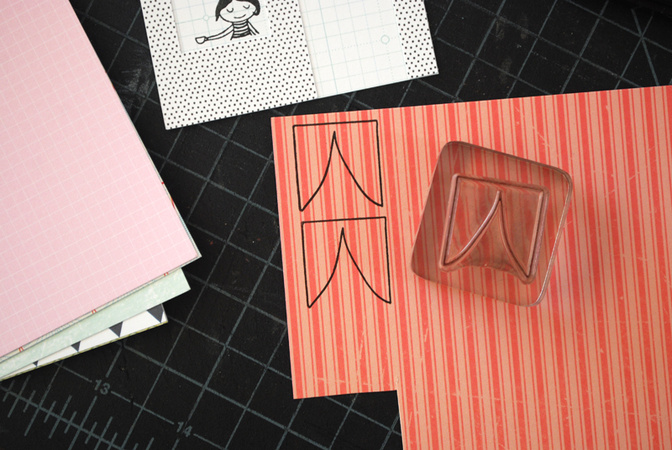
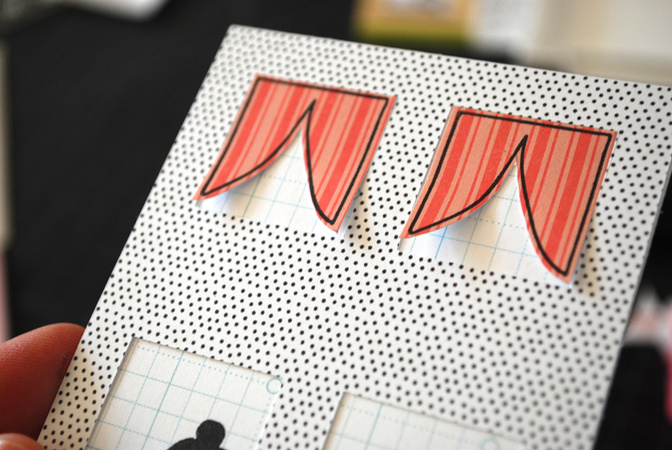
3. Use the curtains outline stamp and stamp on patterned paper. You could also use the solid curtain with a colored ink on white cardstock and then stamp an outline over it. Use scissors to trim out curtains. Cutting just outside the outline will fill the window on the cut file.
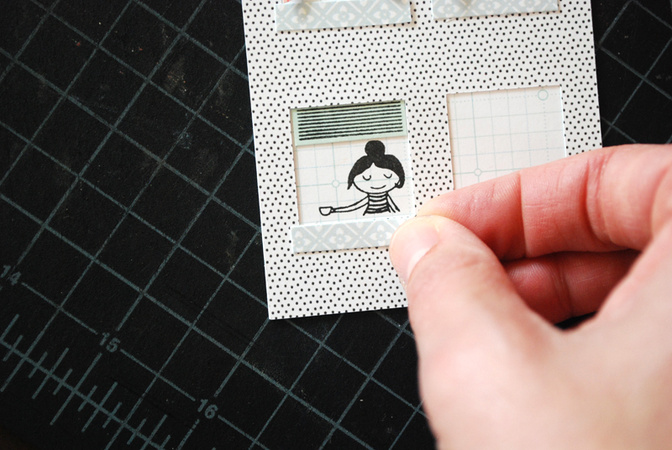
4. Apply adhesive to the back of the curtains and adhere inside the second floor windows.
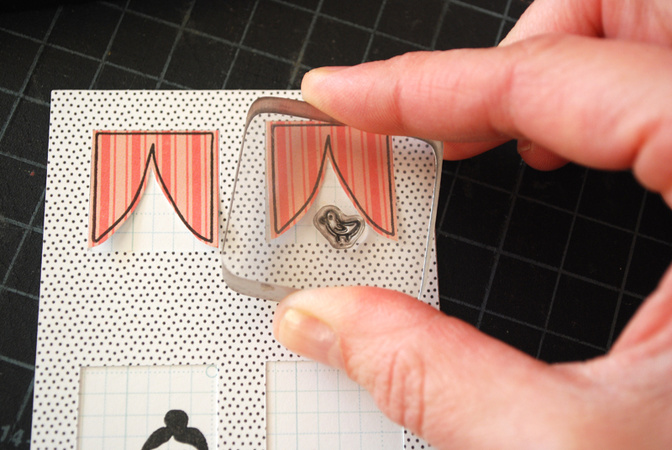
5. Add more details inside the windows. Here I added a bird to the windowsill on the second floor window.
6. Stamp the vertical blind stamp with black ink on patterned paper and cut out. Adhere to the first floor window. Tuck up inside the window if you’d like to adjust how much of the blinds show past the top of the window.
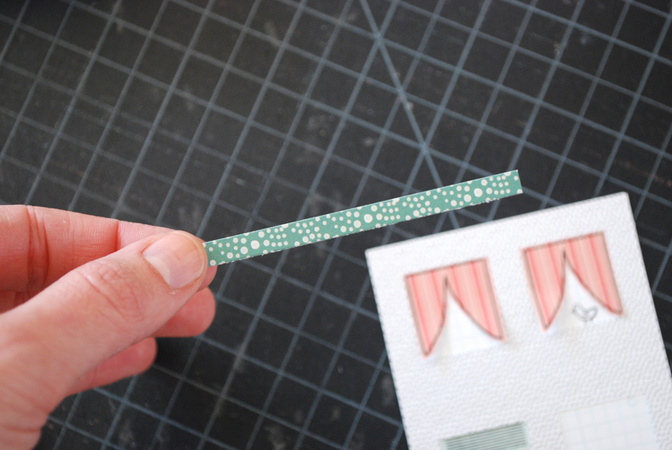
7. Choose another patterned paper and cut a strip that measures 3” long x 1/4" high. Adhere to the top of the house for the cornice.
8. Cut another 1/4" strip of patterned paper and trim down the length for windowsills. Here, mine are just a bit wider than the window, at 1 1/8” wide. Adhere just below each of the three windows.
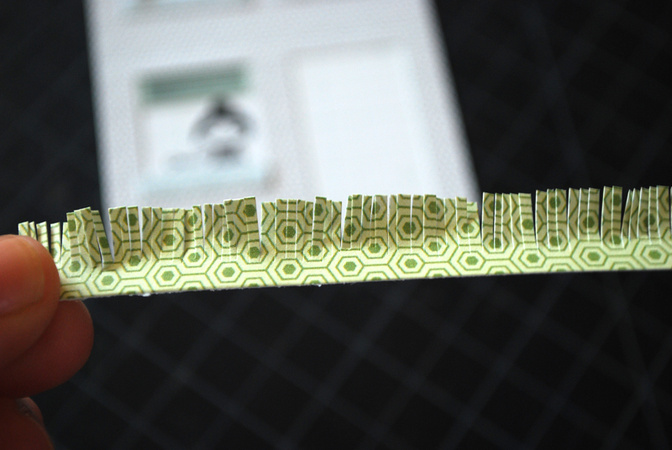
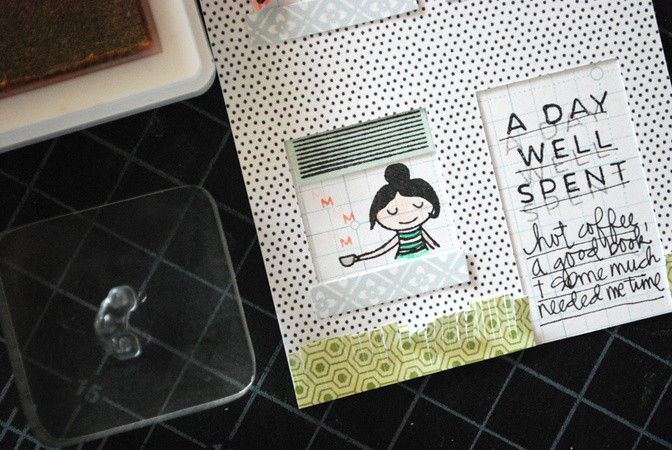
9. Cut a 3/8” strip of green cardstock or patterned paper for grass. Using your scissors, cut fringe on the top half of the paper. Adhere the strip to the bottom edge of the house, leaving a blank space in front of the door. Rough up the top edge of the grass to loosen up the fringe.
10. Add any other stamping details, like the “mmm” stamp. The door space is a nice spot for a short phrase or journaling.
11. With all of the paper and ink color options, the possibilities are endless for these little houses!
*Note : the House Guests cut file measures exactly 3”x4.” This size fits nicely in the Handbook page protectors. If you are using a page protector that has a slightly narrower pocket, trim down the width of the house before layering and stamping.
Supplies : House Guests stamp set, The Underground 4x6 paper pad, dot roller adhesive, scissors, grid paper, acrylic block, Versafine Black Onyx ink, Color Theory Coral Bay ink pad


Comments
Sign in or sign up to comment.
13 comments
What a great idea. Not sure how I missed that gem in your awesome PL pages. Great tutorial too!
I really wish I had purchased the digital house file now, when I purchased the stamp. Maybe SC can re-release it since they made a new Christmas stamp set? Would that be possible?
Replies to supertoni
Sign in or sign up to reply.
@supertoni, the cut file is a freebie! Just click on the link near the bottom of the post after "Note:"
Replies to nicolereaves
Sign in or sign up to reply.
This is so cute, thanks for the cut file.
Replies to LindaInAus
Sign in or sign up to reply.
Great idea, Nicole. Thanks for the tutorial and cut file.
Replies to Brinkleyboy
Sign in or sign up to reply.
What a fun idea!
Replies to toribissell
Sign in or sign up to reply.
This is so great, Nicole!! Love it!
Replies to kellyxenos
Sign in or sign up to reply.
This is too cute! Thanks!
Replies to BeautyScraps
Sign in or sign up to reply.
This is just adorable! Where do you find the "house guests" stamp set?
Replies to Llynx59
Sign in or sign up to reply.
@Llynx59, there is a clickable link under Supplies at the end of this post.
Replies to nicolereaves
Sign in or sign up to reply.
This is so adorable! Where can I find the cut file? :)
Replies to pepper56
Sign in or sign up to reply.
Thanks Nicole! :)
Replies to Llynx59
Sign in or sign up to reply.
thanks!!
Replies to rkokes
Sign in or sign up to reply.
This is so cute!!
Replies to ammi
Sign in or sign up to reply.