Create Your Own Advent Calendar with the Free Printable | Barbara Picinich
Tags: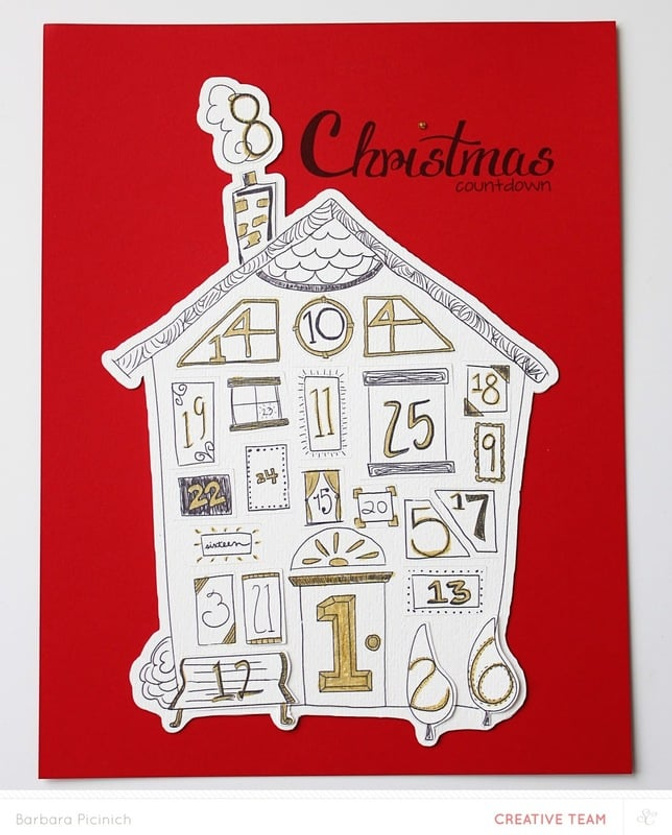
The first thing I did was take some time to think about what I wanted under each of the windows. Was it going to be a photo, some text or a mix of the two? This will not be the only Advent Calendar in our home this season so it didn't need to cover all of the bases, but take a more playful just for fun approach. As I made the list I noticed that it was turning into a sort of bucket list for the season. I added in all of the events I knew we were going to that had already been scheduled and then just added in more seasonal fun stuff to finish up the list.
Here is my list;
- Hello Twinkle! She's back! (our Elf on the Shelf)
- Watch a Christmas movie
- Make a Christmas playlist
- Make a Christmas craft
- Watch 'The Year without Santa' on TV
- Go Christmas Shopping
- Go see the Nutcracker
- Make a Gingerbread house
- Mail our Christmas Cards
- Happy 7th Birthday Simone!
- Have a fireside movie night
- Go see Christmas Lights
- It's Birthday Party Day!
- Go to the World of Christmas event
- Jingle some friends
- Pack up some old toys to donate
- Make Teacher Gifts
- Wrap presents
- Yay! It's the last day of school!
- Have a Starbucks date
- Watch 'The Little Drummer Boy' on TV
- Make Santa's cookies
- Clean my room!
- Go to church with the family, it's Christmas Eve!
- Merry Christmas!
Just a tip, the ABC Family Channel provides their line-up of Christmas specials online so I took a look at the list to make sure we caught the ones that aren't typically aired on network TV.
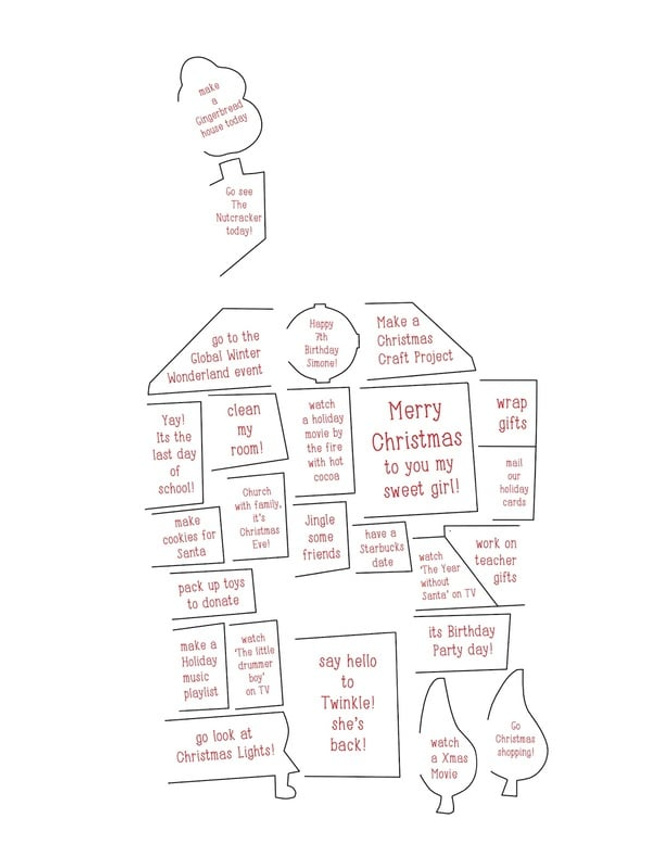
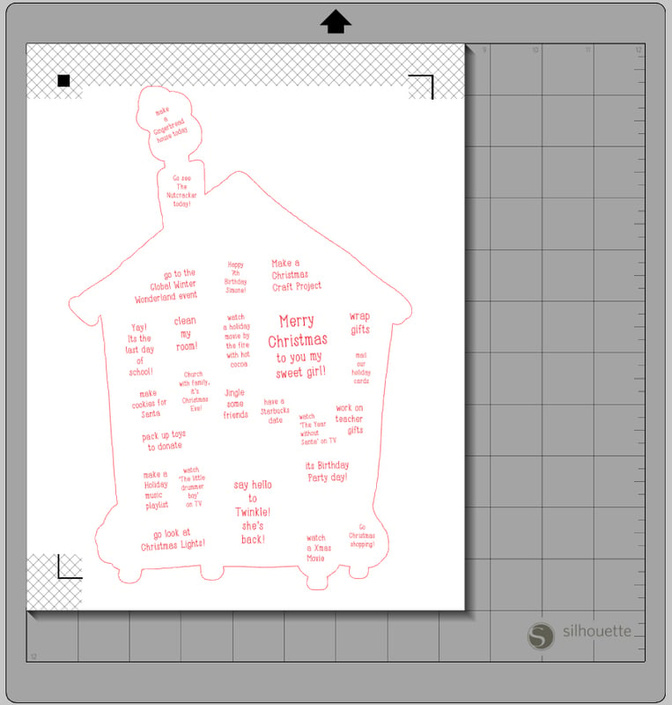
I knew I didn't want to write out my items so I laid it all out using Photoshop Elements. I just went day by day and entered the text in the right space using the cut lines as my guide. I did have the main image open so I knew which box was which. The font I used for my text is called Before Breakfast.
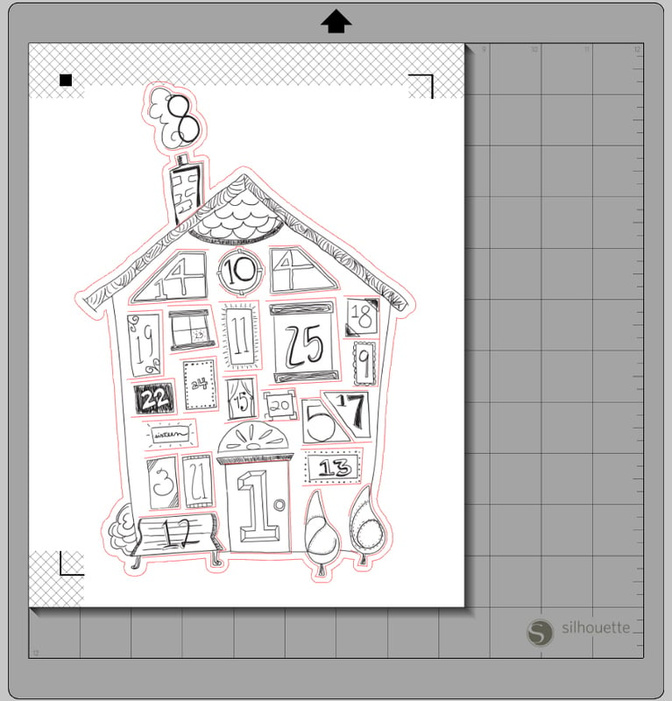
Once I had that laid out I had to work on the top. I ended up doing a print and cut and added in an offset on my Cameo so that it created a bit of the edge. That was for two reasons a) to keep the pieces together, I didn't want the chimney smoke floating off by itself and b) because when I did the print and cut the registration marks would show on the page and I didn't want them on my finished piece. Here you can see what my document looked like in the Studio program. I did have to freehand cut a few places at the very bottom of the document where it fell below the allowed cut area that the Cameo imposes when you do a print and cut, but that can easily be fixed if you just shrink the piece down just a smidgen.
I did the same thing for the under layer with my text because I wanted it to match up exactly to the top layer when I placed it down on my page. In order to make sure it was all lined up correctly I used the same document above, just replaced the hand drawn house image with the one of my text so that I knew it would line up correctly when cut.
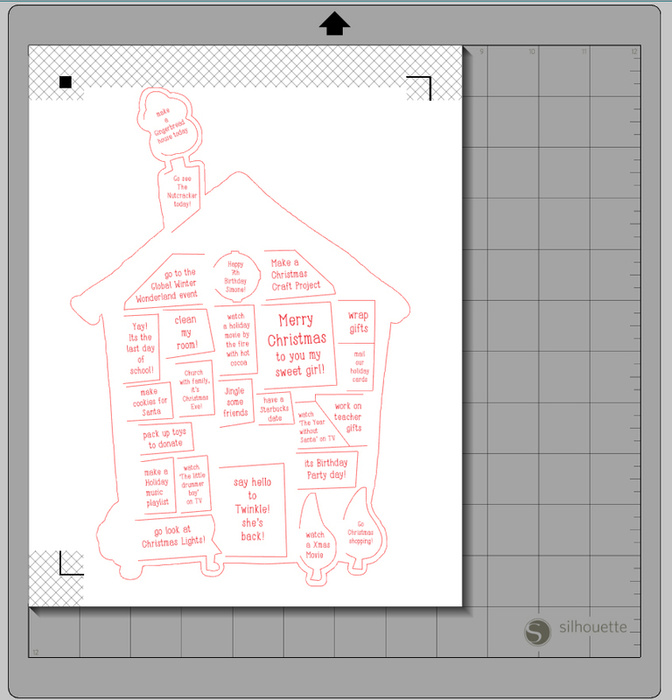
I made sure to delete the cut lines for the windows prior to printing because I didn't need to them cut. This is what I sent through to my printer and then cut out. The only thing cut was the outer offset line.
Here you can see the finished piece with a few windows open. I did cut a bit too much away under one of the trees when I freehand cut those parts the Cameo didn't cut, but it's all good. All in all I was really happy with how everything lined up when the two layers were matched up.
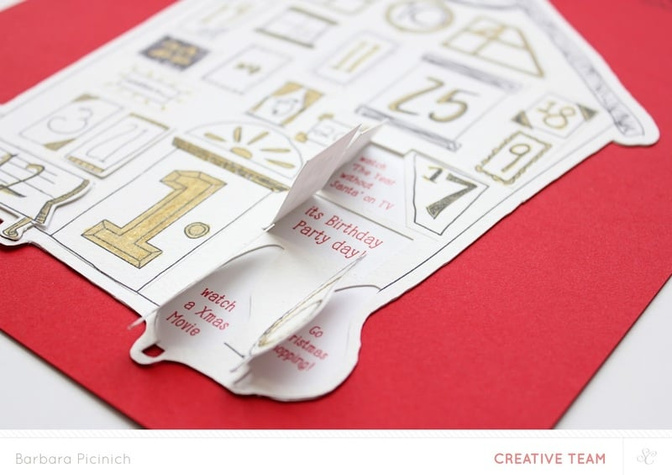
I applied adhesive to the back of the top layer and had to make sure to go around some of the edges very carefully so they would stick down well when the windows were opened. I used Glossy Accents around those tight narrow areas and it worked great. The larger areas were glued just using my adhesive gun.
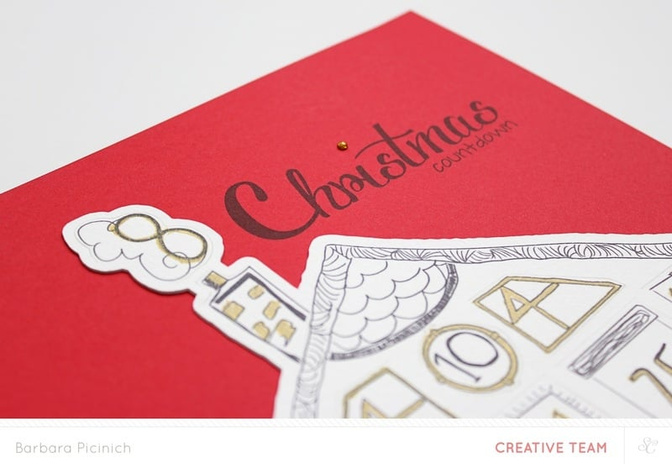
I mounted both layers on top of a piece of red cardstock that I had first run through my printer to add the title. I used the Voluptate free font for the word Christmas. This font doesn't provide capital letters so I just increased the size of just the letter C to make it appear as if it was capital. The font for the word countdown is called CK Journaling.
I also added in a simple gold glitter enamel dot that came in a previous Studio Calico kit to dot the "i," which just gives it a little something three dimensional.


Comments
Sign in or sign up to comment.
3 comments
I love this so much! You've inspired me to make something similar!! @Babz510
Replies to Sparkliie
Sign in or sign up to reply.
This is so cute. I will def use it! Thank you for sharing the file.
Replies to tealandtafetta
Sign in or sign up to reply.
Very nice! I'll make it for my son
Replies to rossana
Sign in or sign up to reply.