Start to Finish Layout | Gillian Nelson
Tags: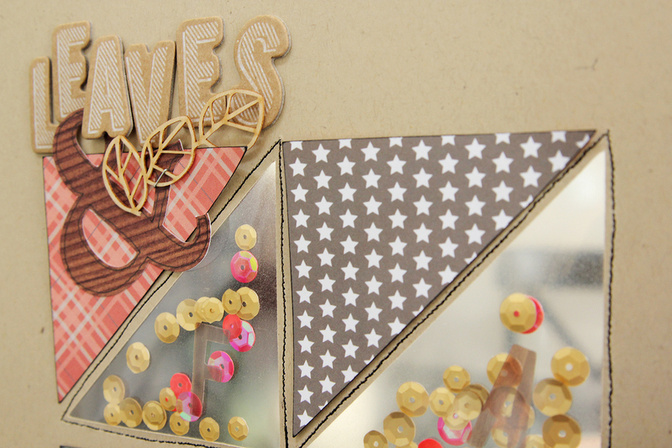
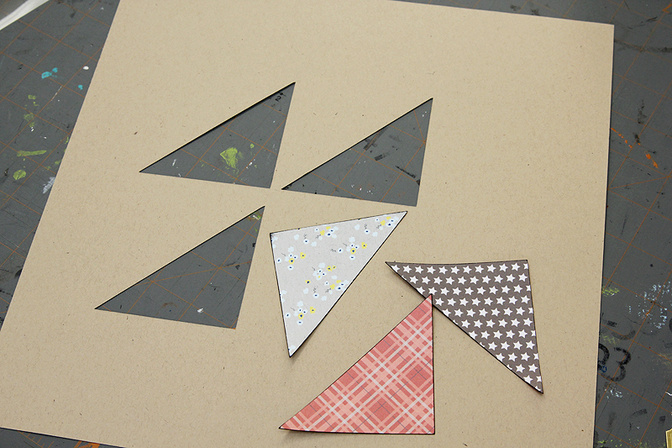
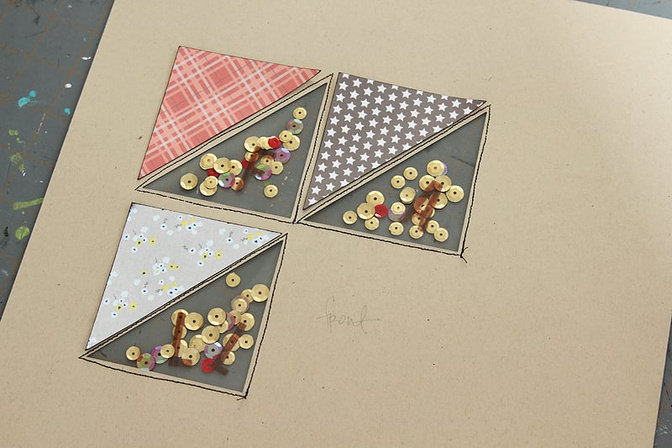
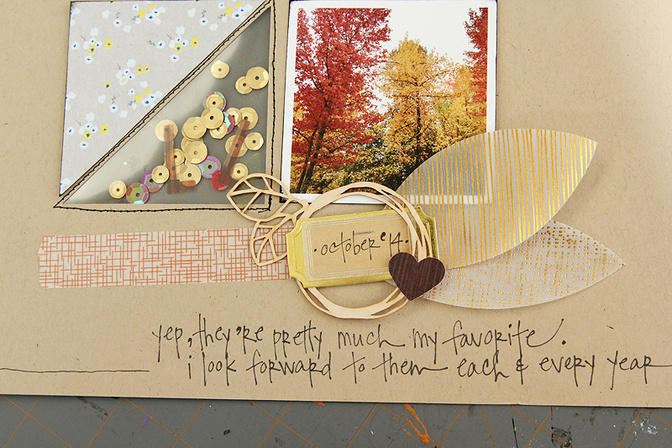
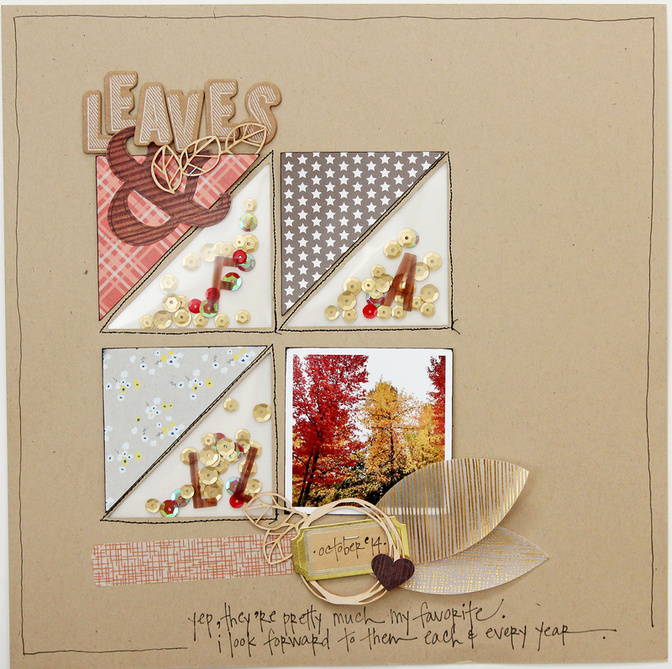
1. I started by cutting three triangle shapes using my Silhouette Cameo from a piece of 12x12 Kraft cardstock. I made the triangles 3 inches high and 3 inches wide, and grouped them in a grid. The negative space of the triangles will serve as my background for my layout. (This can also be done by drawing triangles on the paper and cutting them out with a craft knife.) I then cut the same size triangles from 3 different patterned papers from the Walden kit and add-ons, this time keeping the positive shapes for my design.
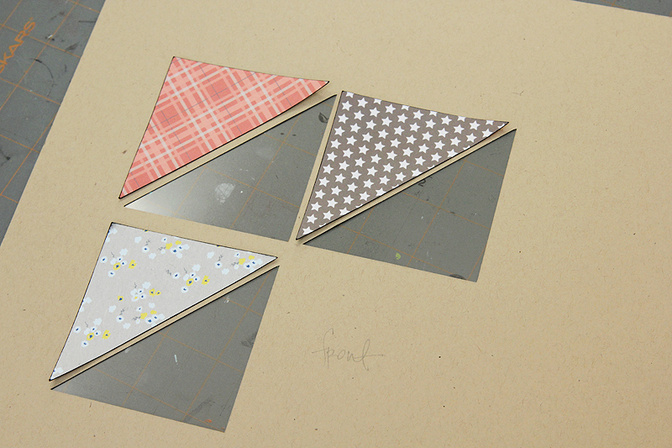
2. I inked the edges of the patterned paper triangles and adhered them to the front of my layout, pairing each of them with a negative-space triangle to form squares.
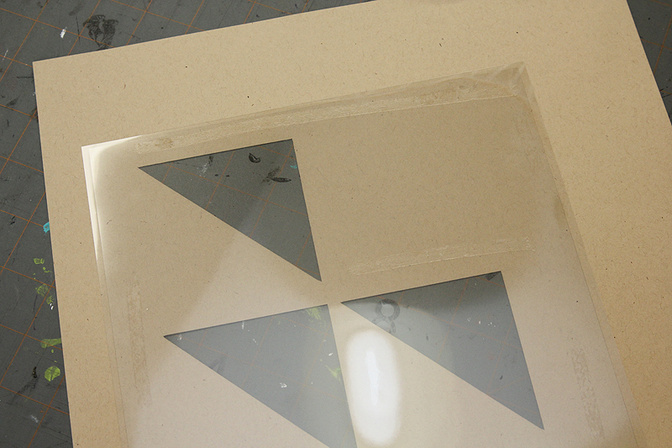
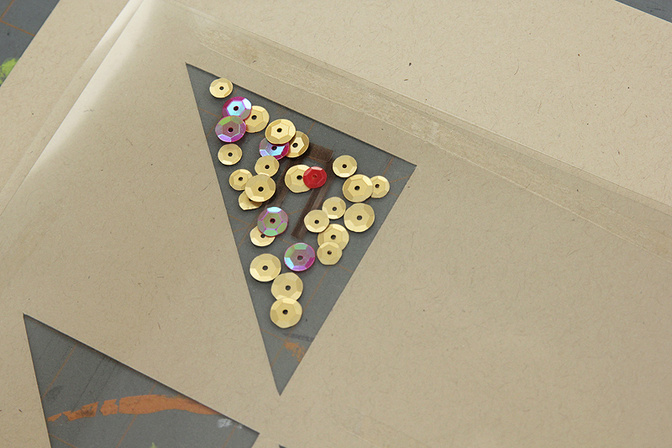
3. I cut two sheets of transparency film down to about 8x8 inches. I flipped the cardstock background over to the back side and adhered one sheet of transparency so that it was covering the triangle shapes. I then layered the second piece of transparency film over the first but only adhered two sides. This would help hold it in place but still allow me to lift it so that I could fill it with pretty baubles in a moment.
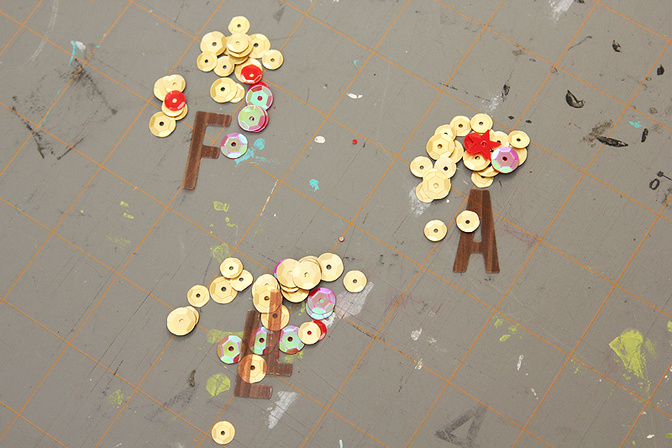
gold and red sequins that came in the Concord and Pine Hill add-ons are perfect for my fall theme. I grouped three little piles of sequins and also fished out the woodgrain alphas from the Baker Bridge add-on, spelling out "FALL."
nds McGee here, but if I can manage, anyone could.) I lifted the transparency, and placed the "L's" in the triangle that is at the top of the page. My layout is flipped over, so I was careful to put the letters upside-down and backwards, so that when the layout got turned over to the right side, they'd appear as they should. (Yes, I know that may seem obvious, but I had to remind myself of it every single time. We all have our strengths, people.) I then layered a group of sequins within the same triangle and over top of the letter. I wanted to be sure that the letters would not be covered up by the sequins when the layout is flipped, so they had to form the bottom layer as I assembled it. Then I gently lowered the top transparency sheet back down, and very carefully flipped the layout over, sandwiching it between my two hands so that the sequins stayed in place.
Walden Scrapbook KitConcord Add-onPine Hill Add-onBaker Bridge Add-onMetal Mini StaplerStazOn Ink Pad-Jet BlackPrecision Pen .05Silhouette Cameo


Comments
Sign in or sign up to comment.
13 comments
This is awesome! They are also pretty much my favorite as well. :) Lovely layout!
Replies to 1Djc
Sign in or sign up to reply.
This is a lovely page. Thank you for sharing this with us.
Replies to PrinzessinN
Sign in or sign up to reply.
Lovely! Fall pages might just be my favorites.
Replies to patowle
Sign in or sign up to reply.
This is such a great layout!
Replies to MichelleWedertz
Sign in or sign up to reply.
Another fabulous project by G... love your work, girl!
Replies to sillypea
Sign in or sign up to reply.
Beautiful. Love the layout and the idea to use transparency. I've only tried it with clear vinyl I had on hand and that doesn't stay tight well.
Replies to Charityroze
Sign in or sign up to reply.
Love.
Replies to PaigeR
Sign in or sign up to reply.
Your handwriting is just oooh so perfect!!!!! Jelaous!!
Replies to all_that_scrapbooking
Sign in or sign up to reply.
Love this - thanks for the step by step. Did you make those vellum leaves....I am seriously in love with them...
Replies to KMKTENN82
Sign in or sign up to reply.
In love with this layout..Fall is prob. my favorite season for many reasons...
I'm definitely going to do this.. Thanks for your tutorial..
Replies to Shes_Crafty
Sign in or sign up to reply.
Thank you, everybody! :)
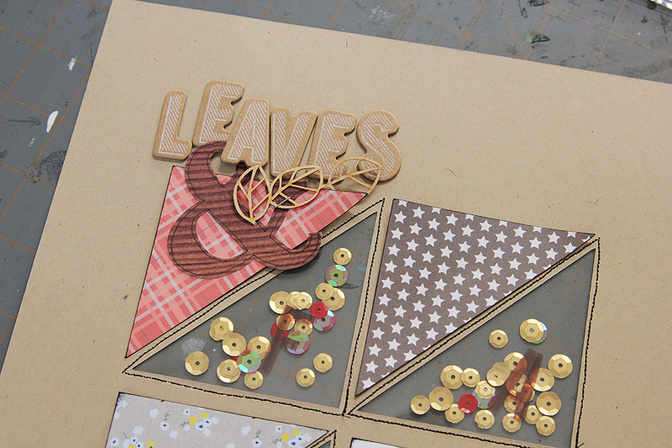
@KMKTENN82 -- The vellum leaves were in the Baker Bridge add-on, which is unfortunately sold out now. You could easily mimic the look by just hand cutting a simple leaf shape like this from vellum at home. You could even decorate the vellum first with gold paint pen or embossing powder.
g
Replies to heygillian
Sign in or sign up to reply.
Stealing this for sure
Replies to juliee
Sign in or sign up to reply.
Such a great tutorial G. I will try this for sure. :-)
Replies to supertoni
Sign in or sign up to reply.