Tutorial | Using Project Life® Cards on a Scrapbook Layout with Geralyn Sy
Tags:Project Life® kitsProject Life®
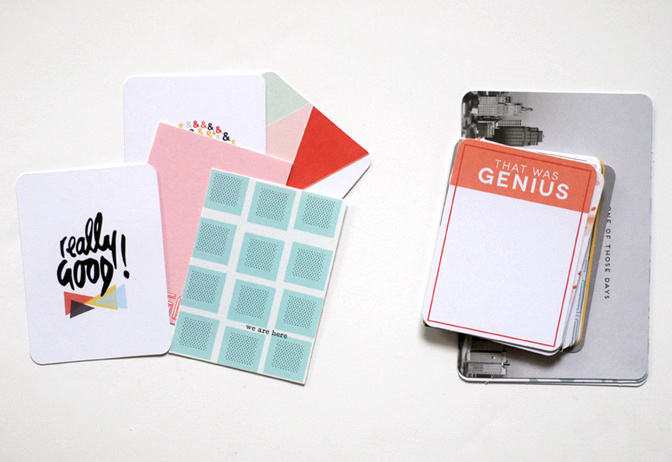
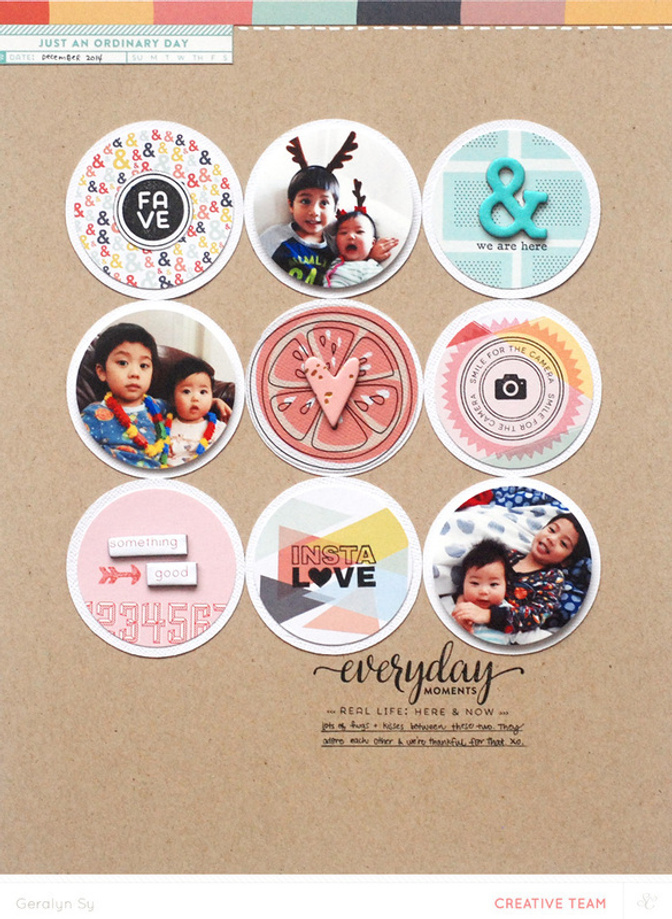
I went through my leftover Project Life®
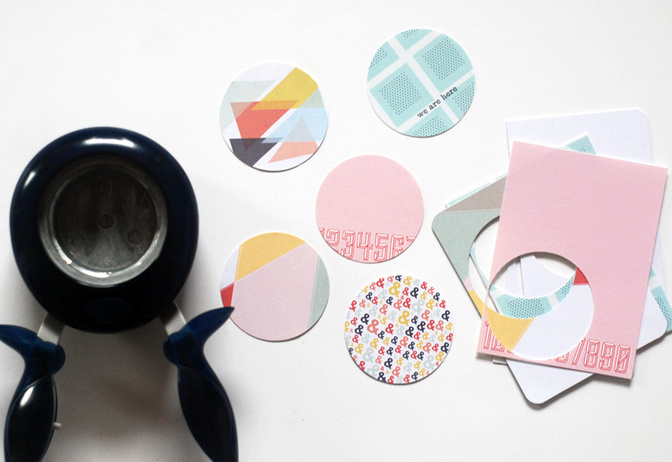
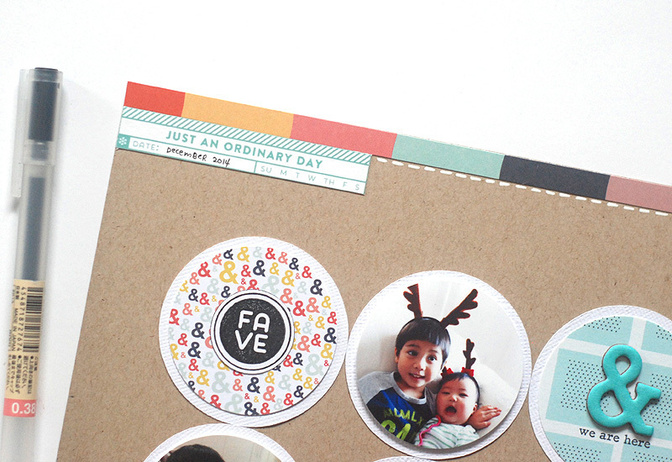
I used my 2” circle punch to punch out circles from the cards I had chosen.
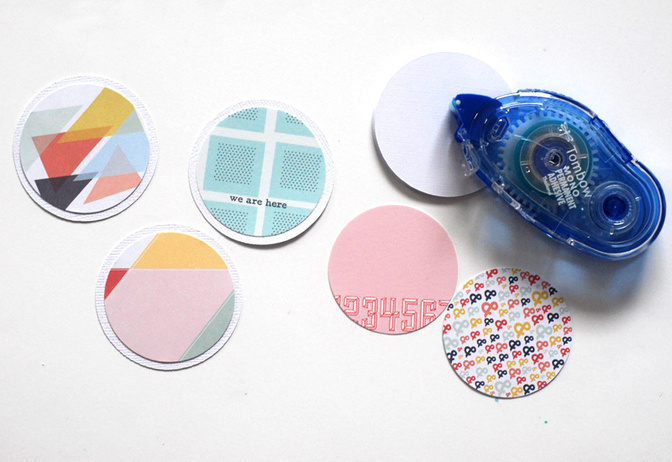
I cut out 2.25” circles with my Cameo and layered my punched out circles on these larger ones so that they would have a white border.
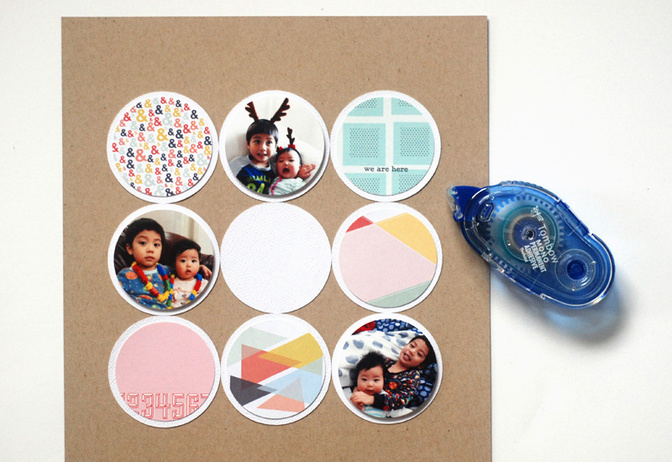
I also chose three photos and punched them out with my 2” circle punch. Then I repeated the process of layering them on larger circles, but with foam adhesive this time to add a bit of dimension.

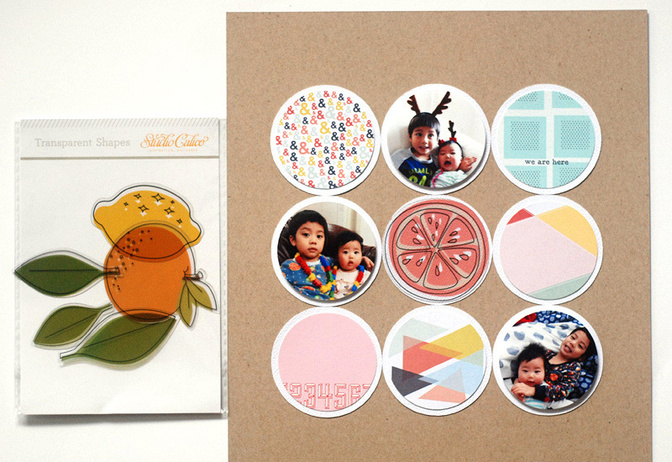
I laid out my circles on my kraft cardstock background, creating a simple grid design. I had 8 circles (5 Project Life
Instead of leaving the middle circle blank, I used the fruit transparency from the Far Far Away Scrapbook kit in the middle. It fit perfectly in the circle and adds a fresh element to the page.
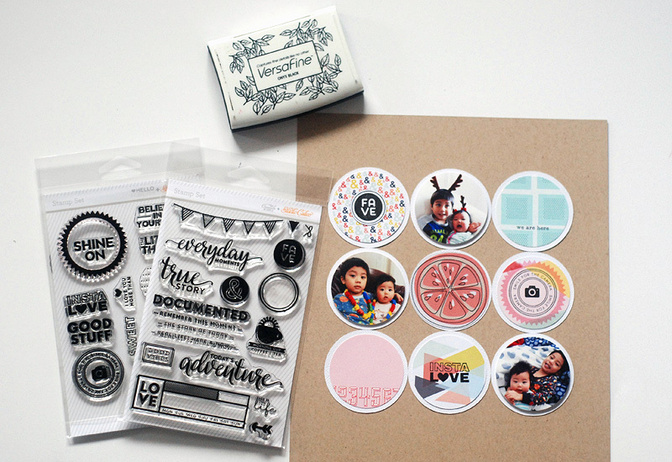
Using the Far Far Away Project Life
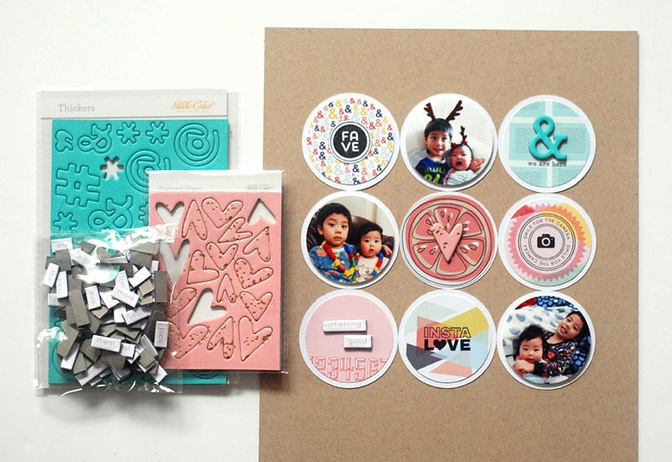
I went through the kits and chose chipboard embellishments to add to some of the circles for more interest and dimension. I love the gold flecks on the hearts!
Underneath the circles, I stamped one of the sentiments from the Everyday Moments stamp set and wrote my journaling underneath it.
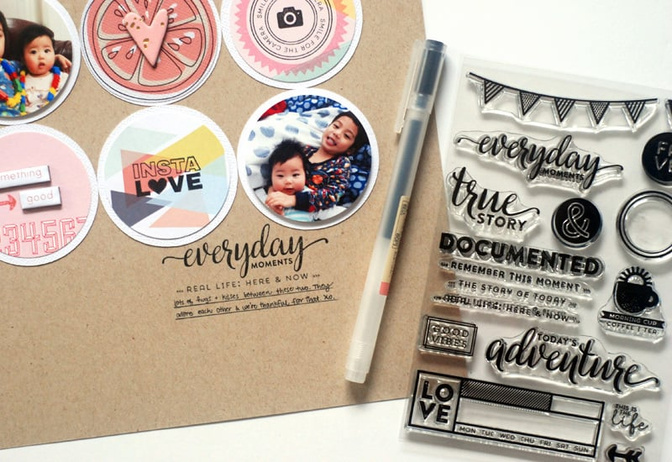

Looking at the layout, you can’t even tell I had used Project Life®Project Life®
Supplies: Far Far Away Project Life® kitMirror Mirror Kit Far Far Away Scrapbook KitShine Stamp Set,Everyday Moments Stamp SetprintableVersafineColor Theory Blush Crush


Comments
Sign in or sign up to comment.
26 comments
Really, really love this layout! Thanks for reminding us what other options we have with the project life cards.
Replies to TresaO
Sign in or sign up to reply.
Nice layout - I don't do Project Life, but I've also used PL kits on traditional layouts!
Replies to shirleyshirleybobirley
Sign in or sign up to reply.
Love this idea!!
Replies to PamBaldwin
Sign in or sign up to reply.
This is so good! Thanks for the great ideas!!
Replies to dptuffy
Sign in or sign up to reply.
I am IN LOVE with this! What a great idea for using the PL cards (I love the PL kits but am a traditional scrapbooker so always looking for ways to use up my kits!)
Replies to Joelaw
Sign in or sign up to reply.
What a lovely page. I use PL cards on layouts all the time for layering or for grids but I never thought of punching circles out of them. What a great idea. And this layout is incredible. Thanks for sharing.
Replies to toribissell
Sign in or sign up to reply.
Super cute... nice idea!
Replies to Mandy_G
Sign in or sign up to reply.
WHAT SIZE LAYOUT DOES THIS END UP BEING? :)
Replies to angymuse
Sign in or sign up to reply.
Brilliant.
Replies to PaigeR
Sign in or sign up to reply.
This is the cutest! Definitely going to scraplift this. Thanks for sharing!
Replies to patowle
Sign in or sign up to reply.
WOW! I love this layout. The White circles underneath really gives the other circles a punch.
Replies to Rockermorsan
Sign in or sign up to reply.
Amazing layout, love it!
Replies to Karilynn
Sign in or sign up to reply.
I love the end look!
Replies to jengd
Sign in or sign up to reply.
Love this layout. Simple and so elegant.
Replies to Neela
Sign in or sign up to reply.
Love this!
Replies to jenjeb
Sign in or sign up to reply.
This absolutely rocks, Geralyn!
g
Replies to heygillian
Sign in or sign up to reply.
Thank you!!
Replies to jeannine
Sign in or sign up to reply.
Wow! I really like how you put it all together. Great job! :D
Replies to Audiene
Sign in or sign up to reply.
Love this layout! Thank you for sharing your process.
Replies to 1Djc
Sign in or sign up to reply.
Awesome, thanks for the tutorial and inspiration!
Replies to kymkt
Sign in or sign up to reply.