Tutorial | Create a Circle-Filled Layout with Geralyn Sy
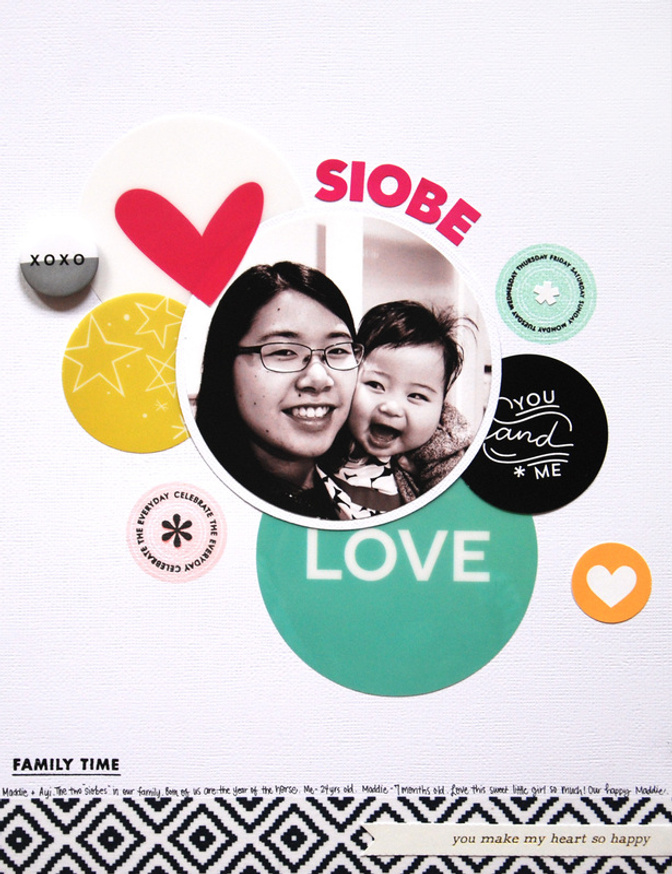
Tags:This month’s Cirque Scrapbook kit came with lots of unique embellishments that I love. Unfortunately, I didn’t have much time to play with the cool circle transparencies when I made my layout for the month. That is why I decided to pull them out today and highlight how fun they can be with a simple, circle-filled layout.
I printed out my photograph and cut it into a circle shape with my circle cutter. Then I matted my photo on a white cardstock circle. 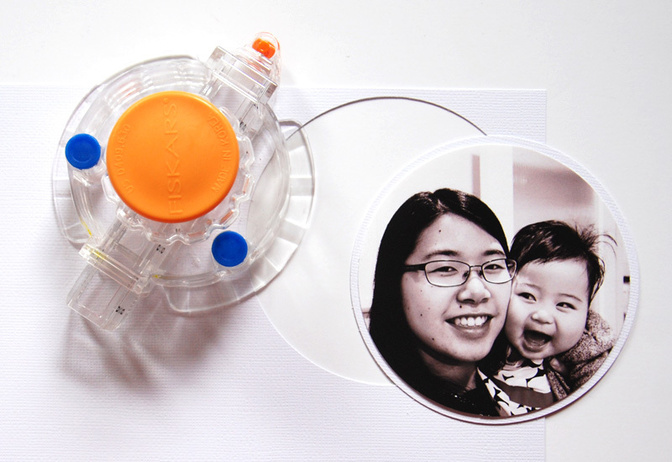
I went through the Cirque scrapbook kits to find any circle embellishments. I also printed out a few printables. 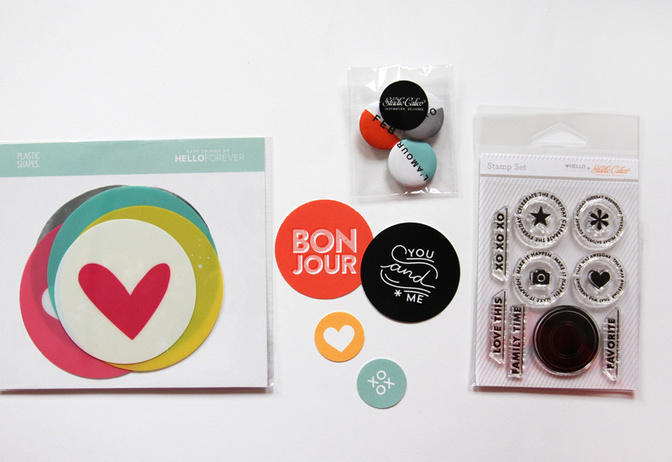
I started with the circle transparencies and arranged them around my photograph and cardstock base to get an idea of how I wanted them to look on my page. 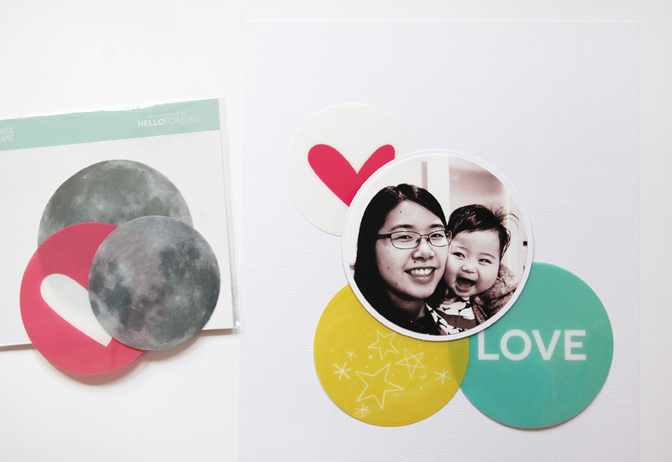
Using my x-acto knife, I carefully cut around part of the heart on one of the circle transparencies so that I could tuck in my photo. 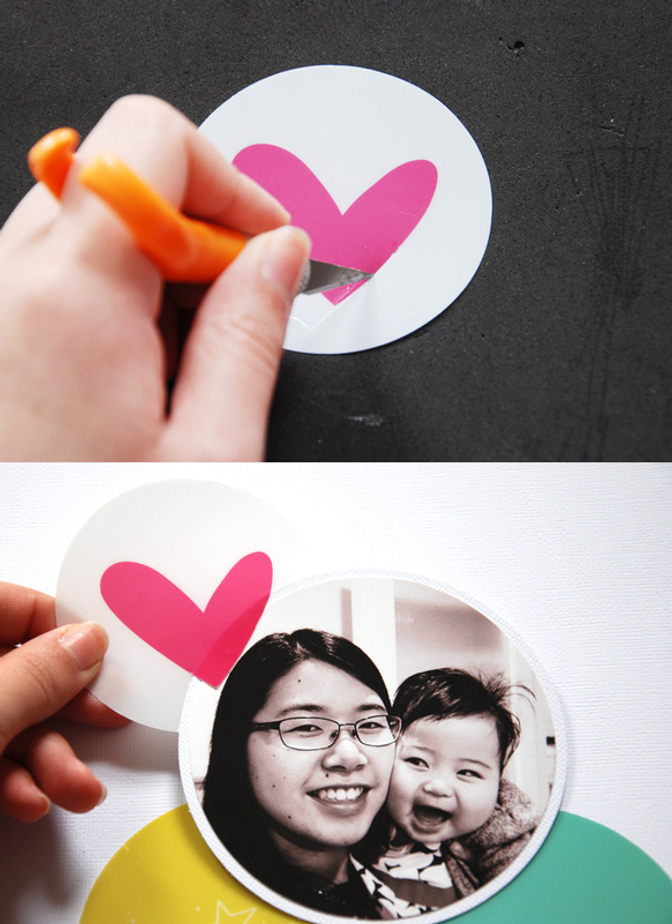
I also altered the yellow circle transparency by punching it with my 2” circle punch since I wanted it to be a different size than the ‘LOVE’ circle. It is really easy to alter these circle transparencies to fit your project. 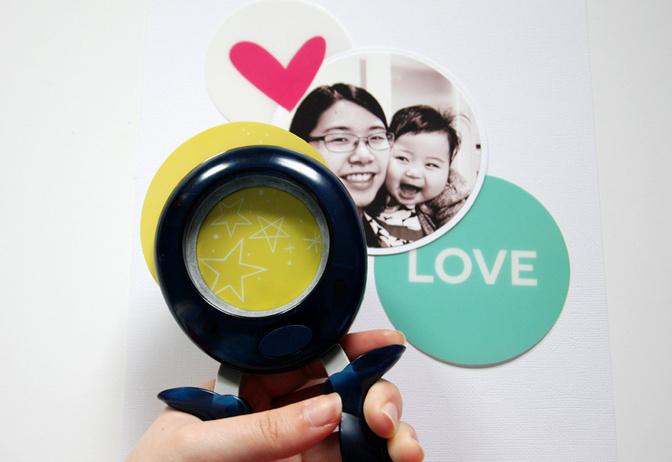
I glued the circle transparencies behind my photograph and added a flair button and some printable circles. 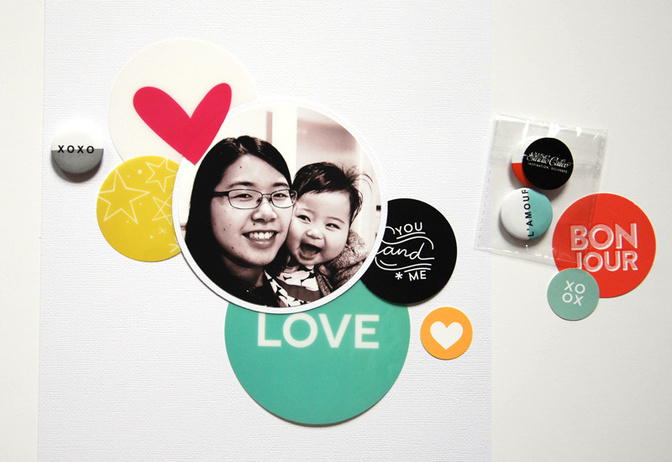
Using the Ringmaster add-on stamp set, I stamped two circles on my page using Color Theory inks. This set is really fun because you can combine the words and icons with the solid circle.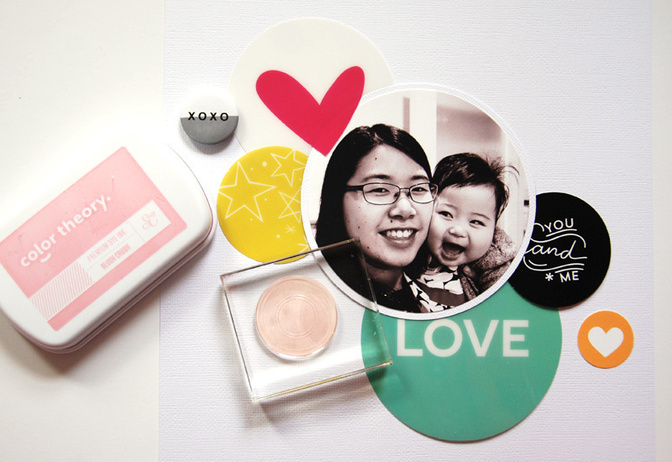
I chose the pink alphas from the Pantomime add-on to use for my title. (‘Siobe’ means ‘little sister’ in the Chinese dialect I speak.) 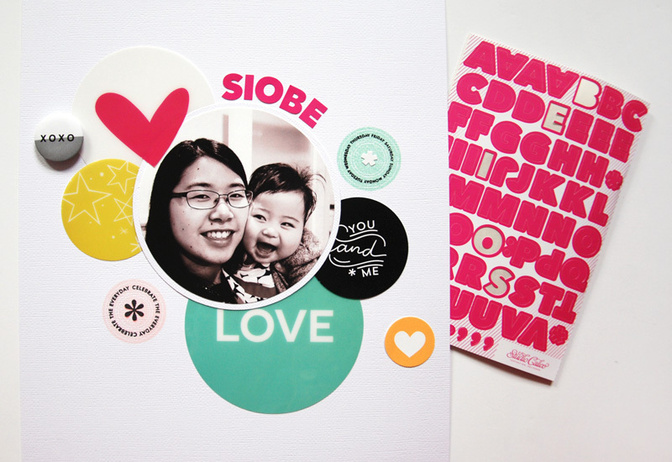
Lastly, I added washi tape (from Ringmaster – love!) to the bottom of my layout and one of the word strips before I wrote my journaling at the bottom. 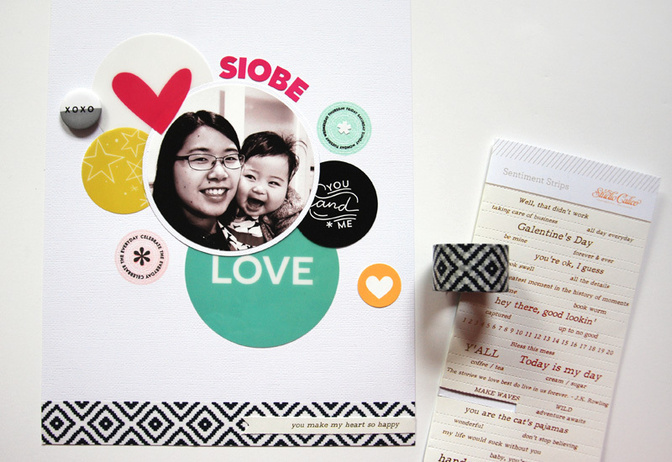
It’s a simple layout, but I’m loving all the bold and bright colors I got to use on this page! I have just a few of those circle transparencies left but you can bet I’ll be saving them for something special. Thanks for following along with my step-by-step process for putting together this page!
Cirque Scrapbook kitRingmaster add-onPantomime add-onColor Theory Blush CrushMint HintVersafine Cirque Printables by In a Creative BubbleCirque Printables by Hello Forever


Comments
Sign in or sign up to comment.
9 comments
I love this layout and am totally scraplifting it! I can see that I'm going to have to order another add-on after all. Thank you for the tutorial.
Replies to Kristi_
Sign in or sign up to reply.
This is beautiful. I love simple! The impact of your message is strengthened with simple. Great job.
Replies to 1Djc
Sign in or sign up to reply.
Circle love!
Replies to toribissell
Sign in or sign up to reply.
This is so striking. Love the use of primary colors with the circles. I'm going to go dust off my circle cutter and use those stamps in the Ringmaster kit. Thanks Geralyn for the inspiration. I love your work!
Replies to pinksoup
Sign in or sign up to reply.
Aw, that picture with her looking at you is so adorable! This is another fantastic layout, Geralyn! Thanks for the inspiration!
Replies to PunkyBear8210
Sign in or sign up to reply.
Great layout! Love it!
Replies to AlexandraBoehnke
Sign in or sign up to reply.
Love this layout!
Replies to jenniferd
Sign in or sign up to reply.
This is so cute!! Loving the fun design!
Replies to KimberlyMarie
Sign in or sign up to reply.