Use Your Paper Stash Tutorial | Jamie Waters
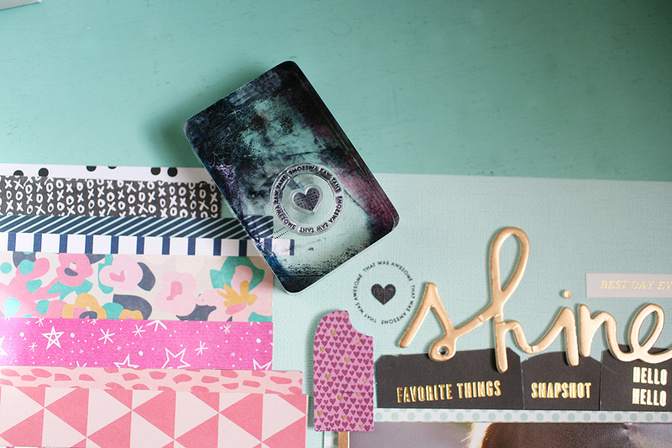
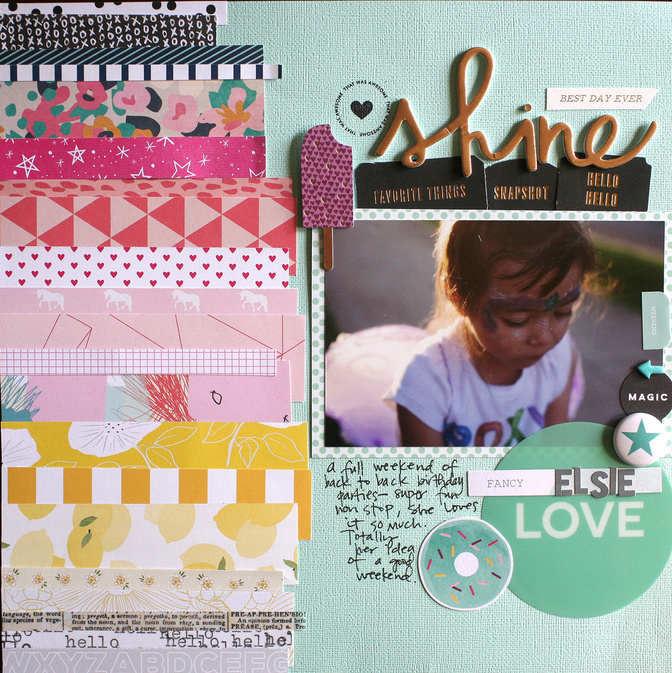
Tags:First, I gathered the papers I wanted to use and arranged them in a loose rainbow fashion. I ended up with way more papers than I had space for so I had to weed some out. Tough decisions!
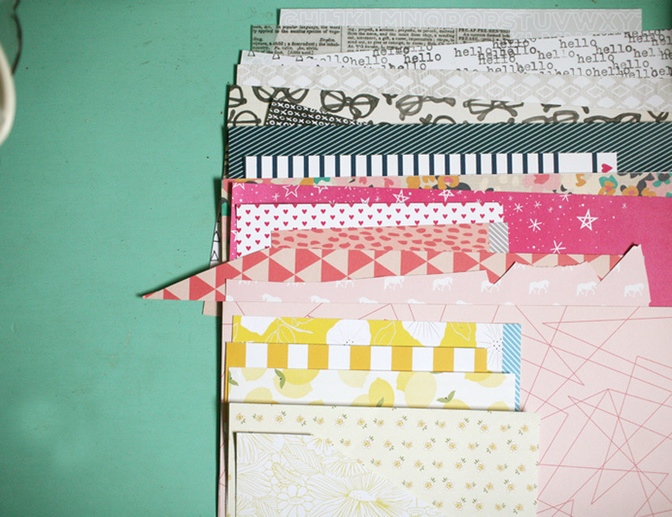
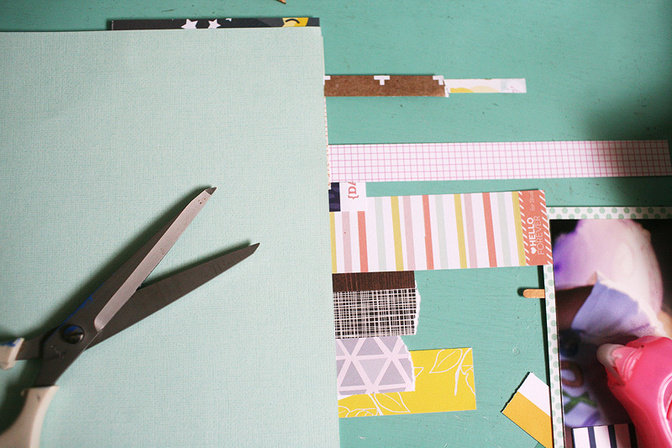
Next I glued them down to my leftover piece of colored cardstock. (I often said to myself as I was pulling papers, I can't believe I have more of this paper left, I loved it!) So I was surprised and happy to find this full sheet of mint cardstock.

Next was the trimming of strips.
Since my rainbow was so nice and colorful, I chose my photo mat to coordinate with my background cardstock.
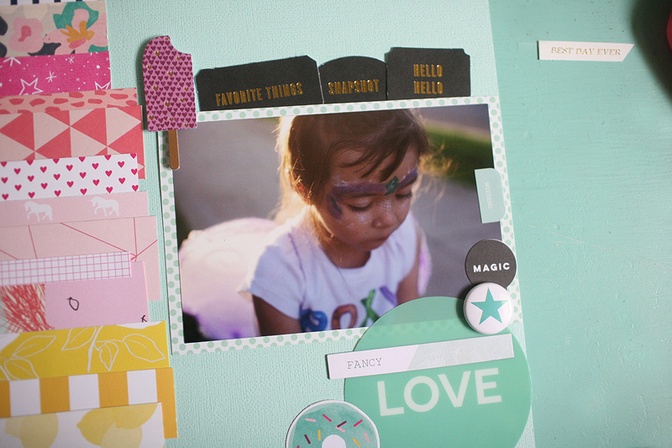
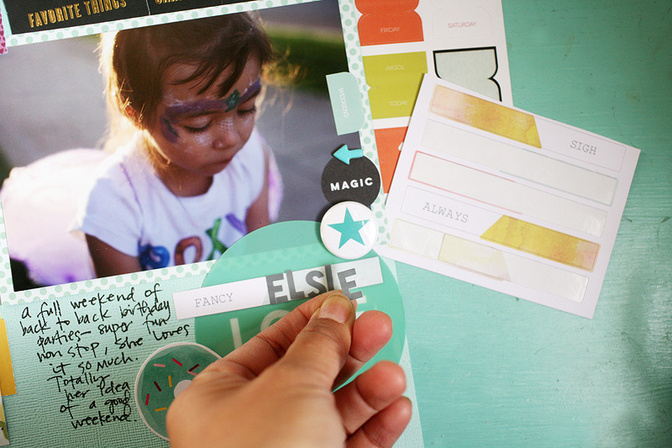
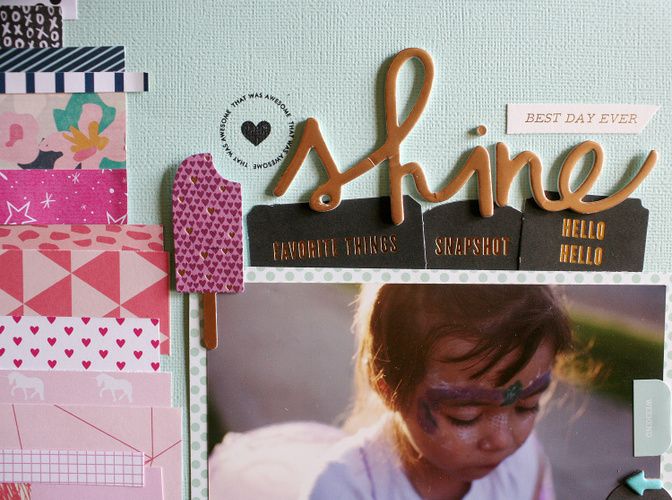
Next I tucked in those color theory die cut labels into the top of my photo. I decided to keep the bottom of my photo area mint colored so the layout wouldn't be too all over the place.
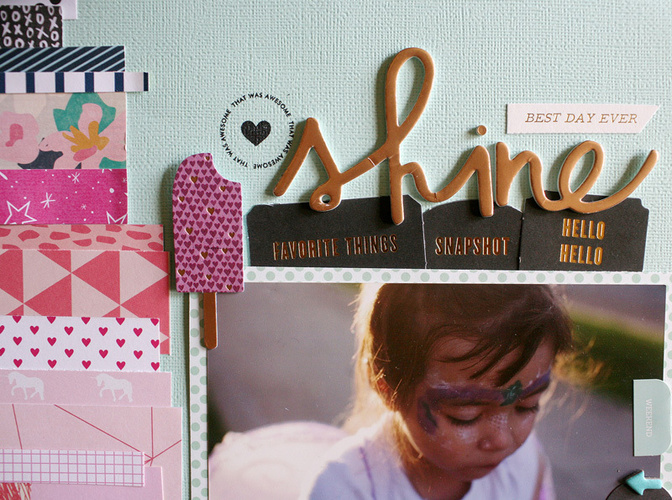
I added the shine sticker and stamped the heart image+text nearby. Adding some diecuts, flair and other stickers near my photo were my next steps.
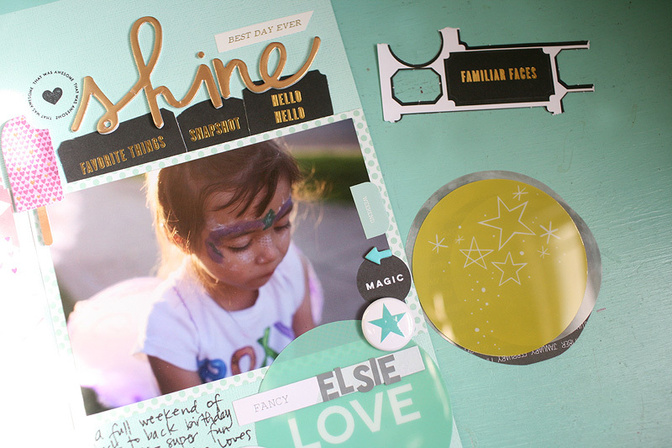
I handwrote my journaling and then I was done.
Far, Far, Away, Cirque,Lisse StreetHero Arts Dye Ink - Blackboard Mid-Tone; Project Life Black Journaling Pens, Set of 3; Foam Tab Circles; This to That Glue Runner


Comments
Sign in or sign up to comment.
8 comments
@jamiewaters - I love this! Thanks so much for ideas like this! I have so many SC kits sitting on my table and this is perfect for digging into my stash :)
Replies to jenjeb
Sign in or sign up to reply.
The paper strips remind me of a stack of presents. Perfect for a birthday layout.
Replies to kathyr
Sign in or sign up to reply.
Ohhh yes. I am scraplifting this with a swiftness.
Replies to goldenblind221
Sign in or sign up to reply.
This is a great layout. I usually don't like colored card stock but you totally make it work.
Replies to tealandtafetta
Sign in or sign up to reply.
Love this so much Jamie!!! xo
Replies to sideoats
Sign in or sign up to reply.
@Stefanie.Velten i usually have a hard time with colored cardstock too! :)
Replies to jamiewaters
Sign in or sign up to reply.
Love your layout!
Replies to janelparis
Sign in or sign up to reply.
Great stash busting, Jamie!
Replies to welobellie
Sign in or sign up to reply.