Tutorial: Using the Birthday Craft Die with Dana Fleckenstein
Tags:Hi everyone! Dana here with a fun die-cutting technique. Inlays are quite trendy right now and will show you a fun variation with the Happy Birthday To You craft die from the Brimfield kits. Instead of doing a regular inlay technique, however, we'll try to give a the impression of a "floating" inlay. Here's my step-by-step instruction to create your own:
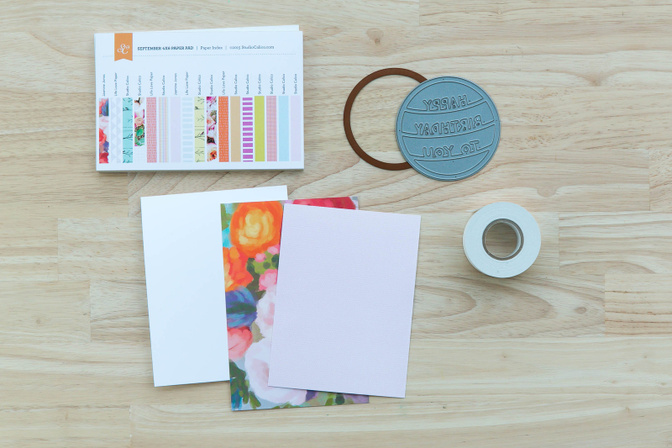
Step 1 - Gather your supplies! I used the 4x6 Brimfield Paper Padmetallic copper cardstock (not pictured)
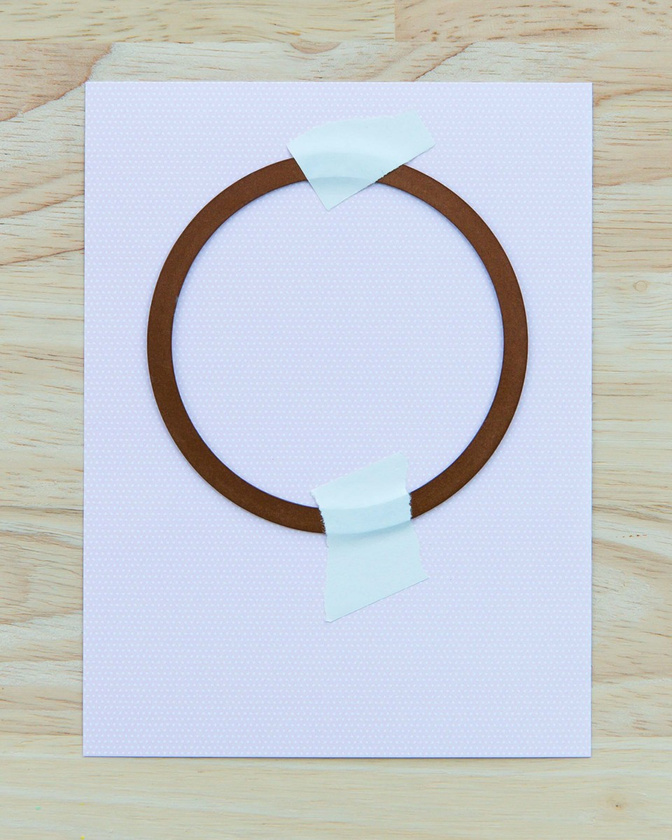
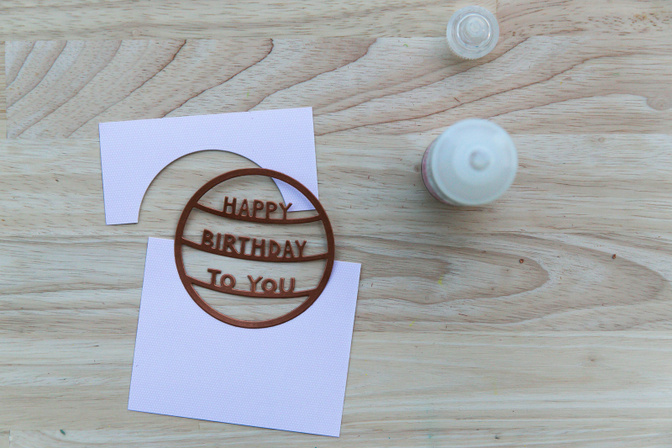
Step 2 - Tape the plain circle die down on a piece of patterned paper to hold it in place. Run this through your die-cutting machine to cut out the circle. The circle die must be slightly smaller than the birthday craft die so we can "seamlessly" layer it on top.
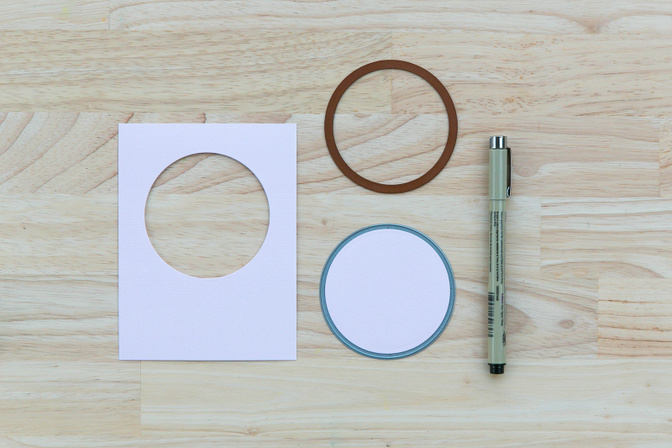
Step 3 - Use your paper trimmer to cut 1/8th of an inch from the die-cut paper.

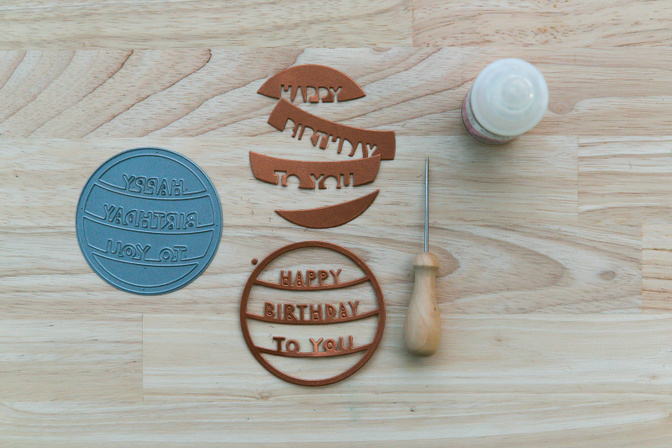
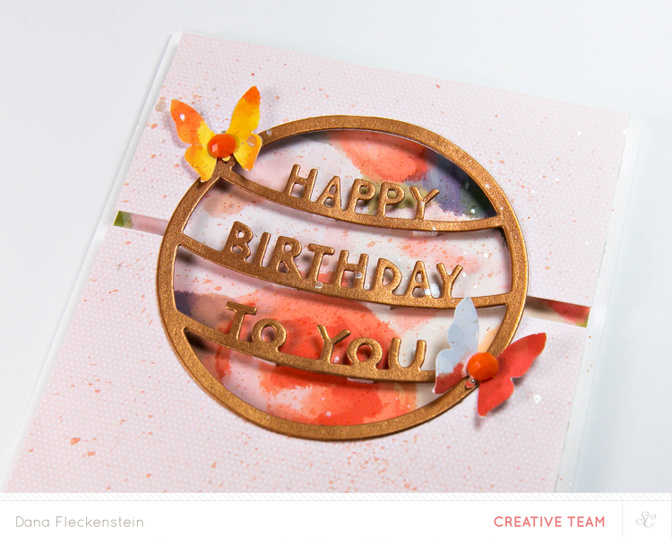
Step 4 - Cut the birthday die-cut from a thicker cardstock. I used a metallic copper cardstock from a previous card kit (The Underground).
Step 5 - Glue the birthday die cut on top of the patterned paper right along the circle frame.
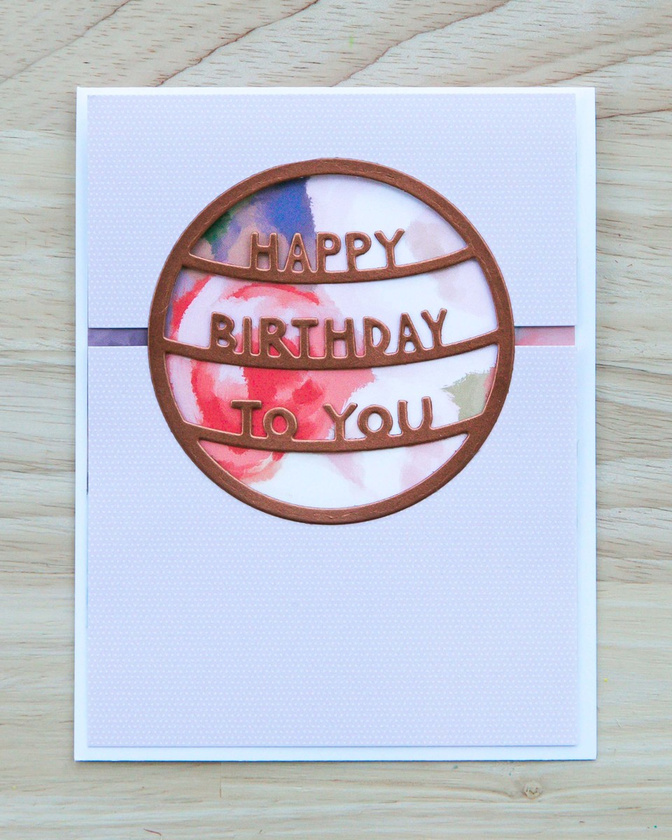
Step 6 - Find a contrasting patterned paper. This will go directly behind the floating die cut.
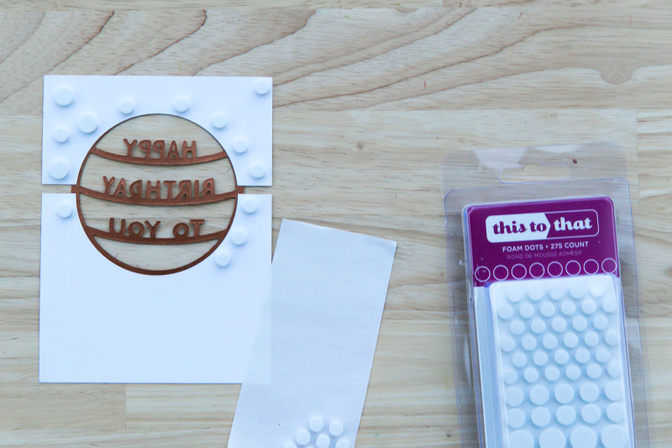
Step 7 - Put foam tab circles on the back of your upper card layer for more dimension and distinction between the layers. Don't forget to also add some foam adhesive behind the sentiment.
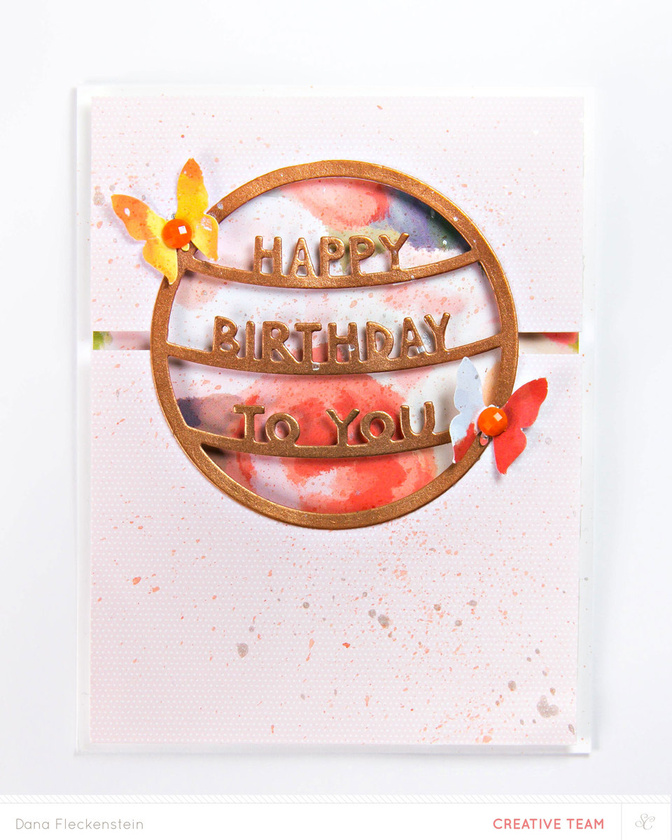
Step 8 - Decorate your card and glue it down on a card base.
I can't wait to experiment more with this technique and hope you also give this ago.
Supplies: Craft Die: Happy Birthday To You, Brimfield Paper Pad, Glossy Accents, This to That Foam Tab Circles, Color Theory Coral Bay Mini Mist, Studio Calico The Underground Card Kit,


Comments
Sign in or sign up to comment.
2 comments
Lovely Dana!
Replies to artgirlbev
Sign in or sign up to reply.
Wow, beautiful colors!
Replies to cmsplitt
Sign in or sign up to reply.