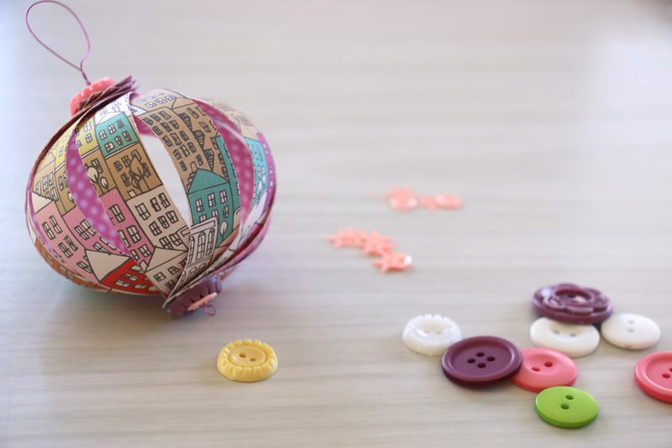
Quick and Simple Christmas Ornaments Tutorial | Natalie Elphinstone
Tags: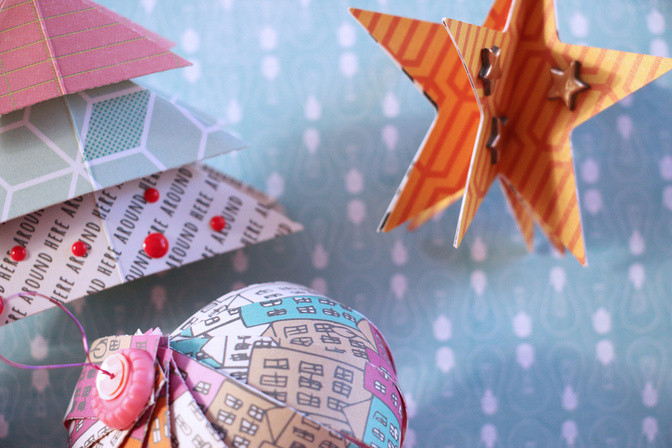
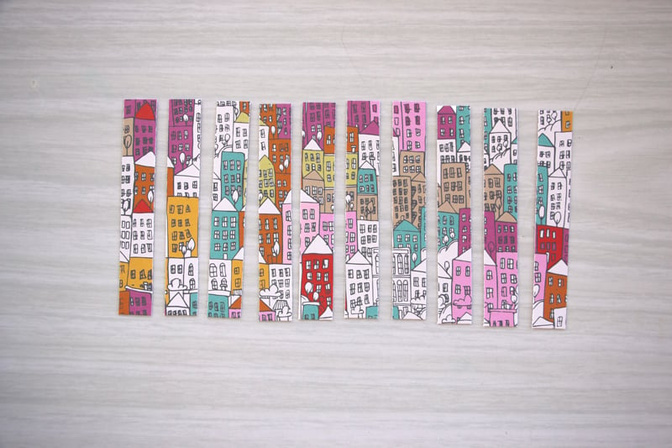
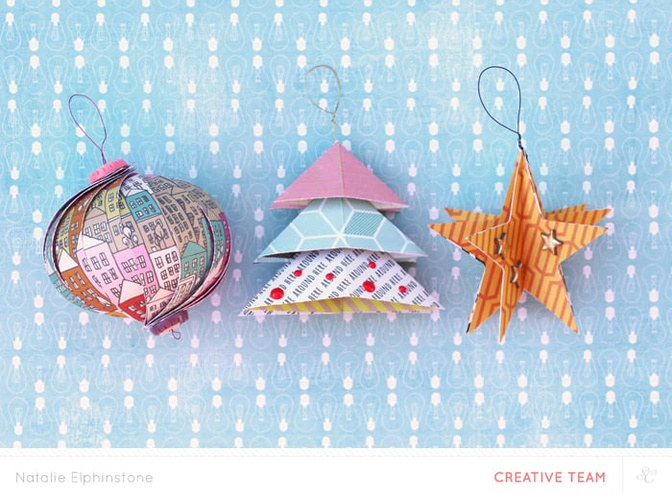
1. Cut a length of paper 4" by 5" and cut it into 0.5" strips so that you have 10 of them. You might cut more strips if you prefer your bauble to be 'fuller' or if you were making it bigger. If your patterned paper has an irregular design like the one I'm using then make sure to keep the strips in the right order so they line up at the end. Pierce a hole through the middle of each of the strips at both the top and the bottom.
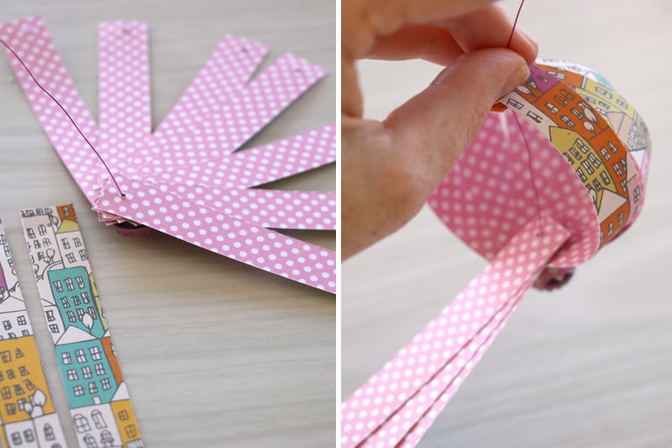
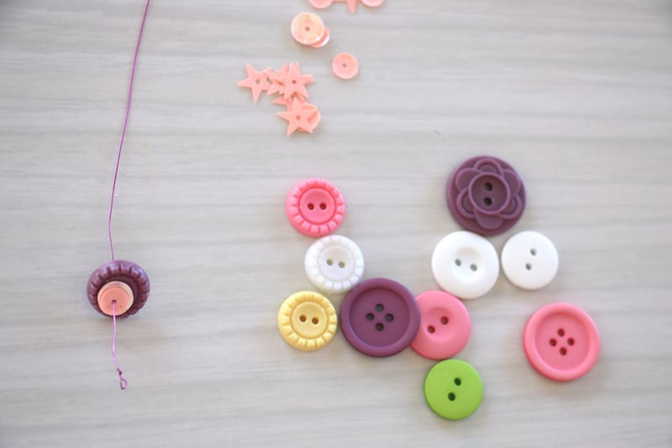 3. Next is to thread on each strip of paper onto the wire. First thread on all 10 at one end, and then loop each one around in order and thread on the top end.
4. Secure it all in place by popping on another button and a couple of sequins and then creating a larger loop in the wire so you can hang your bauble.
Christmas Tree
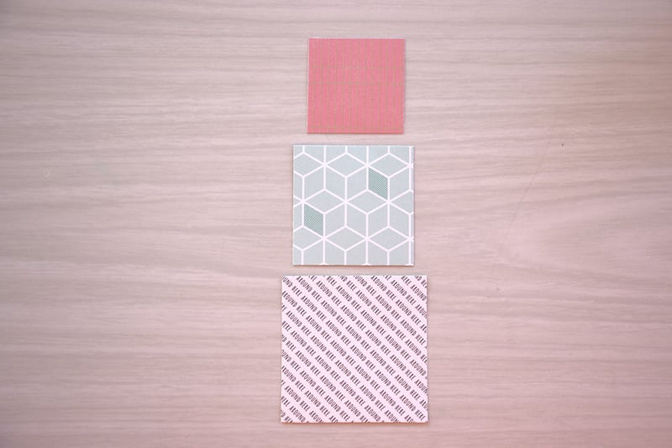
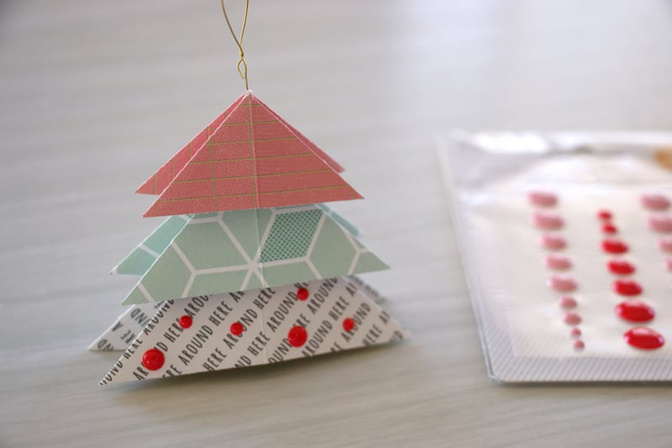
5. Cut three squares of patterned paper in progressively larger sizes. Mine are 2x2", 2.5x2.5" and 3x3" but this can be adjusted to any size you'd like.
6. Fold each square in all 4 directions to create creases, meaning from corner to corner to create triangles, and then from edge to edge to create rectangles. Unfold them again so they're relatively flat.
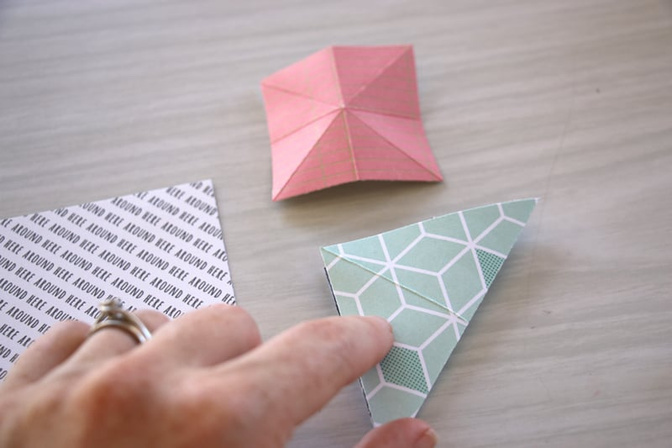 7. Next is manipulating them into triangle tree shapes by folding in opposite sides of the square. This is a bit difficult to explain in words, best to look at the photo!
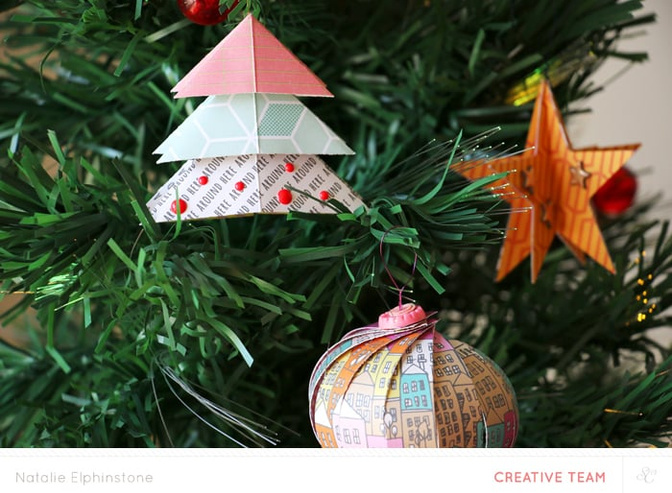
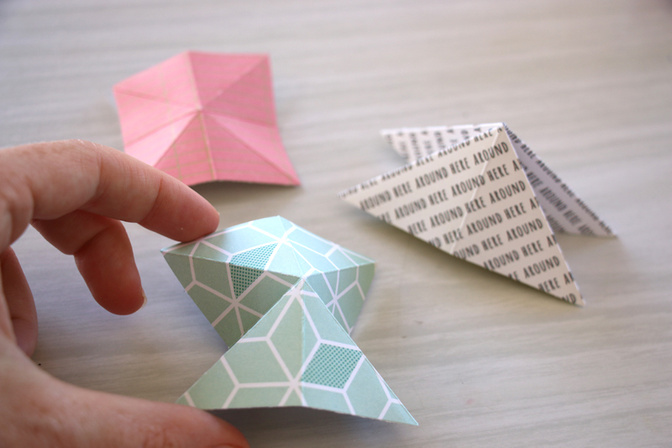 8. Stack each triangle on top of one another and glue together. Decorate it if you like with small embellishments such as enamel dots. Thread a wire loop through the top of the tree to hang it.
9. Punch or cut out 5 or 6 stars the same size from patterned paper.
 10. Fold each star in half lengthways.
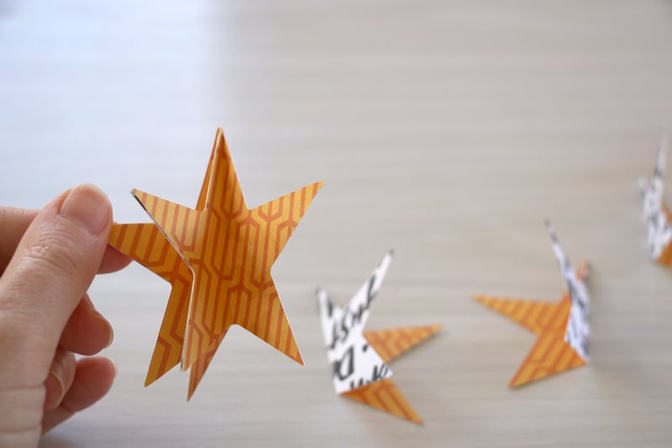
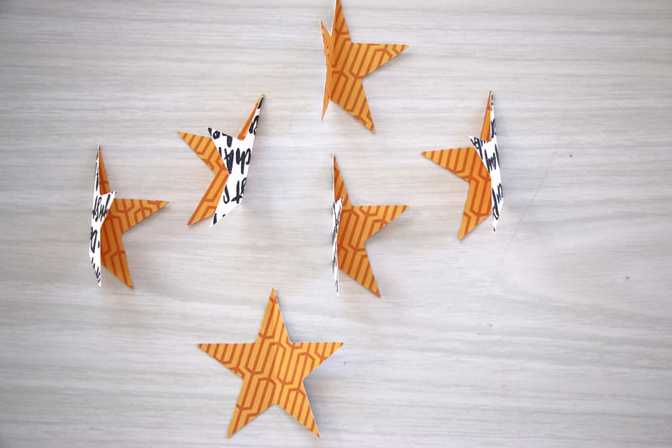 11. Glue one half of a star to the back of half of the next star, and continue doing this until all the stars are used.
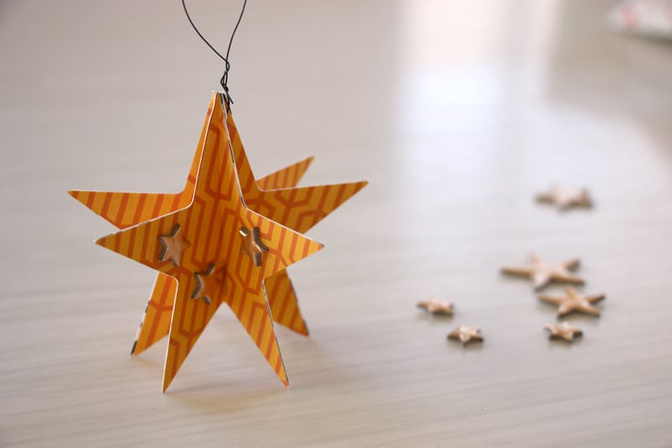
 12. Glue the last two remaining halves together so you've created a full circle. Decorate with small embellishments such as these chipboard stars and thread a wire loop through the top for hanging.
Supplies:
- Park Ave Scrapbook Kit (paper)
Star:
- Park Ave Scrapbook Kit (paper)
 Have you made any cool ornaments or other holiday projects this season? Share in the comments!


Comments
Sign in or sign up to comment.
13 comments
Thank you so much for this post! These ornaments are just so creative. My daughter was just asking last night to make some homemade ornaments!
Replies to kathyv
Sign in or sign up to reply.
Okay I love this sooo much! I totally want to make paper ornaments now!
Replies to toribissell
Sign in or sign up to reply.
Wow this is beautiful! I love that stars! Definitely wanna try!!!
Replies to all_that_scrapbooking
Sign in or sign up to reply.
OMG you cut into the skyscraper paper. GASP!
The ornaments are lovely Natalie, thank you for giving me some crafting ideas for my daughter and I this week.
Replies to supertoni
Sign in or sign up to reply.
just wonderful. great ideas.
Replies to Sarastella
Sign in or sign up to reply.
Ack, the bauble ornament is adorable!!!! I think a craft day with a certain 4 year old is in my future! :)
Replies to PunkyBear8210
Sign in or sign up to reply.
Thanks so much!! I love that you did a tutorial. Perfect timing for cold indoor days here. Going to attempt with the toddler this week :)
Replies to mugsie
Sign in or sign up to reply.
oh how pretty! would be a great project to try with kids!
Replies to AKTay
Sign in or sign up to reply.
These are so fabulous, Natalie! I'll be making some for sure!
g
Replies to heygillian
Sign in or sign up to reply.
Fabby project, Natalie!
Replies to pixnglue
Sign in or sign up to reply.
Done!! What a fun! And the stars look soooo wonderful!! Thank You!!
Replies to all_that_scrapbooking
Sign in or sign up to reply.
I have made a bunch of ornaments this year, paper mini envelopes and diy air dried clay which I painted gold, going to try your ones this week :)
Replies to Michelle0604
Sign in or sign up to reply.