Tutorial - Add Embossing to Craft Die Projects | Lisa Spangler
Tags:Lisse Street Card Main kitProject Life®layouts
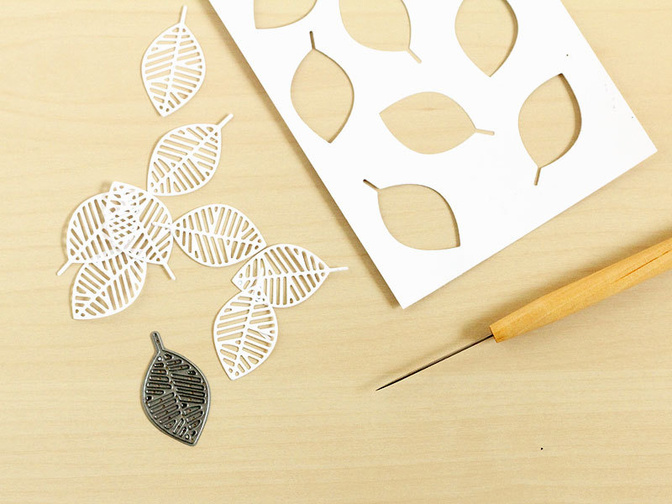
Since we're going to need a bunch of leaves, I decided to trim a piece of white cardstock to 4x5.25" and die cut the leaves from there. This way I'll be able to use this as another layer on my card. I like to use a book binding awl to pop the leaves out of the die. If you don't have one, you can use the end of a metal paper clip instead -- just unfold it. Speaking of equipment, I like to use a metal shim in my die cut "sandwich" when cutting delicate dies like this one -- I just place it under the cutting plate. If you don't have a metal shim then a sheet or 2 of cardstock also works great!
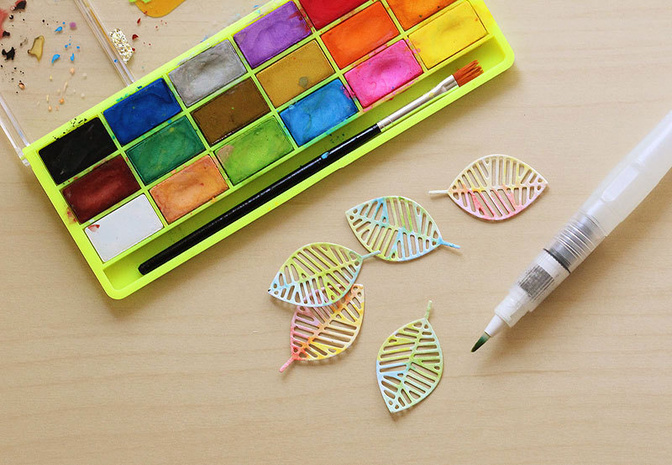
Next, grab some watercolors and color the leaves. This is a great way to add color to your die cuts. I used my trusty Mister Huey's watercolors.
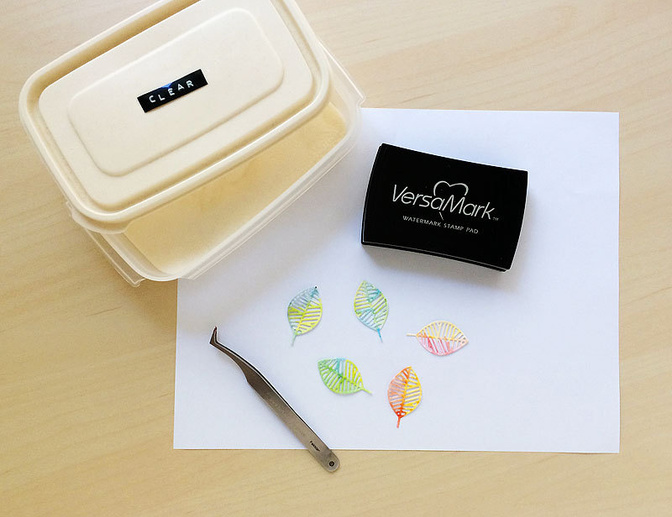
Now for the magic! Place a leaf colored side up on white scrap paper, then press a VersaMark ink pad (or other clear embossing ink pad) over top, then heat emboss with clear powder. This will make the colors really vibrant!
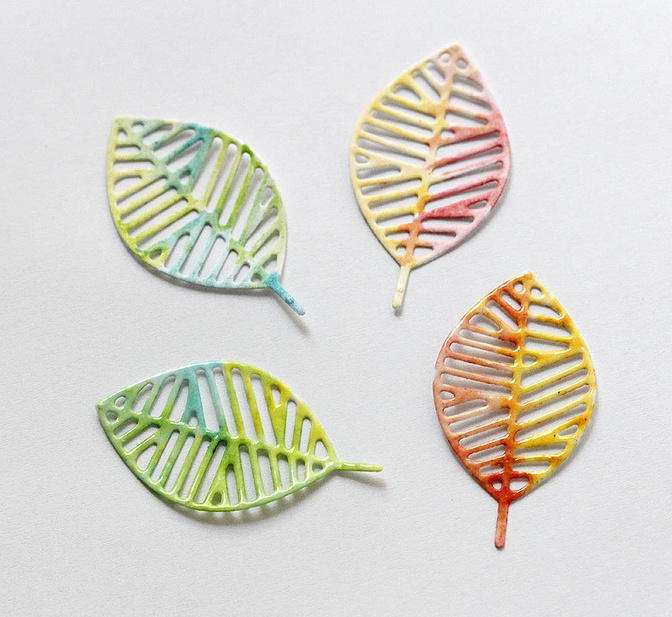
See how the bottom leaves are much more vibrant after they've been heat embossed with clear powder? Love that.
I use a ton of clear embossing powder, so I keep mine in a container. I also use a pair of tweezers to fish my die cuts out of the powder and hold it while heat embossing so it doesn't roam around my desk. You can also do this same trick with patterned paper -- and the embossing helps to add strength to thinner papers too. Bonus!
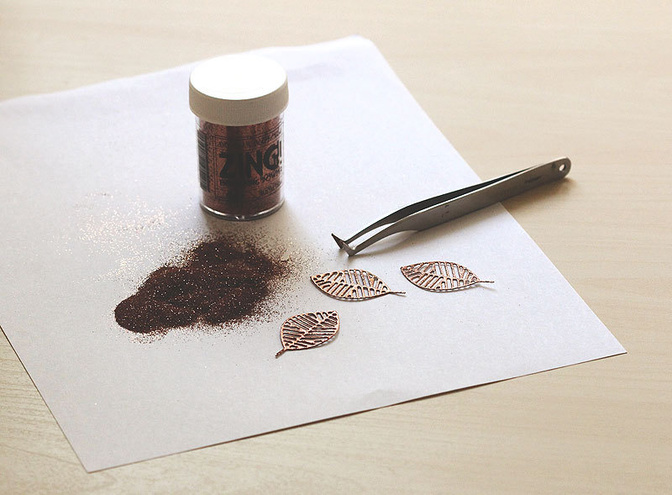
Now for another trick! You could cut a leaf out of glitter paper, but if you don't happen to have any on hand or you don't have the right color you can emboss a die cut for a glittery metallic look. So cool. Here I used copper glitter Zing embossing powder. I just can't seem to get enough of copper lately.
One trick here is to try and use an ink that's close to the color of your embossing powder. Or you could use colored paper and VersaMark ink again. You could also use sparkle embossing powder. The sky's the limit.
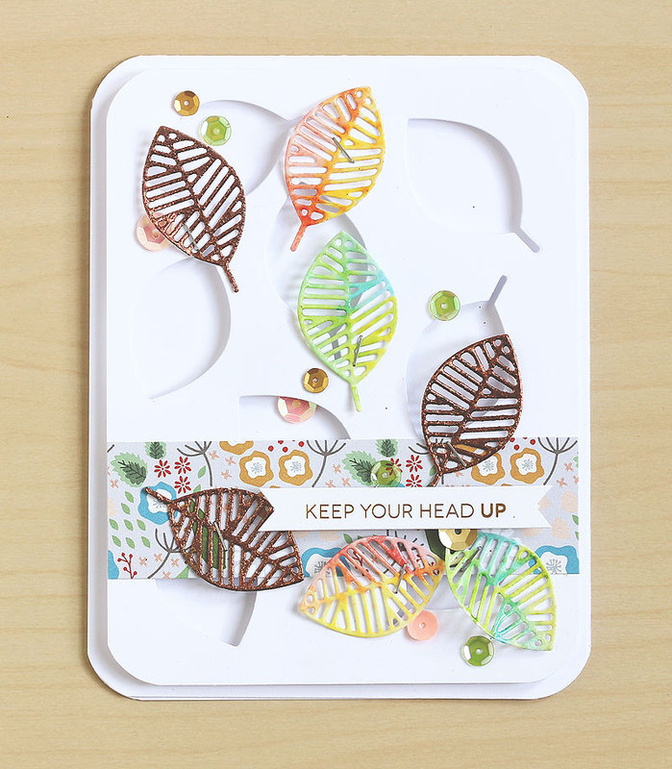
Now for my finished card! I used a tiny attacher to staple the leaves onto that piece that I die cut the leaves from, the popped the whole enchilada on to a white card base with foam dots. Love all the extra dimension, don't you?
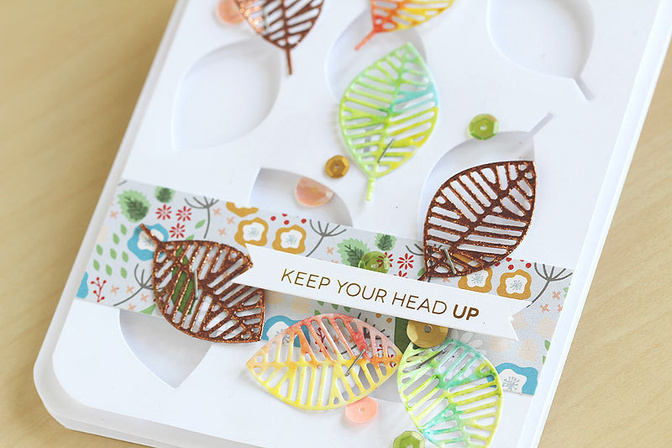
To wrap it up, I just added some sequins in coordinating colors. The tiny ones are included in the Lisse Street Card main, aren't they cute?
Thanks so much for joining me today, and I hope you give these techniques a try.
xo
Supplies: Lisse Street Card MainCopper Zing glitter embossing powderColor Theory 24 Karat sequinsColor Theory Coral Bay sequinsColor Theory Yes Peas sequinsTiny attacherTiny attacher refillsVersaMark ink


Comments
Sign in or sign up to comment.
12 comments
I want to buy this leaves die cut, will you sell it separetly ?
Replies to sinushawa
Sign in or sign up to reply.
You are awesome, Lisa! This is such an awesome card!!
Replies to photochic17
Sign in or sign up to reply.
Thanks so much @photochic17! xo
Replies to sideoats
Sign in or sign up to reply.
love it!!! :)
Replies to EyoungLee
Sign in or sign up to reply.
Ooooh so many great tips in this Lisa! I definitely am going to try that clear embossing tip!
Replies to Brinkleyboy
Sign in or sign up to reply.
These leaves are so gorgeous! Will definitely be trying this technique:)
Replies to Leanne1965
Sign in or sign up to reply.
Love how you used the 'waste' to give it dimension! Brilliant.
Replies to pinksoup
Sign in or sign up to reply.
love it. so many good tips.
Replies to josmary
Sign in or sign up to reply.
Loving those leaves!
Replies to DinCA
Sign in or sign up to reply.
Love, love those leaves! What a great technique.
Replies to Normajean
Sign in or sign up to reply.
Love this card TONS, Lisa! What a fab way to use the leaf die!
Replies to donnamikasa
Sign in or sign up to reply.
Lisa, this card is so beautiful! Thank you for sharing your tips and techniques!
Replies to CarlaM
Sign in or sign up to reply.