Tutorial - Start to Finish Layout with Galileo kits + Grid Design | Marcy Penner
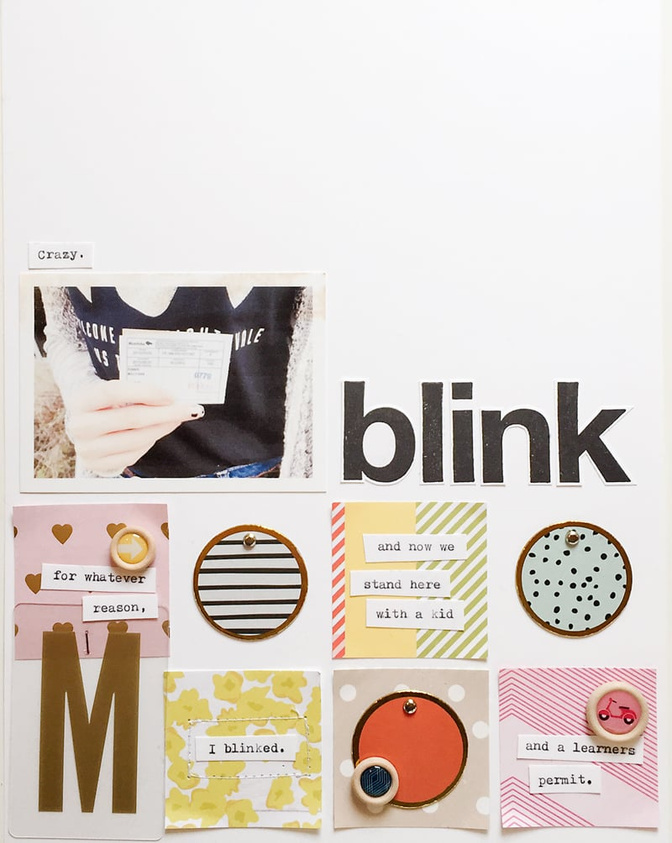
Tags:In this tutorial I wanted to walk you through a layout that features an embellished grid on the lower half.
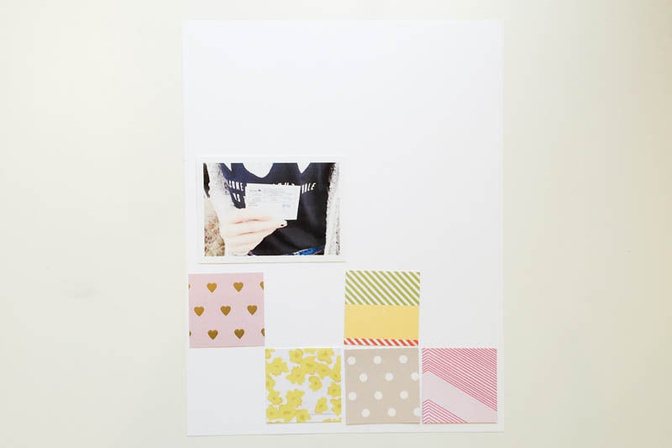
To start I decided on my size (8.5 x 11) and that I wanted a grid on the lower portion of the page. Initially I thought I might make all my "squares" out of the Dear Lizzy tags from Saturn
I went through the JupiterSaturn
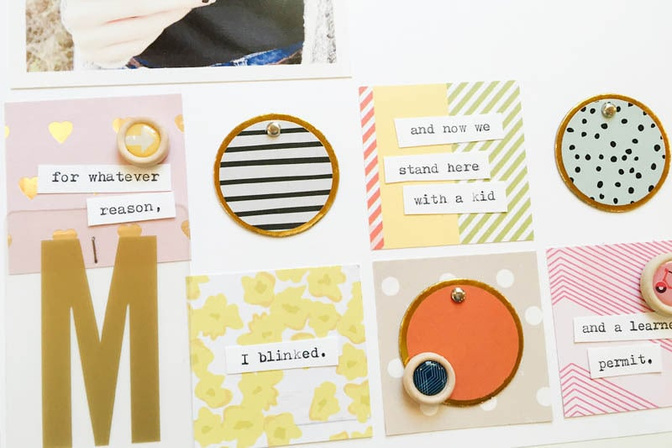
I laid out my papers along the bottom of my page and left a few random spots empty.
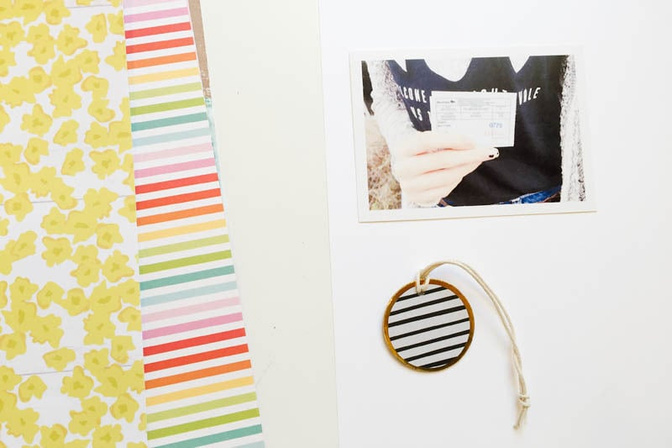
I chose a few of the Dear Lizzy tags to fill in the spaces and swapped one out for an acrylic letter from the Saturn
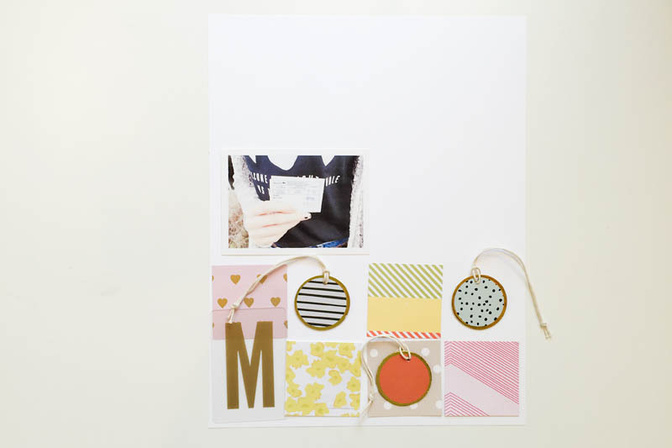
I kept the patterned tags in the white spaces and added a solid tag on a patterned paper. This page was going to feature quite a few papers so I wanted to keep them all little organized and not have them compete against each other if I could help it.
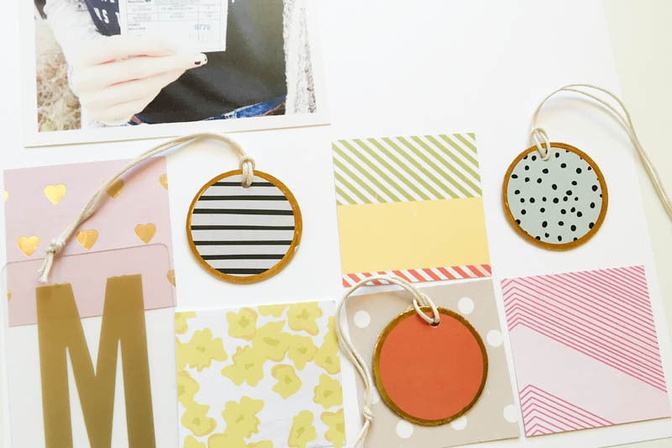
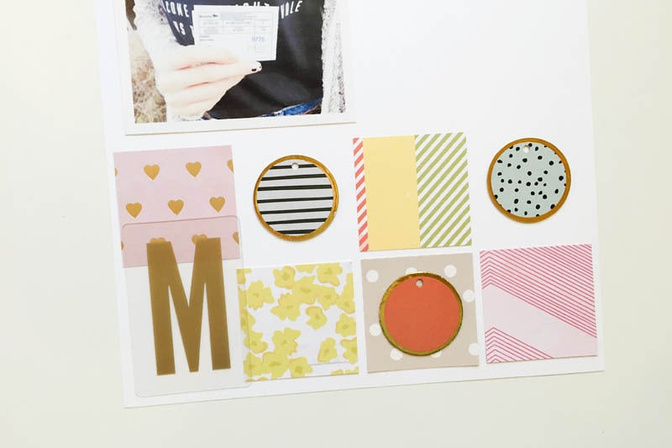
The strings on the tags were fighting with the clean lines of the squares so I removed those entirely.
Much better.
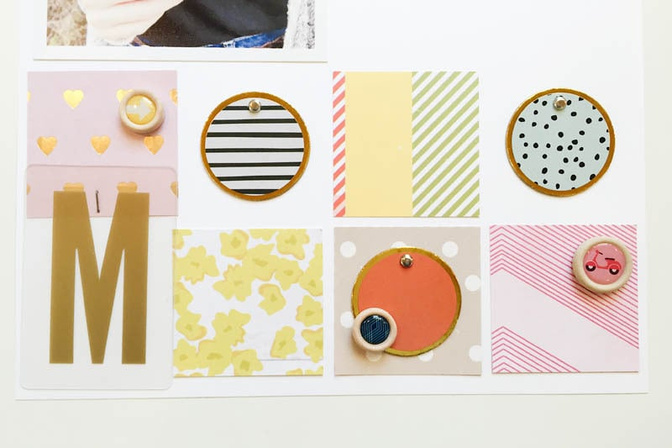
To play off the circles a little more I added some wooden buttons from Jupiter
The first button is at the far left and has an arrow pointing right… leading your eye in the same direction that it would go when you read the soon-to-come journaling.
The second button layers slightly over the tag and the patterned paper.
The third button reflects the theme of my page… a daughter with a learner's permit.
At this point I also added some small mini brads to the tags and stapled on my letter.
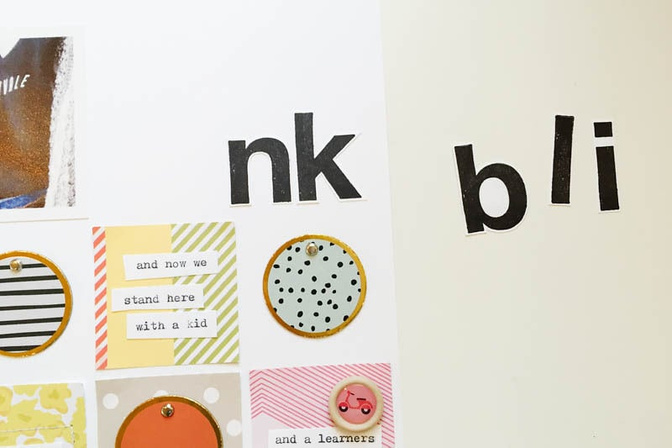
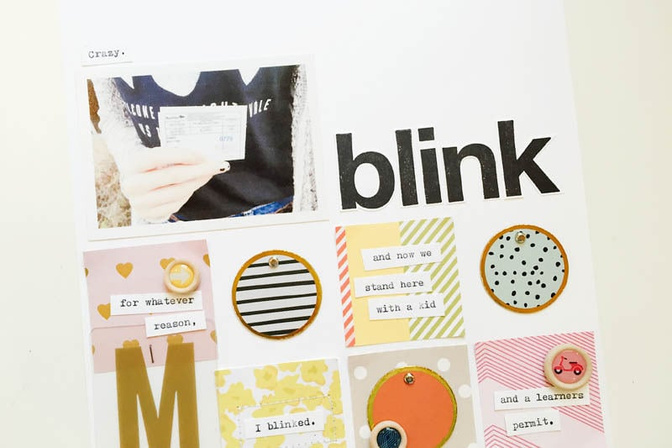
I typed out my journaling in my typewriter and made sure to leave room to trim them out.
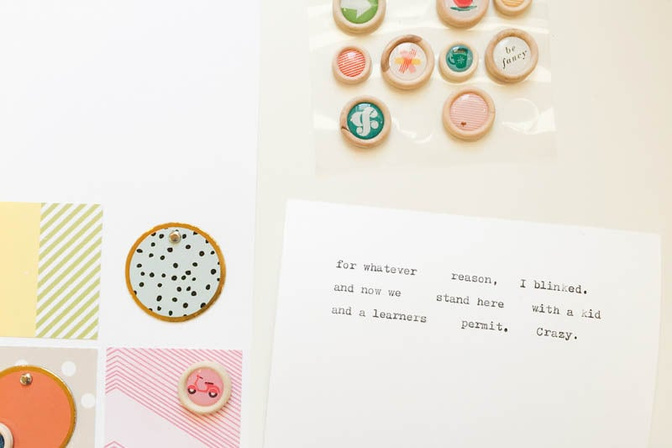
I played with their arrangement until I was happy with them and glued them onto the patterned paper squares.
I LOVE those Max
I didn't want to chance messing anything up on my page so I stamped on white cardstock and trimmed them out with my scissors. This let me play around with their spacing before committing.
Finally, I added a tiny bit of stitching and it was done!
I hope you're encouraged to try a grid on your pages. And try mixing in other elements into them as well… other shapes, embellishments… you name it.
Happy scrapping!

Supply List: patterned paper, tags, transparent letters - Saturn; patterned paper, wooden buttons - Jupiter; stamps - Max; ink - Versafine; tiny attacher; mini brads


Comments
Sign in or sign up to comment.
4 comments
I love how you typed your journaling and placed it around your grid. Great idea!
Replies to 1Djc
Sign in or sign up to reply.
I can relate. and this is so perfect. :)
Replies to jamiewaters
Sign in or sign up to reply.
My son starts driver's ed in September. Sigh. I feel you momma. Love the layout!
Replies to supertoni
Sign in or sign up to reply.
So awesome!!
:)
Replies to kgriffin
Sign in or sign up to reply.