Tutorial: Wink Wink Project Life® Spread with Geralyn Sy
Tags:Hi everyone, I have a Project Life® spread to share with you today! I wanted to walk you through my process and show you how I had fun embellishing my cards with the Wink Wink kit and add-ons to create a simple but cohesive spread. Let’s get started.
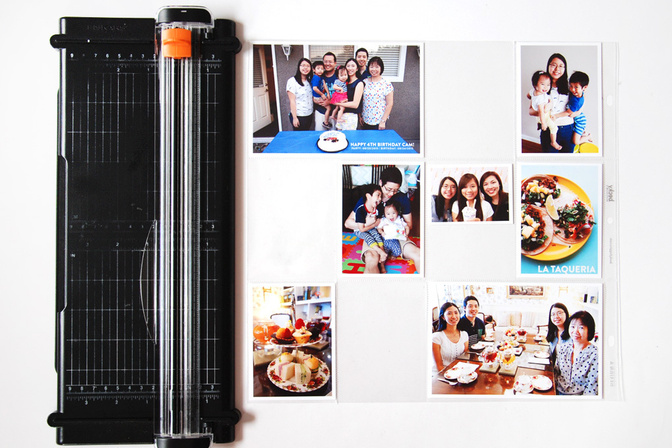
As always, I started by printing out my photos at home and laying them out on my 12x12 page protector. I’m using an altered Design A page protector which has two 4x6 slots and eight 3x4 slots.
My next step is choosing my Project Life cards. I wanted to pick some bright, colorful cards that would coordinate with my photos. 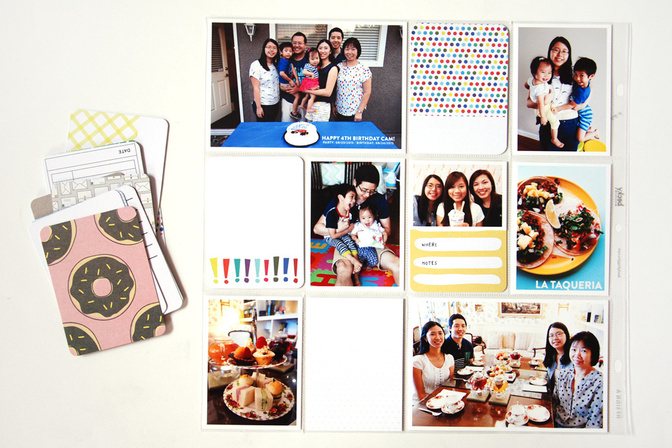
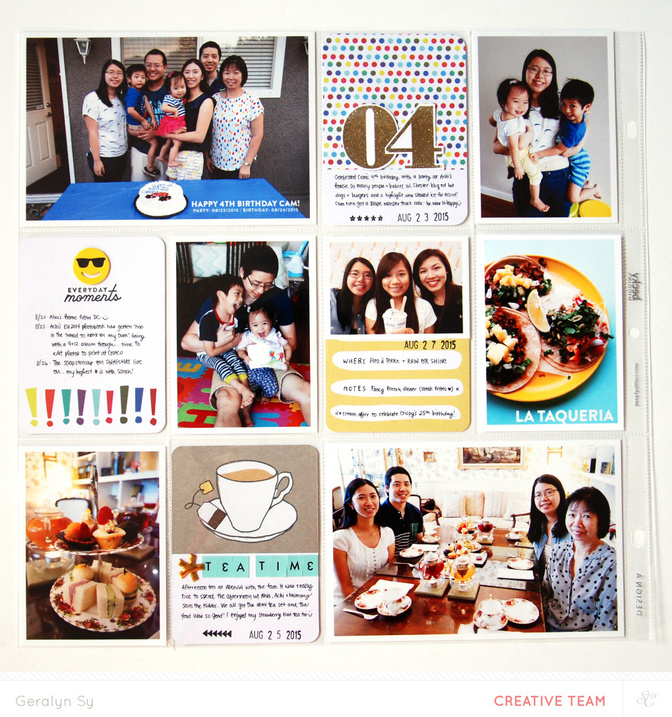
I wanted to highlight the number 4 on one of my cards using the 6x8 Jack number stamp set because it was my nephew’s birthday. I decided to give it a bit of shine by heat embossing the numbers and using gold glitter Zing. 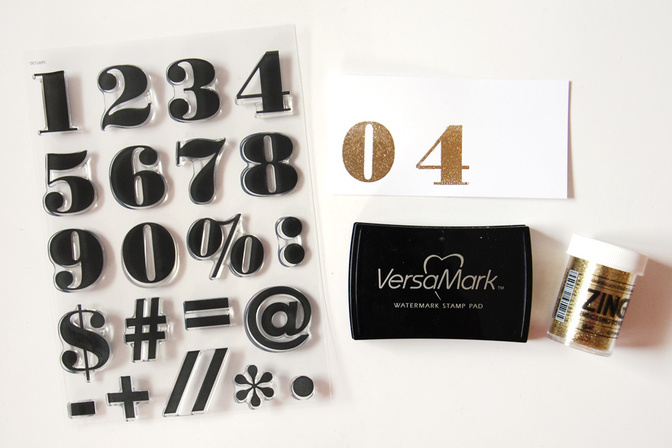
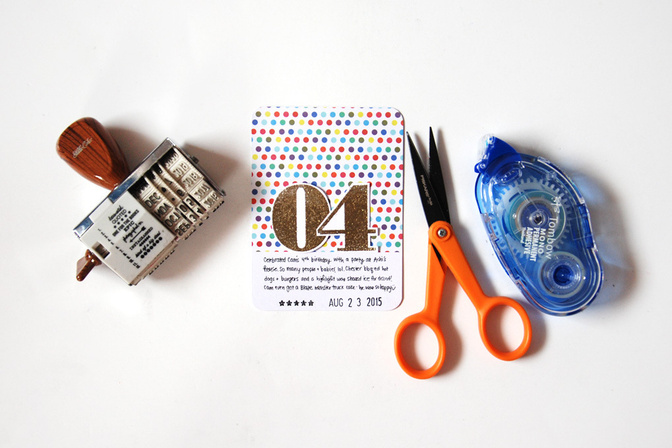
I fussy cut around the numbers and used them as embellishments on one of my cards. It simply jotted down some notes and added the date to finish this card.
For my next card, I pulled out my BigShot machine so I could cut out some emojis with the new emojis metal craft dies. 
I used the sunglasses emoji on the fun exclamation marks card, and added a little phrase underneath from my Good Times stamp set. I wanted to create a simple card where I could write some highlights that were happening in life. 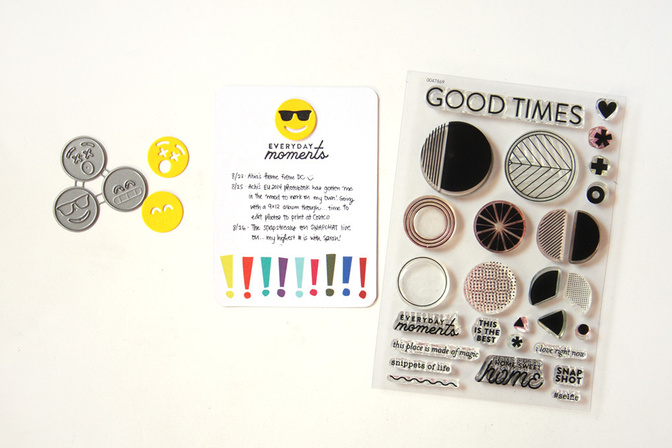
I love finding cards that are the perfect match for my spread! I used this tea cup card to document an afternoon tea event, and I simply used some alpha stickers to spell out ‘tea time’. I had run out of ‘E’s because I had used these alphas on a different project already, so I replaced the ‘E’s in my title with upside down number ‘3’s. 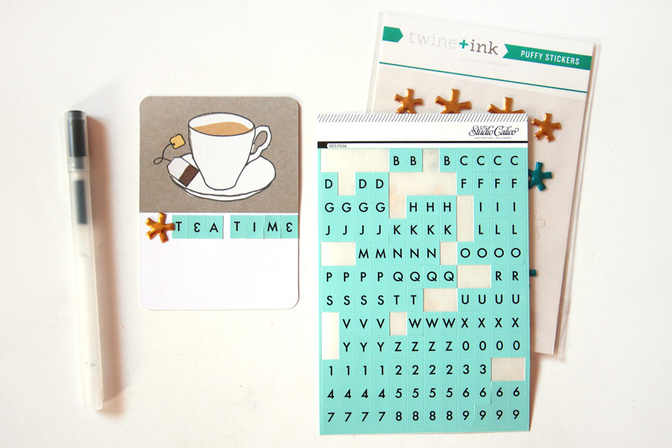
My final step is added journaling and the dates to the rest of the cards. Easy peasy. 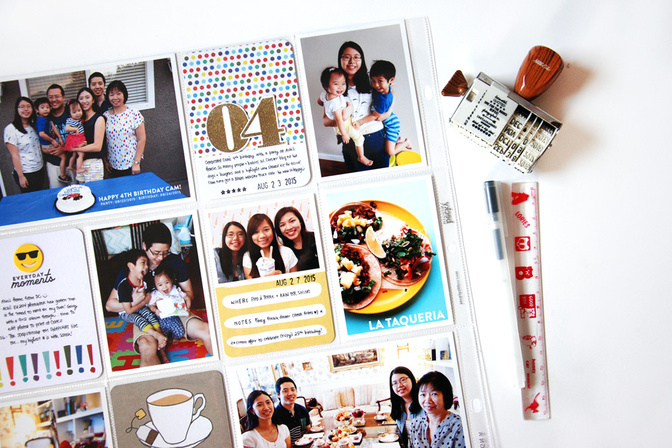
Here’s my completed spread. Lots of pops of color and some fun embellishing as well. Hope you enjoyed seeing my process! Have a great day!

Supplies: Wink Wink Project Life® Kit – cards; Wink Wink scrapbook kit – puffy sticker; BRB add-on – alphas; dies – Emojis die; stamps – Good Times by In a Creative Bubble; ink – Versafine; embossing powder - American Crafts; pen - Muji


Comments
Sign in or sign up to comment.
3 comments
Love this PL layout and thanks for the tutorial @qingmei!
Replies to terriblygreat
Sign in or sign up to reply.
Love it! You make it look so easy! =)
Replies to jendcnguyen
Sign in or sign up to reply.
Love the 04 embellishment you made!! Great layout :)
Replies to carolinet
Sign in or sign up to reply.