Vintage Post | Tutorial with Susan
Tags:It’s Studio Calico’s 9th birthday! To celebrate, we’ve dug into the archives to find some vintage inspiration. Please enjoy this post from Susan Weinroth, which was originally shared on April 19, 2011.
Hey everyone, Susan here today with a new tutorial on photo collages. I frequently take (quite) a few photos at an event, or in one outing, and then end up with a few faves that I want to combine together in a collage manner on a single 4" x 6" print. This servves multiple purposes—it's cost effective for me to print as a 4" x 6", it takes up less space when I'm loading photos to albums for my boys, and it also makes a great base for a multi-photo scrapbooking page. This is my process (as done in PSE 7.0):
Start by selecting three images you'd like to collage.
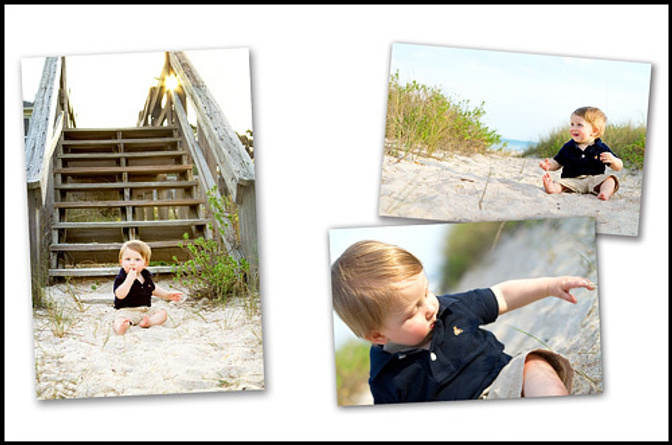
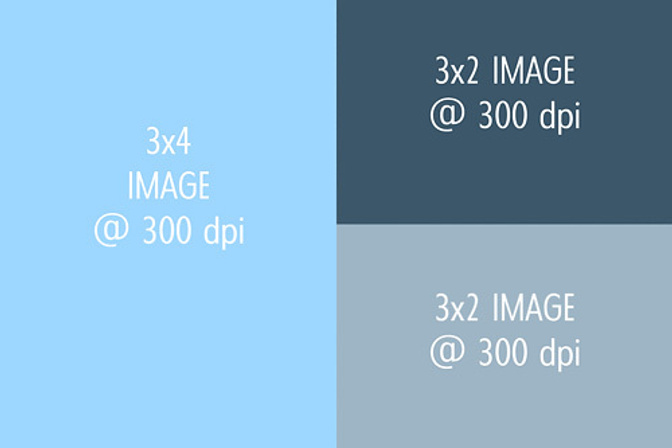
Next decide what layout format best fits the images you selected - for these three images I decided to go with this layout.
Open a new file in PSE - FILE > NEW > BLANK FILE
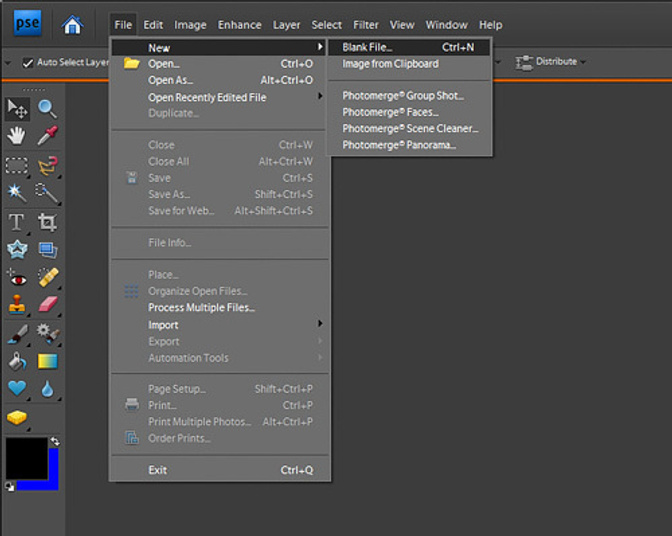
Fill in the parameters of your new file. You will want 6 INCHES BY 4 INCHES (or the reverse) AT 300 DPI with a WHITE BACKGROUND.

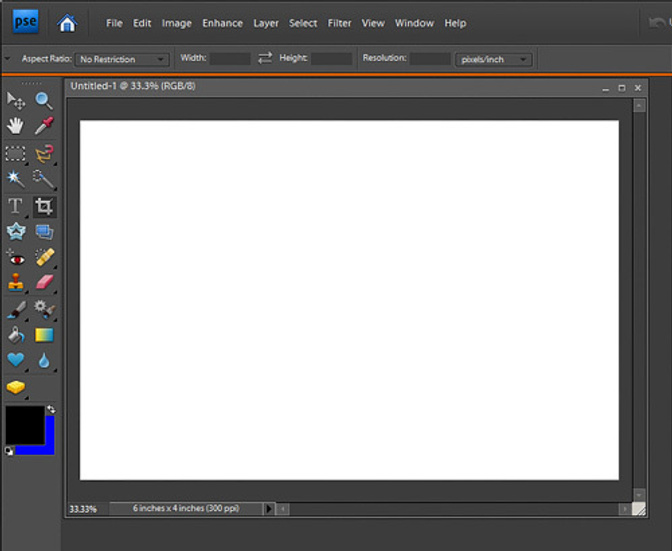
You will see your new file pop up on your screen.
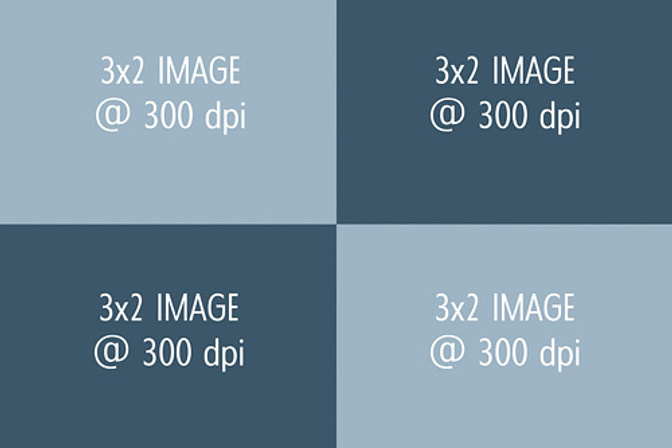
Next open the first image that you'd like to add to your collage (aka new file). You are going to want to crop your image to fit the space you designated for it in your collage layout format (above). In this instance the first photo is going to go in the upper right corner and be 3x2 inches. THE KEY HERE is to make sure that you are cropping your image with the same parameters as you set your new file up with. CLICK the CROP BUTTON in your left hand sidebar and then FILL IN THE CROP PARAMETERS IN THE UPPER TOOLBAR TO 3 inches by 2 inches at 300 DPI. Crop your image and then click the green check mark to apply the crop.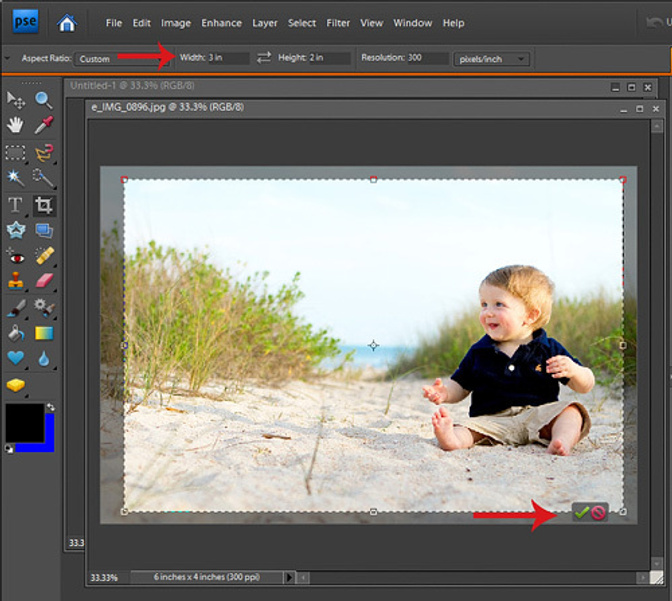
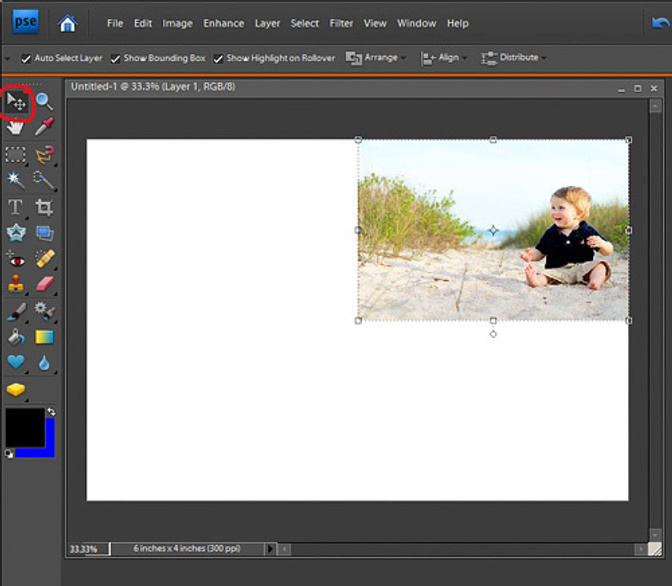
Copy and paste your cropped image onto your new file. Shortcuts to do this are CONTROL-A (select all on your cropped image) - then CONTROL-C (copy) - then click over to your new image and CONTROL-V (paste). Use the move tool (I circled it in red) to move your image to the upper right of your new file.
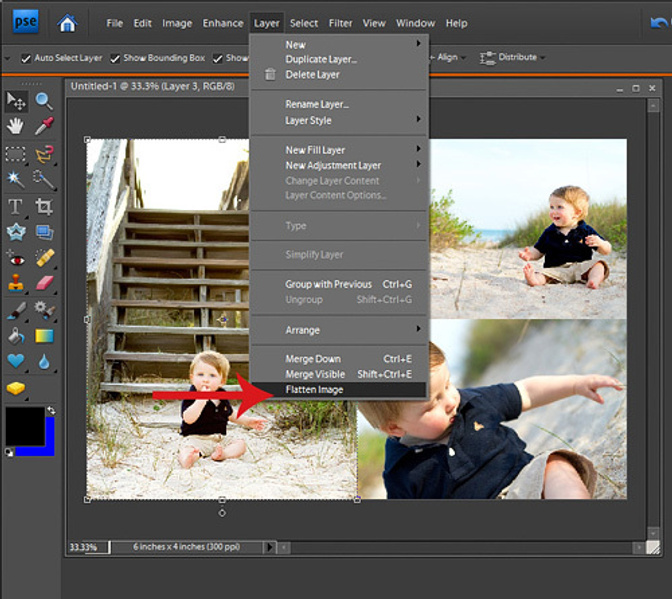
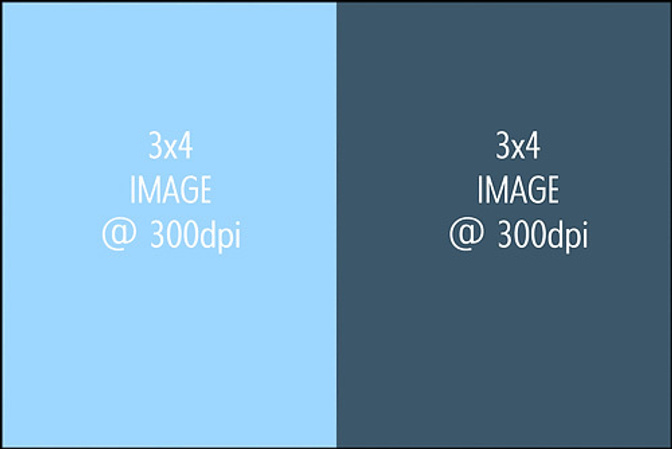
Repeat this process for cropping then copying and pasting and moving for the 2nd and 3rd image - being sure to change the crop parameters for the 3rd image to 3x4 inches at 300 DPI. Once all three images are arranged onto your new file, you will need to flatten all of these layers - with LAYERS > FLATTEN IMAGE.
Be sure to save your new photo collage once you are finished!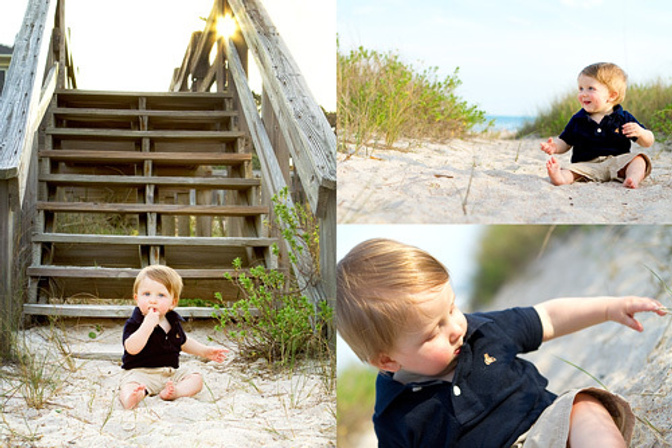
Here are ideas for two other collage layout formats that you may want to try - but you can easily design your own as well! Have fun with it and Enjoy!


Comments
Sign in or sign up to comment.
0 comments
No comments yet — be the first!