Video | Using the Documenter Homestead Kit with Pam Baldwin
Tags:Hi, friends! This is Pam, and I'm so happy to be here with you today, sharing a video of how I used this month's "Homestead" Documenter Kit to create a page for my album. The week I'm documenting was one of those weeks where I wound up with waaaay too many photos after attending a Halloween event with my family. It's important for me to document the everyday moments of life as well as the special adventures. So with that in mind, my plan for this page was to create a documenter page that captures a full week with just one picture per day, knowing that I'll likely create a scrapbook layout (or two) for the opposite side of the spread to capture the "big event." I keep a running chronological album that includes both my Project Life® spreads and scrapbook layouts with an assortment of sizes, and I love the mix of layers it creates.
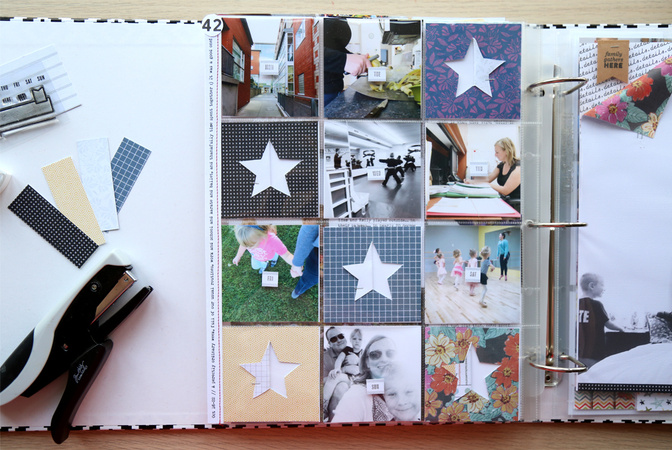
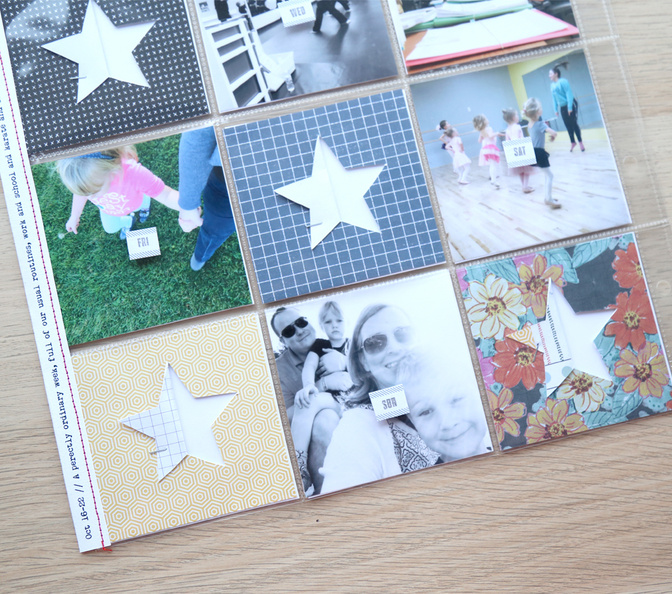
I chose to use a 9" x 12" page with as many pockets as possible (12 3" x 3" squares). This gave me enough space to include all seven pictures, plus five more pockets to play. I used the documenter stamp set to add a little tab for each day of the week directly onto the photos (raised up with some foam dots, because I like dimension and don't worry too much about bulk).
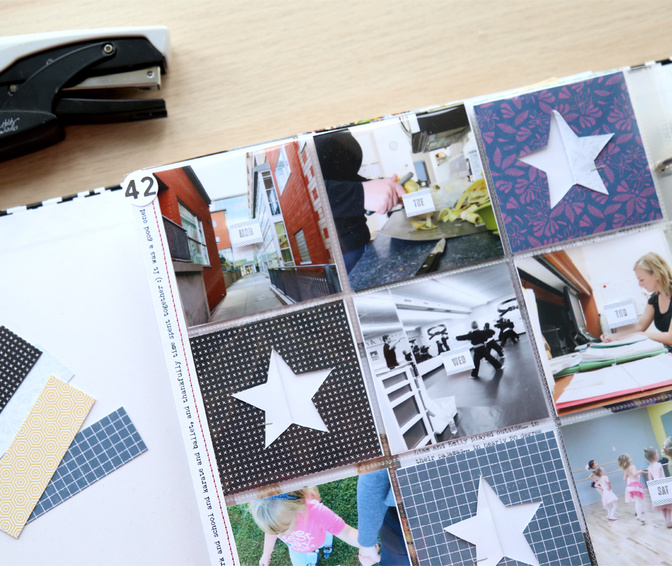
Normally, I probably would have filled those extra five pockets with journaling, but I wanted to switch things up and play with paper for this page. I chose a few journaling cards that I still had from my Documenter Kit (not many left this month—this might be the first kit I actually "kill"). Sometimes the hardest part is trying to decide which side of the card I want to use. My solution was to use a craft knife to cut HALF of a simple shape (I used a star punch and some extra cardstock to create a template to work with), and fold it over, revealing the pattern on the back side of the card. Love how that turned out!! I used a tiny attacher to secure the shape in place.
The words: Including journaling on my pages is one of the most important parts for me. That doesn't mean I have to go to great lengths to include lots of them on EVERY page, but having something there to add a bit of context and at the very least the date, is a must. I printed my journaling on a strip of cardstock, folded it over, and stitched it directly to the outer edge of the page protector. I really like how this turned out also. (Friendly note: make sure all your pockets are filled, front and back, before sewing your journaling strip in place. You might not be able to get into your pockets so easily after you've finished.) Check out the video below to see this whole project come together!
Tips & Tricks:
- Use a common element/embellishment on all of the photos in your spread (I created days of the week tabs for mine) to create a cohesive page.
- Can't decide what side of your journaling card to use? Use both! Other really simple and effective shapes might be circles, hearts, diamonds, Christmas trees(!!). Have fun with it!
- Consider alternate ways to include the journaling in your documenter spreads, like adding it to the outside of your page protector.
Thank you so much for stopping by today! Please feel free to ask any questions in the comments below. I can't wait to see what you make. :)


Comments
Sign in or sign up to comment.
0 comments
No comments yet — be the first!