Using the TV Stamp Set with Barbara Picinich
Tags:Hello, everyone! Barbara here to share a little bit more about my February Watch List Traveler's Notebook project. The minute I opened my box and saw this TV stamp set, I knew that I had to put it to use. I don’t know if it’s the cold, rainy weather but it feels like, this winter, all I’ve wanted to do is get cozy on the couch and watch some of my favorite shows. I loved the idea behind this stamp set and I knew that it would make a super fun spread in my Traveler's Notebook.
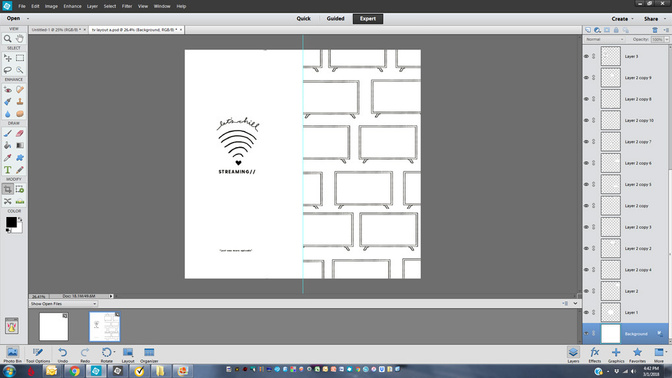
The first step in planning out this spread was to determine how many of the little TVs I could fit on one side of the spread. I knew I wanted them to be varied in position and I made sure to have some hang over the edge. To plan out my layout, I used Photoshop Elements and the digital files of the stamp set to plot out how it would look before I started my stamping. I'm a big pre-planner—especially so when working in my Traveler's Notebooks because it's a lot more unforgiving in that medium, especially if you're stamping. I also needed to determine how big to print out my little photos. I ended up cropping my photos to 1.8125" x .9375" and I printed all of my images on to one sheet of 8.5" x 11" photo paper with room to spare.
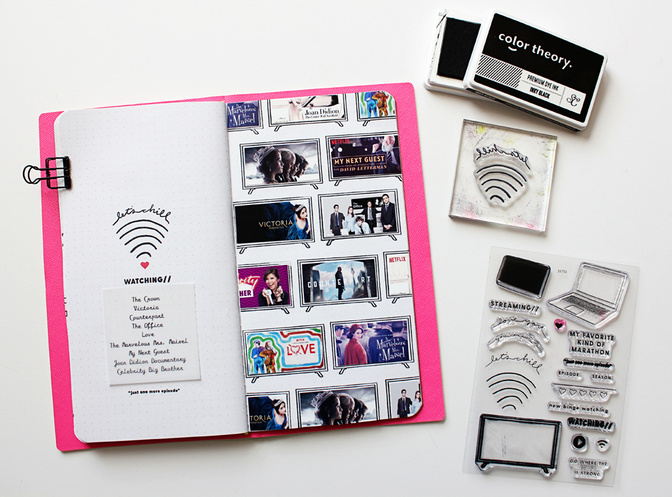
Once I knew how many TVs I could fit, I planned out how I wanted the stamping to look on the left side of the spread. I left space for the list of TV shows that I was currently watching, and since I couldn't print or type on the page of my notebook, I opted to print that list out on vellum and attach it in the space I had allotted.
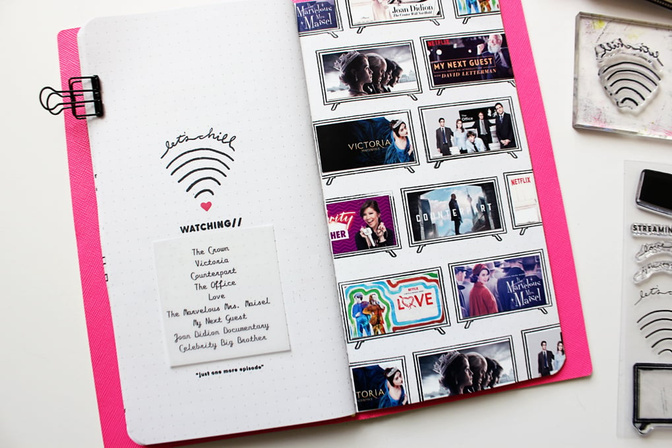
Writing up my list of shows to include was super fun. Right now, we're rewatching The Office with our daughter, so that one had to be included. I'm also watching a lot of documentaries on Netflix, so I included my current fave on the list. I'm a huge fan of period dramas so, of course, two made the list. And Netflix is just killing it right now with original content, so I had a few of their shows to include, too. is our favorite show right now, so that made the coveted center spot on my spread. It was fun planning out where each photo was going to go and I did try to make sure everything was evenly spread out. I really like the images that are cut off on the edge; something about tiny little photos hanging off the edge of a page makes me really happy.
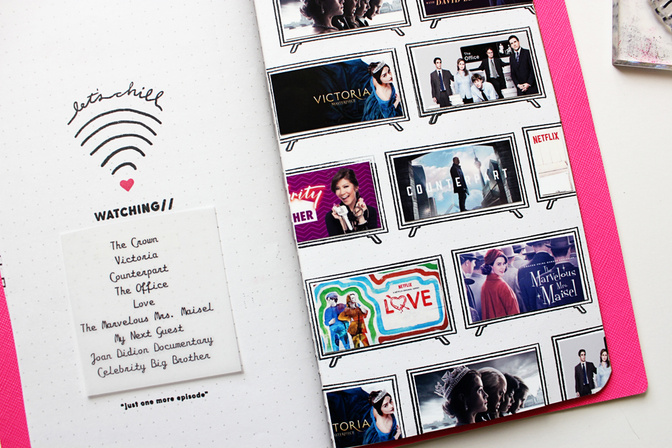
Once all of the stamping was done and I had added all the photos, I started stamping on the left side. This ended up being super simple but the stamps were so graphically cool it really didn't need a lot. I just loved the curved text that follows the streaming lines—genius! I also love the pop of red of the tiny red heart. I think it plays with the red in some of the photos really well.
I hope this inspires you to create a watch-list layout. While the spread did take a little bit of time to plan, once that that was done, it was a really quick one to put together. I can see this type of layout working in planners, full-size layouts, and even Documenter spreads. It was such a fun project to work on and I think you'll love it, too.


Comments
Sign in or sign up to comment.
0 comments
No comments yet — be the first!