Using the Lost River Planner Kit with Rianne Alonte
Tags:Hi, everyone! I’m here with you today to share a planner project using the Lost River kit and September add-on stamp sets.
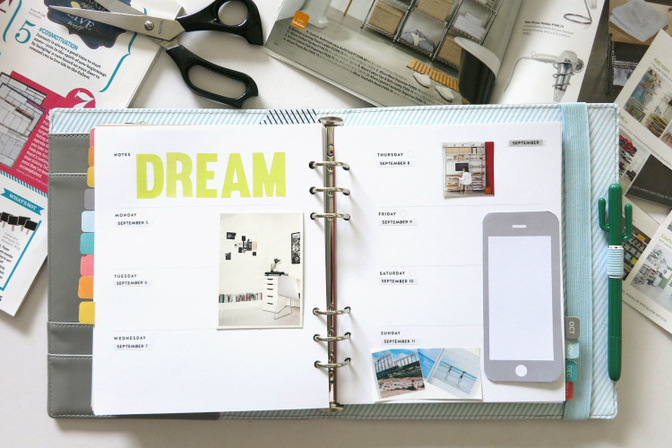
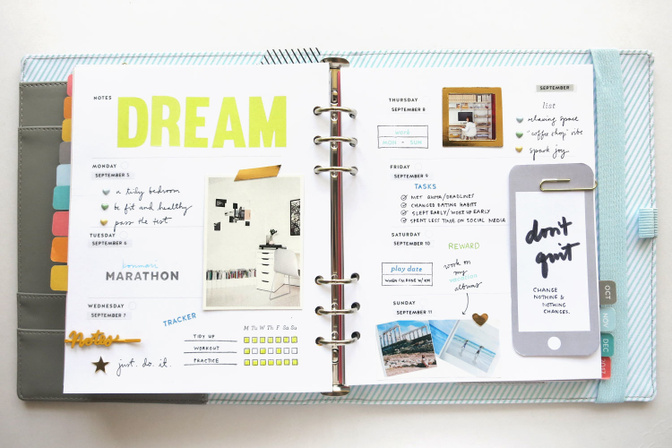
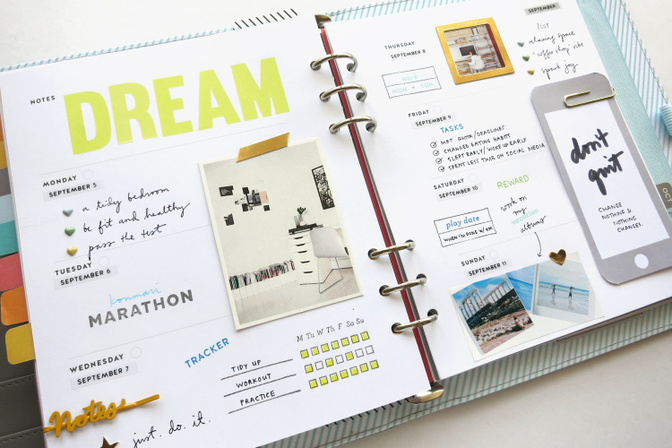
I like using my Hello Forever Graystone weekly planner pages in many ways other than recording daily tasks and appointments: memory-keeping, art journaling, documenting travel memories, food journaling, travel itinerary planning and much more. I like to challenge myself and try something different on each project that I submit. This time, I chose to do a vision journal theme because I am going through some changes in my life at the moment, and I needed extra motivation. My pages will contain the following: my goals for the week, photos that represent my dreams, and inspirational words. I’ve read from several self-improvement books that keeping a vision board or journal will help me remind myself to think positive and believe that my dreams could possibly turn to reality! I completed this layout the week before the first Monday of September, so I have something to reflect on before the new month starts.
Here’s how I created my vision journal spread:
1. Choose a positive word
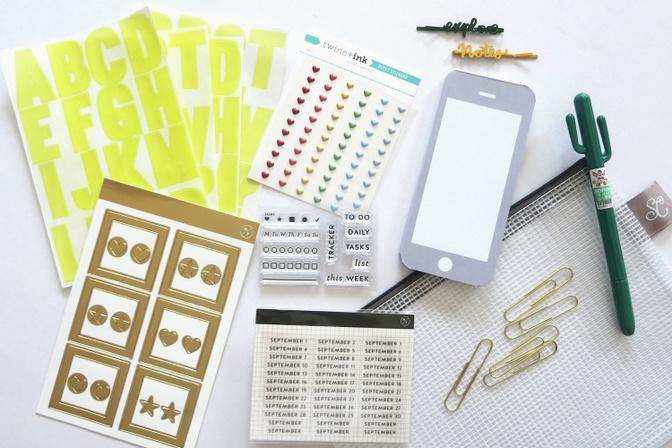
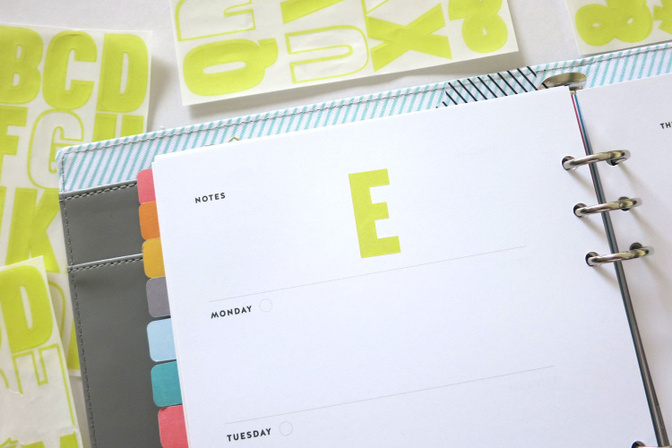
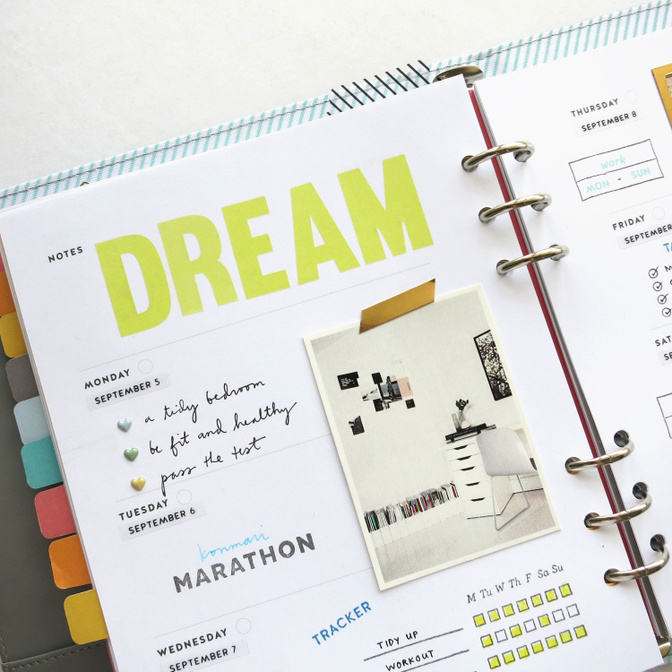
I used the vellum alpha sticker sheet from the main planner kit to spell out “Dream.” This is my favorite item from the kit because it makes any layout look modern! Here’s a tip when using alpha stickers or stamps: To center the word, I often start with the middle letter of the word first.
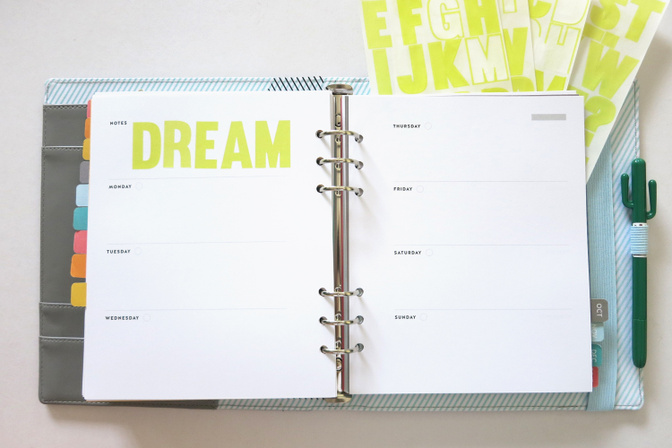
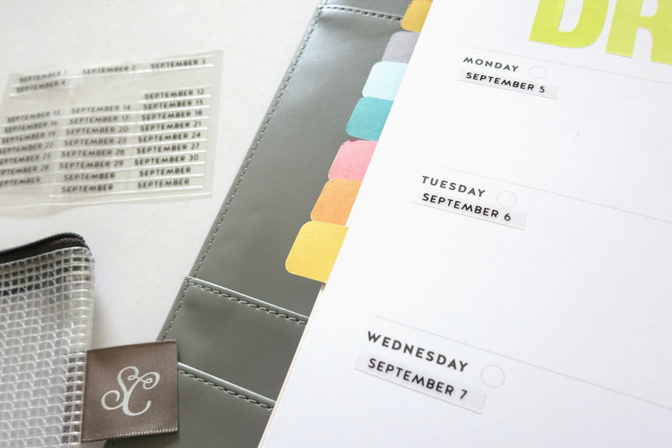
Next, I pulled out the clear September sticker sheet and placed the dates below their days.
3. Collect and paste photos
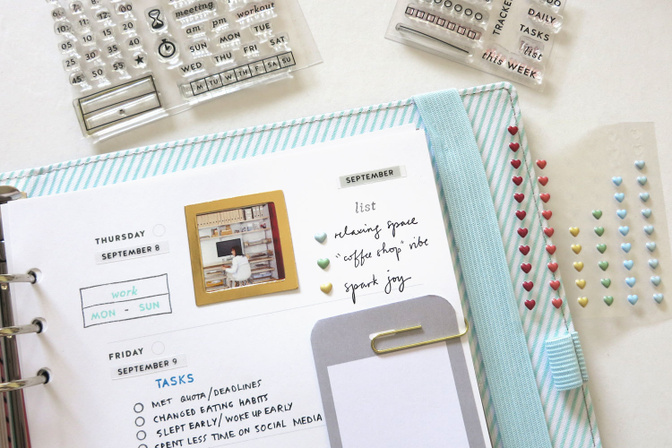
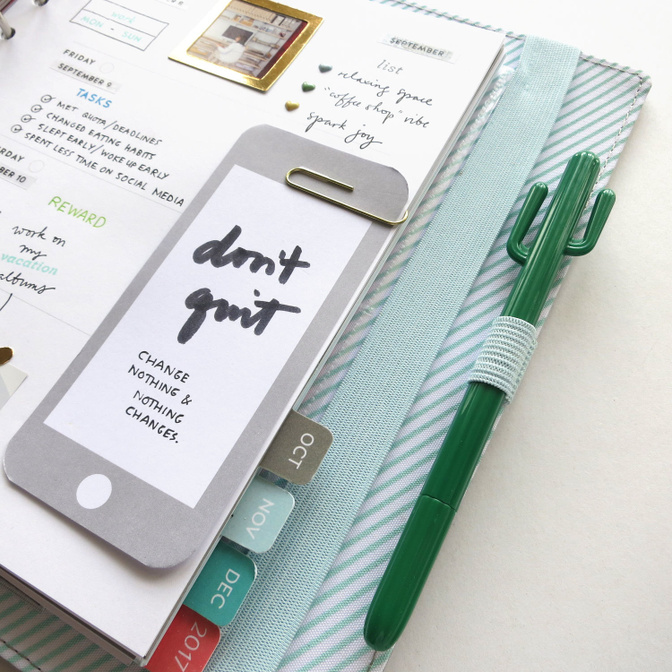
I looked for pictures that represent goals that I want to achieve for the week, and pasted them on my planner pages. My current main goals are to solve my (big) clutter problem, and to turn my bedroom into an inspiring space conducive for work. I’ve been reading Marie Kondo’s second book Spark Joy, and I’m so excited about the life-changing results that tidying up will bring! I printed a photo from Pinterest (source: www.amerrymishapblog.com) that best resembles my dream room. I cut out an organized workspace image from a storage store catalog. On the lower right part of my layout, I pasted a photo of my reward once I complete my task: vacation albums that I got from a local women’s magazine. I adhered a page from the phone notepad - this will be my space for writing inspirational quotes later.
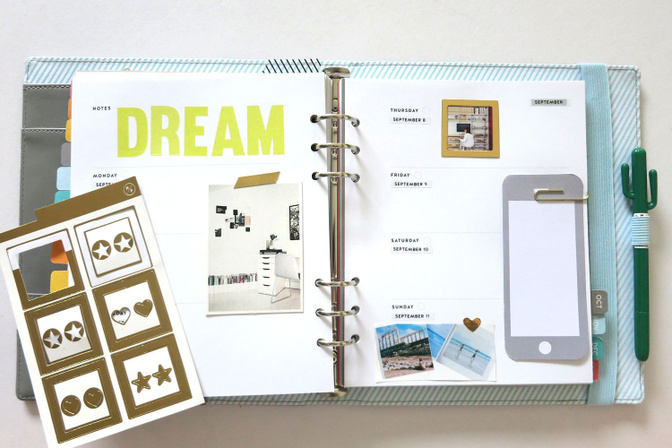
4. Add gold stickers
I used the Hello Forever gold stickers to decorate my photos. On the first photo, I cut the branding strip on top of the sheet to make a washi tape embellishment.
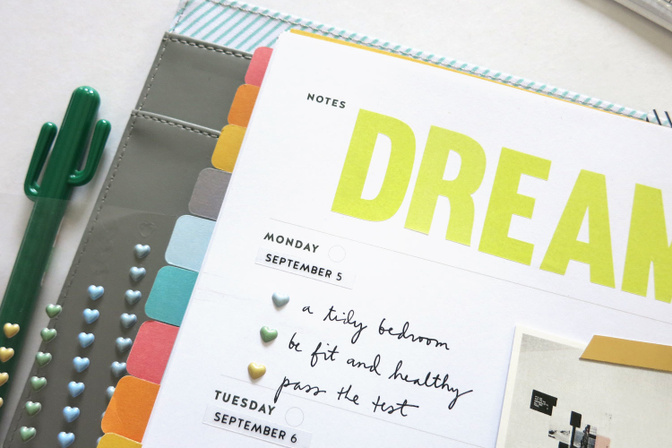
5. Write a list of dreams
I wrote down my top three dreams for the week and used the Twine and Ink mini puffy heart stickers as bullet points. I used the cactus pen that came from the kit, and I love how smoothly it writes!
6. Add stamps and embellishments
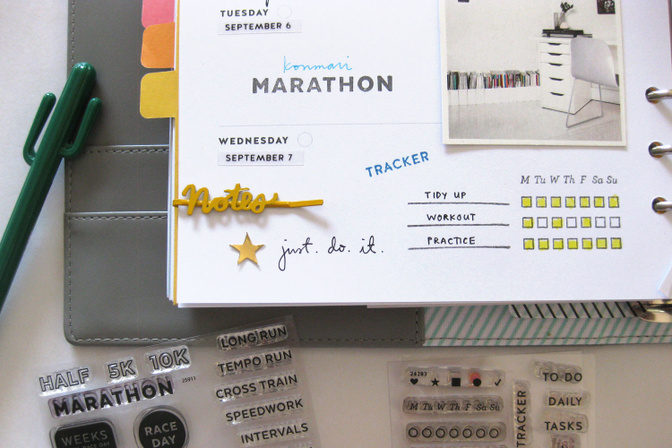
Next, I stamped the word “Marathon” from the 4" x 3” Running add-on stamp set by One Little Bird, and made a tracking chart using the stamp set from the main kit. I shaded the boxes already, even though the week hasn’t passed, because I’m visualizing how I want my chart to look at the end of the week! I want my week to be a productive one. I added more embellishments: a word paperclip by Jasmine Jones and a gold star sticker by Hello Forever. To make my spread look cohesive, I chose a color scheme of four colors: yellow, green, blue, and gold.
7. Add more notes
I added more notes about my ideal lifestyle. On the Friday box, I used the circle stamps from the main kit to form a checklist. My tasks are already written in past tense, which is another way of visualizing. (I added check marks after I took this photo)
8. Write down my reward
As I mentioned earlier, my reward for myself is to have a lot of crafting time! I hope to be able to start working on my Japan album (Photo credit: Fotogra Books). I added stamps from the 4" x 3” Time Tracking stamp set by Hello Forever.
9. Write quotes
Lastly, I wrote motivational quotes from Pinterest on the phone notepad.

Here’s the finished spread! I hope I inspired you to make a vision journal of your goals and dreams! :) I’d love to see what you create. Please share your work in the Studio Calico gallery and tag me at @riannealonte.
Supplies: Kit - Lost River Planner Kit; Ink - Studio Calico Color Theory Dye Ink (Mojito, Deja Blue); Stamp Sets: 4x3 Time Tracking by Hello Forever, 4x3 Running by One Little Bird; Planner - Hello Forever Graystone


Comments
Sign in or sign up to comment.
1 comment
Awesome idea! Will try vision journaling on my planner for a change ❤️
Replies to riaris
Sign in or sign up to reply.